
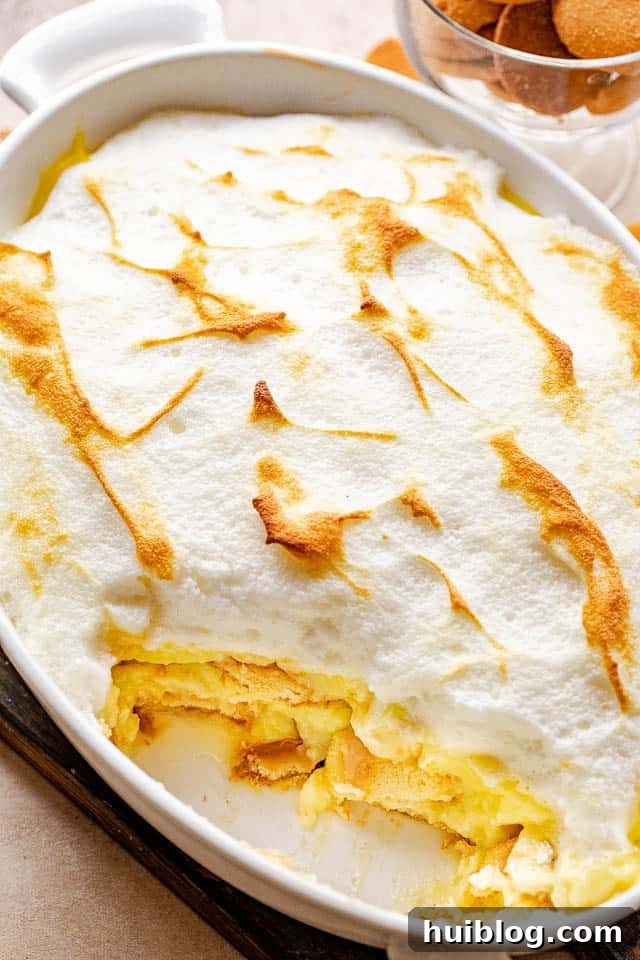
Indulge in the ultimate classic comfort dessert with this incredible Homemade Banana Pudding recipe. Forget boxed mixes; this from-scratch rendition delivers a rich, creamy, and utterly irresistible experience, layered with sweet, ripe banana slices and crisp vanilla wafers. It’s a nostalgic treat that evokes warm memories and creates new ones, perfect for family gatherings, potlucks, or simply a sweet everyday indulgence. Crafted with just a handful of wholesome ingredients, this recipe proves that the best desserts are often the simplest to make.
The Irresistible Allure of From-Scratch Banana Pudding
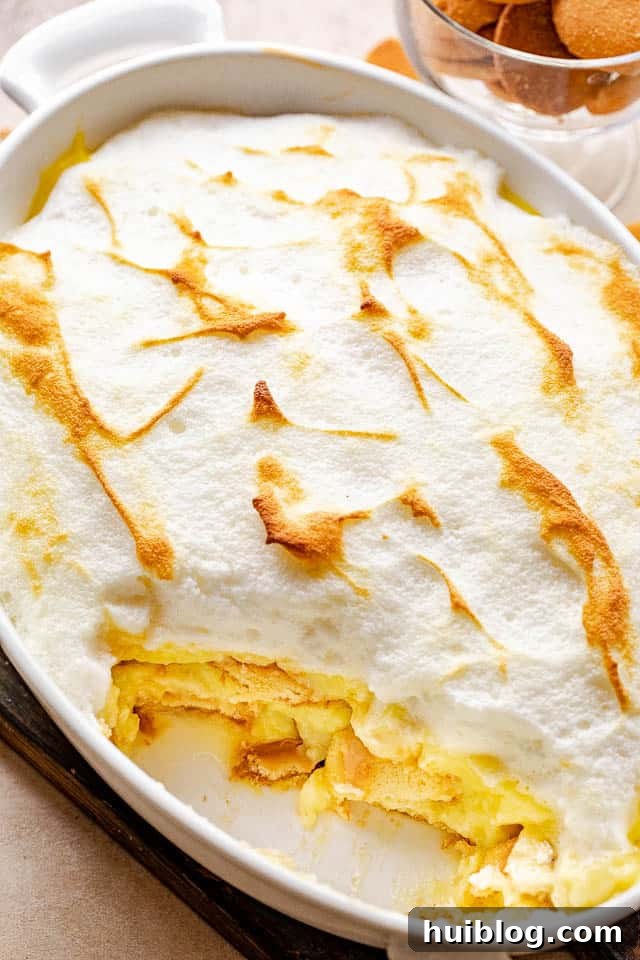
There’s an undeniable charm to a cool, creamy dessert, and when it’s homemade banana pudding, that charm transforms into pure magic. This isn’t just any pudding; it’s a luscious vanilla pudding base meticulously prepared from scratch, offering a depth of flavor and a silky-smooth texture that simply can’t be matched by instant versions. This carefully crafted pudding perfectly complements the delicate crunch of vanilla wafers and the natural sweetness of fresh banana slices, creating a harmonious symphony of textures and tastes.
Often hailed as the quintessential Southern comfort food, homemade banana pudding is synonymous with warmth, hospitality, and pure indulgence. Each spoonful offers a delightful medley of sweet decadence, rich banana flavor, and that signature creamy texture. It’s a versatile dessert, equally suited for grand celebrations like holidays and birthdays as it is for a simple weeknight treat to uplift your spirits. If you’re a banana lover, preparing this easy, no-bake (mostly!) dessert from scratch is an absolute must-try experience. Its straightforward assembly and incredible flavor make it a family favorite that you’ll want to revisit again and again.
Essential Ingredients for Your Perfect Banana Pudding
Crafting the best homemade banana pudding starts with selecting the right ingredients. Each component plays a vital role in achieving that signature creamy texture and balanced sweet flavor. Here’s a detailed look at what you’ll need:
- Granulated Sugar: Provides the foundational sweetness for the pudding, balancing the rich flavors of milk and eggs.
- All-Purpose Flour: Acts as the primary thickening agent for the pudding, creating that wonderfully smooth and velvety consistency.
- Salt: A pinch of salt is crucial. It doesn’t make the pudding salty, but rather enhances all the other flavors, making the sweetness more pronounced and the vanilla more fragrant.
- Milk (2% or higher): The fat content in 2% milk or whole milk contributes significantly to the pudding’s rich taste and creamy mouthfeel. Avoid skim milk, as it can result in a thinner, less satisfying pudding.
- Large Eggs: Eggs serve as a secondary thickener and emulsifier, contributing to the pudding’s luxurious texture and helping it set beautifully. They also add a subtle richness to the flavor profile.
- Pure Vanilla Extract: This is where much of the pudding’s classic flavor comes from. Use a good quality pure vanilla extract for the best aromatic and sweet notes.
- Vanilla Wafers: The iconic crispy layer in banana pudding! These classic cookies soften beautifully as they absorb the pudding’s moisture, creating a delightful contrast with the fresh bananas. Ensure you have enough for two generous layers.
- Bananas (Medium-Ripe): Choose firm, yellow bananas with only a few small brown specks. They should be ripe enough to be sweet but not overly ripe or mushy, as they will continue to soften in the pudding. Slice them into approximately ¼-inch thick pieces to ensure even distribution and pleasant bites.
For the Optional Meringue Topping: If you desire a classic, airy, toasted meringue topping, you’ll also need:
- Egg Whites (from large eggs): These will be whipped into stiff peaks to create the light and fluffy meringue.
- Pinch of Salt: Helps stabilize the egg whites as they’re whipped.
- Granulated Sugar: Added gradually to the egg whites to form a glossy, stable meringue.
Step-by-Step Guide: Crafting Homemade Banana Pudding From Scratch
Making banana pudding from scratch is a rewarding process that results in a dessert far superior to any store-bought version. Follow these steps carefully for a perfectly creamy and delicious outcome:
- Prepare the Dry Ingredients and Milk: In a large, heavy-bottomed nonstick saucepan, combine the granulated sugar, all-purpose flour, and salt. Whisk these dry ingredients together thoroughly to ensure there are no lumps. Gradually whisk in the milk until the mixture is smooth and well-combined. Place the saucepan over medium heat on your stovetop.
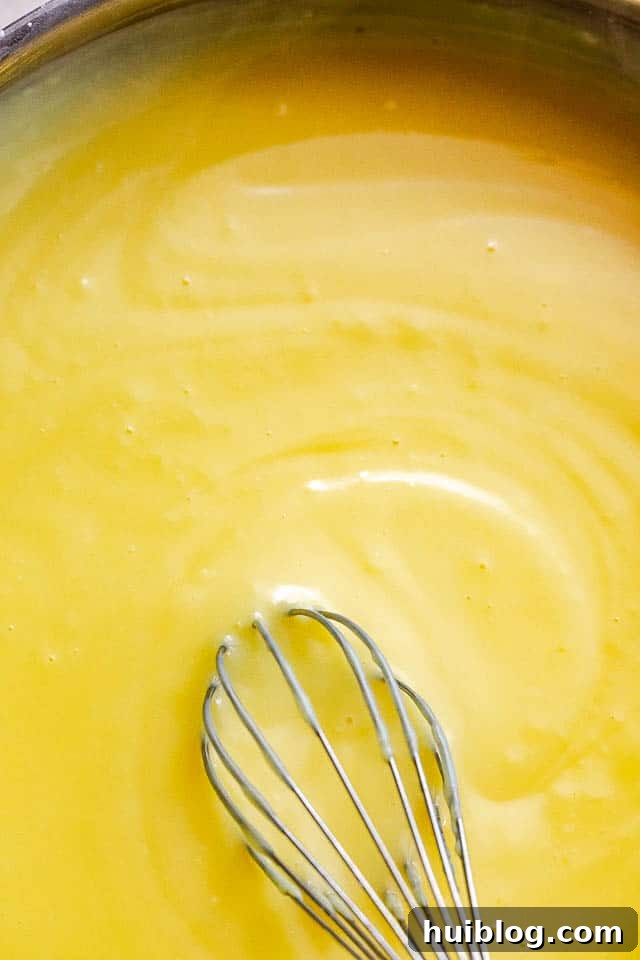
- Cook the Pudding Base: Cook the milk mixture, continuously stirring with a whisk. This constant stirring is crucial to prevent scorching and ensure even thickening. Continue cooking until the mixture visibly thickens and begins to bubble gently. This should take about 8-10 minutes.
- Continue Cooking for Consistency: Once the mixture is thickened and bubbly, reduce the heat to low. Continue to stir and cook for an additional 2 minutes. This extra cooking time helps to fully cook the flour and ensures the pudding will have a stable, smooth texture without any starchy taste. Remove the saucepan from the heat and set it aside momentarily.
- Temper the Eggs: In a separate medium-sized bowl, lightly whisk the large eggs. To prevent the eggs from scrambling when added to the hot pudding base, you must temper them. Slowly pour a small amount (about ½ cup) of the hot milk mixture into the whisked eggs while continuously whisking the eggs vigorously. This gradually raises the temperature of the eggs without cooking them instantly.
- Incorporate Eggs into Pudding: Now, pour the entire tempered egg mixture back into the saucepan with the remaining hot milk mixture. Whisk everything together thoroughly until fully combined and smooth.
- Return to Heat for Final Thickening: Place the saucepan back on the stovetop over medium heat. Bring the pudding mixture to a gentle boil, stirring constantly with your whisk. Cook and stir for 2 more minutes. The pudding should be quite thick at this point.
- Add Vanilla and Cool: Remove the saucepan from the heat. Whisk in the pure vanilla extract until fully incorporated. Set the pudding aside to cool for at least 15 minutes, stirring occasionally during this time. This helps it cool evenly and prevents a skin from forming on top.
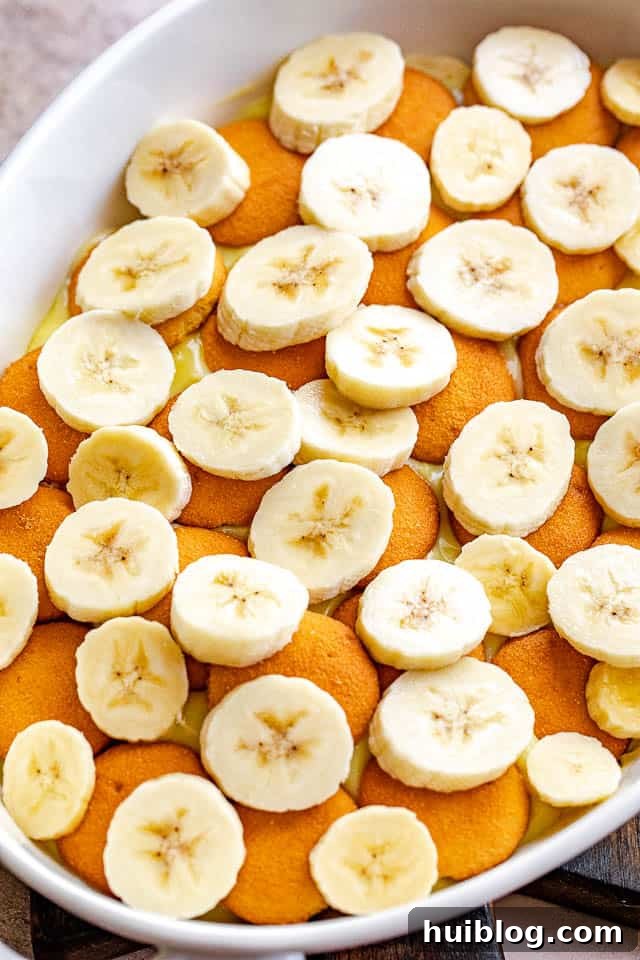
- Assemble Your Banana Pudding: Choose an 8-inch or 9-inch square baking dish or a similarly sized brownie pan. Begin by arranging a generous single layer of vanilla wafers across the bottom of the dish, breaking some as needed to fill gaps. Next, layer half of your freshly sliced bananas evenly over the wafers. Pour half of the prepared, slightly cooled pudding over the bananas, spreading it gently to cover. Repeat these layers: add another layer of vanilla wafers, followed by the remaining banana slices, and finally, top with the rest of the creamy pudding.
- Chill for Perfection: Cover the baking dish tightly with plastic wrap, pressing the plastic wrap gently onto the surface of the pudding to prevent a skin from forming. Refrigerate the banana pudding for a minimum of 6 hours, or ideally, overnight. Chilling allows the flavors to meld, the pudding to set completely, and the vanilla wafers to soften to that delightful cake-like consistency.
- Serve and Enjoy: Once fully chilled, your homemade banana pudding is ready to be served! Spoon generous portions into individual bowls and savor every creamy, sweet bite.
For the Optional Meringue Topping:
- Preheat Oven: If you’re adding meringue, preheat your oven to 425°F (220°C) towards the end of the pudding chilling time, or just before serving if you prefer warm meringue.
- Whip Egg Whites: In a clean, dry mixer bowl, beat the 4 egg whites with a pinch of salt on medium-high speed until they form stiff peaks.
- Add Sugar Gradually: Gradually beat in the ¼ cup granulated sugar, continuing to beat until the meringue is glossy, firm, and holds its shape perfectly – it shouldn’t slide out of the mixing bowl if inverted.
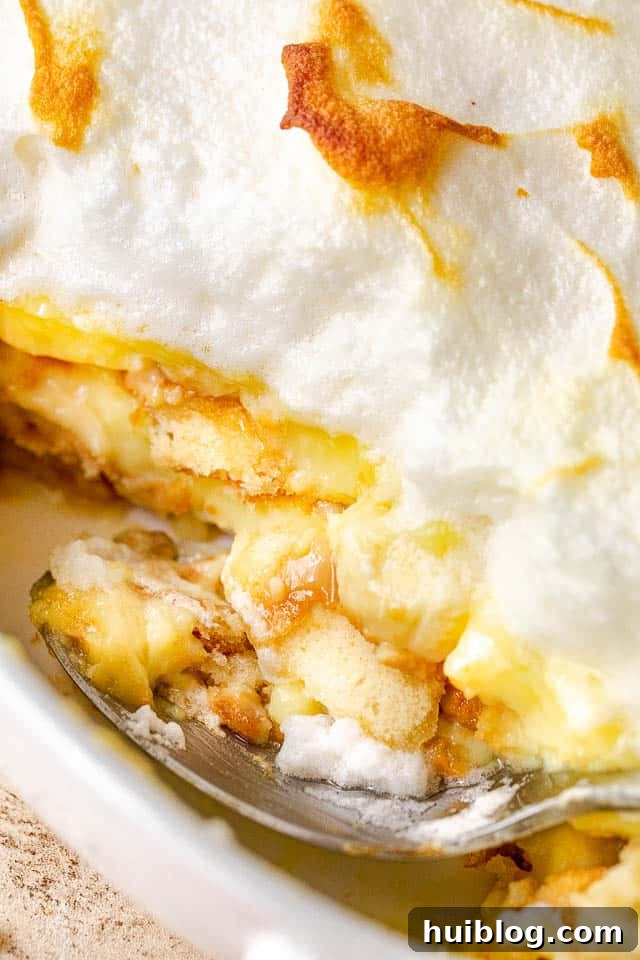
- Top and Bake: Gently spread the meringue topping over the assembled banana pudding, ensuring it touches the edges of the dish to seal. Bake for 5 minutes, or until the meringue turns a beautiful golden brown on top. Serve immediately for a warm meringue, or allow it to cool before chilling.
Expert Tips for the Best Homemade Banana Pudding
Achieving banana pudding perfection is simple with a few key techniques. Keep these tips in mind to elevate your dessert:
- Tempering Eggs is Key: Never skip the step of tempering your eggs! Slowly adding a small amount of hot pudding mixture to the whisked eggs before incorporating them into the main pot prevents them from scrambling. This ensures a silky-smooth, lump-free pudding every time.
- Constant Stirring for Smoothness: This pudding recipe is very hands-on, especially during the cooking phase. Continuous stirring and whisking are essential. This prevents the pudding from sticking to the bottom of the pan, ensures even cooking, and helps achieve that desired thick, creamy consistency without any burned bits.
- Chill for Optimal Flavor and Texture: While 6 hours of refrigeration is the minimum, for the absolute best results, I highly recommend chilling your banana pudding overnight. This extended chilling period allows the flavors to fully develop and meld together, resulting in a more intense and deeply “banana-y” taste. It also gives the wafers ample time to soften, transforming them into a delightful cake-like texture.
- Select the Right Bananas: The quality of your bananas significantly impacts the final taste and appearance. Opt for ripe but firm bananas – look for vibrant yellow skins with a few small brown specks. Avoid overly green bananas (which lack sweetness) and very brown, mushy bananas (which will quickly disintegrate in the pudding). Medium-ripe bananas offer the perfect balance of sweetness and texture.
- Don’t Overcook the Pudding: Once the pudding has thickened and boiled for the specified time, remove it from the heat. Overcooking can lead to a rubbery texture or cause the eggs to curdle.
- Cover Properly for Chilling: When covering your pudding with plastic wrap before chilling, make sure the wrap touches the surface of the pudding directly. This creates a barrier that prevents a skin from forming on top, keeping your pudding perfectly smooth and inviting.
Preventing Bananas from Browning in Your Pudding
One common concern with banana pudding is the bananas browning. While it’s a natural process, there are steps you can take to minimize it:
- Start with Medium-Ripe Bananas: As mentioned above, using bananas that are ripe but not overly ripe is the easiest way to keep them from browning too quickly. Overripe bananas will brown much faster when exposed to air.
- The Lemon Juice Trick: If you’re particularly concerned about browning, or if you’re making the pudding several hours in advance, a simple trick is to lightly toss your sliced bananas in a very small amount of lemon juice (about ½ teaspoon for 4 bananas) before layering them into the baking dish. The acid in the lemon juice acts as a natural antioxidant, significantly slowing down the oxidation process that causes browning. Be careful not to use too much, as it can impart a slight lemon flavor.
- Quick Assembly: Work relatively quickly when assembling the layers of bananas and pudding. The faster the bananas are covered by the pudding, the less exposure they have to air, which helps prevent browning.
Storing Leftover Homemade Banana Pudding
If you’re lucky enough to have any leftover banana pudding, proper storage is key to maintaining its freshness and taste:
- Refrigeration is Essential: Always store leftover banana pudding in an airtight container or keep it tightly covered with plastic wrap (ensuring it touches the pudding surface) in the refrigerator. This will help keep it fresh and prevent it from absorbing odors from other foods.
- Enjoy Within 2-3 Days: Homemade banana pudding is best enjoyed within 2 to 3 days of preparation. While it might still be safe to eat for a bit longer, the quality will start to decline.
- Anticipate Changes: Keep in mind that the longer your pudding sits in the refrigerator, the more likely the banana slices are to brown, even with preventative measures. Additionally, the vanilla wafers will continue to absorb moisture and become softer over time, eventually losing their initial “cake-like” texture and becoming quite mushy. For optimal texture and appearance, serving within 24-48 hours is ideal.
Can You Freeze Banana Pudding?
While fresh is always best for banana pudding, you can certainly prepare components or even the assembled dessert in advance. Freezing is possible with a few considerations:
- Make Ahead (Refrigeration): This dessert can be prepared 1 to 2 days in advance if kept tightly covered and refrigerated. This allows the flavors to meld beautifully without compromising texture too much.
- Freezing the Pudding Base: If you wish to make the pudding base ahead of time for later use, you can freeze it. Allow the cooked pudding to cool completely, then transfer it to a resealable freezer-safe bag or an airtight container. It can be stored in the freezer for up to 3 months. When ready to use, thaw the pudding completely in the refrigerator overnight. You may need to whisk it gently to restore its smooth consistency after thawing.
- Freezing Assembled Pudding (With Caution): You *can* freeze assembled banana pudding, but be aware that the texture of the bananas and wafers will change. The bananas may become mushier and darker, and the wafers can become very soft or even slightly crumbly upon thawing. For the best experience, it’s generally recommended to freeze the pudding base separately and assemble the dessert fresh. If you do freeze the assembled pudding, ensure it’s in a freezer-safe dish, tightly wrapped, and consumed within 1-2 months. Thaw overnight in the refrigerator before serving.
Homemade Banana Pudding: The Full Recipe
Homemade Banana Pudding
By: Katerina | Easy Weeknight Recipes
This Homemade Banana Pudding is a creamy dessert layered with sweet banana slices and crisp vanilla wafers. It’s easy to make with just a handful of ingredients!
Prep Time: 15 minutes
Cook Time: 15 minutes
Chill Time: 6 hours
Total Time: 6 hours 30 minutes
Servings: 10
Ingredients
- 3/4 cup granulated sugar
- 1/4 cup all-purpose flour
- 1/4 teaspoon salt
- 3 cups milk, 2% or higher
- 3 large eggs
- 2 teaspoons pure vanilla extract
- 8 ounces vanilla wafers, divided
- 4 large bananas, cut into 1/4 inch slices
For the Meringue Topping (Optional)
- 4 egg whites
- Pinch of salt
- ¼ cup granulated sugar
Instructions
- In a large, heavy-bottomed saucepan, combine the sugar, flour, and salt. Whisk in the milk until smooth. Place the saucepan over medium heat.
- Cook and stir continuously with a whisk until the mixture visibly thickens and begins to bubble.
- Reduce the heat to low and continue to stir and cook for 2 more minutes. Remove from heat and set aside.
- In a separate bowl, whisk the eggs. To temper the eggs, slowly add about ½ cup of the hot milk mixture into the eggs while continuously whisking vigorously.
- Whisk the entire tempered egg mixture back into the remaining milk mixture in the saucepan.
- Return the saucepan to the stovetop over medium heat. Bring to a gentle boil, stirring and whisking constantly for 2 more minutes until the pudding is thick.
- Remove from heat. Whisk in the vanilla extract. Set aside to cool for 15 minutes, stirring occasionally to prevent a skin from forming.
- Arrange a layer of vanilla wafers in an 8-inch or 9-inch baking dish or brownie pan.
- Layer half of the sliced bananas evenly over the wafers.
- Pour half of the pudding over the bananas, spreading gently.
- Repeat the layers with remaining vanilla wafers and banana slices, finishing with the rest of the pudding.
- Cover the dish tightly with plastic wrap, pressing it gently onto the surface of the pudding to prevent a skin.
- Refrigerate for a minimum of 6 hours, or ideally overnight, before serving.
- Serve chilled and enjoy!
For the Meringue Topping (Optional)
- Preheat oven to 425˚F (220°C).
- In your mixer’s bowl, beat the 4 egg whites with a pinch of salt until they are stiff and hold peaks.
- Gradually beat in the granulated sugar and continue beating until the meringue is glossy, firm, and stable.
- Spread the meringue topping evenly over the banana pudding, ensuring it reaches the edges of the dish.
- Bake for 5 minutes, or until the meringue begins to brown beautifully on top.
Equipment
- Large, heavy-bottomed saucepan
- Whisk
- Mixing Bowls
- 8-inch or 9-inch baking dish
- Electric Mixer (for meringue, optional)
Nutrition (Estimate per serving)
Calories: 282kcal | Carbohydrates: 48g | Protein: 6g | Fat: 8g | Saturated Fat: 3g | Cholesterol: 57mg | Sodium: 200mg | Potassium: 303mg | Fiber: 2g | Sugar: 32g | Vitamin A: 220IU | Vitamin C: 4mg | Calcium: 92mg | Iron: 1mg
Nutritional information is an estimate and provided as a courtesy. Values may vary according to ingredients used and preparation methods. Please use your preferred nutritional calculator for more detailed information.
Variations and Serving Suggestions
While classic banana pudding is perfect as is, you can easily customize it to your taste or for different occasions:
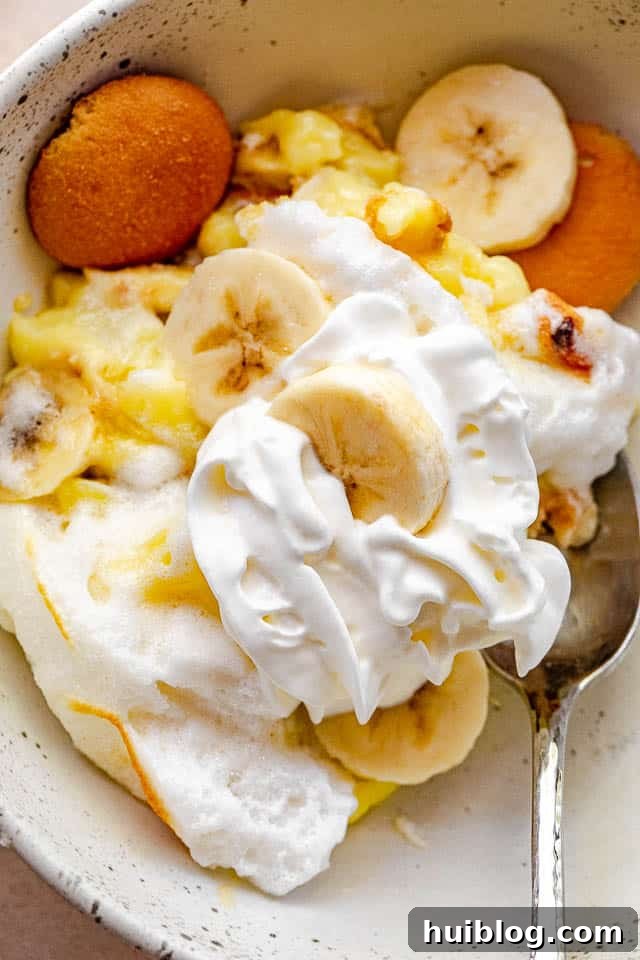
- Whipped Cream Topping: If meringue isn’t your preference, a generous dollop of freshly whipped cream makes a fantastic alternative. You can pipe it elegantly or simply spoon it over the pudding before serving.
- Caramel Drizzle: For an extra layer of indulgence, drizzle some homemade or store-bought caramel sauce over each serving. The combination of banana, vanilla, and caramel is divine.
- Different Cookies: While vanilla wafers are traditional, consider experimenting with other cookies. Graham crackers, shortbread cookies, or even gingersnaps could offer interesting flavor twists.
- Mini Servings: Instead of a large baking dish, assemble the banana pudding in individual parfait glasses or small ramekins for elegant single-serving desserts. This is especially great for parties.
- Garnish Galore: Beyond the cookies and bananas, consider garnishing your pudding with a sprinkle of cinnamon, a dusting of cocoa powder, or a few chocolate shavings for added visual appeal and flavor complexity.
- No-Bake Pie: Transform this recipe into a no-bake banana pudding pie by layering the components into a pre-made graham cracker or vanilla wafer pie crust.
Why Homemade Makes All the Difference
In a world full of convenient shortcuts, taking the time to make banana pudding from scratch is a culinary choice you won’t regret. The difference in taste, texture, and overall satisfaction is profound. Homemade pudding offers a richness and depth of flavor that simply cannot be replicated by instant mixes. You control the quality of ingredients, ensuring fresh eggs, real vanilla, and pure milk create a superior base. The process itself, though requiring a bit of stirring, is incredibly rewarding, culminating in a dessert that tastes like a warm hug and showcases your culinary care. It’s more than just a dessert; it’s an experience, a tradition, and a testament to the simple joys of good food made with love.
Whether you’re new to making pudding from scratch or a seasoned baker, this homemade banana pudding recipe is designed for success. Its easy-to-follow steps and straightforward ingredients promise a delicious outcome that will impress your guests and satisfy your sweet cravings. So gather your ingredients, set aside a little time, and prepare to create a truly unforgettable dessert that will quickly become a cherished favorite in your recipe collection.