
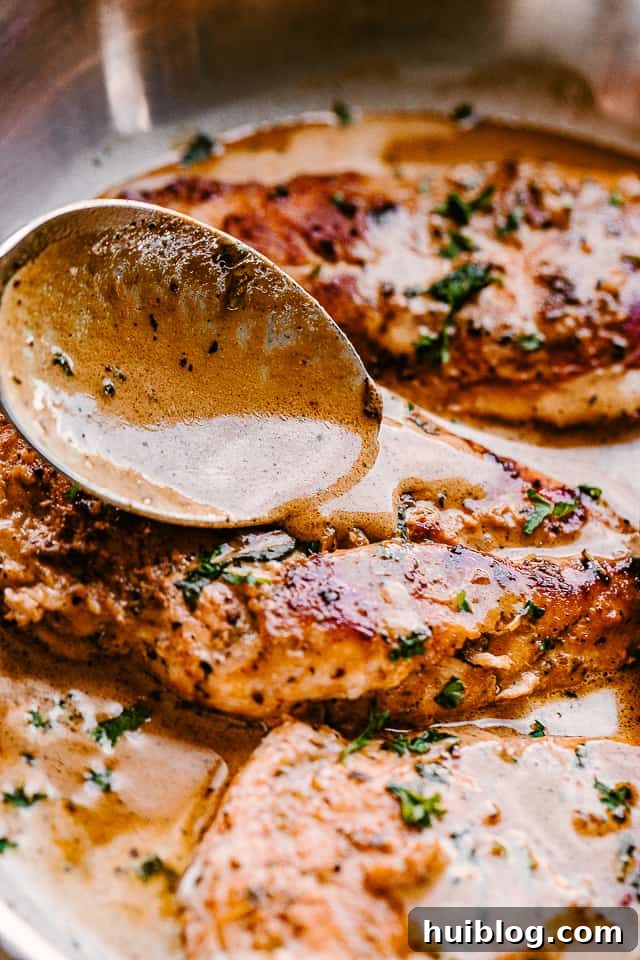
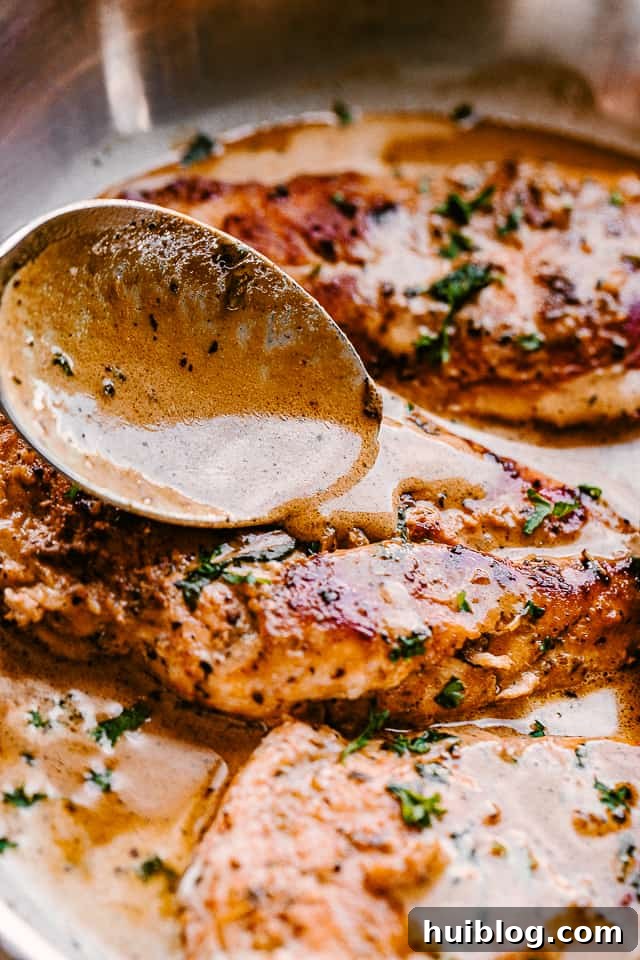
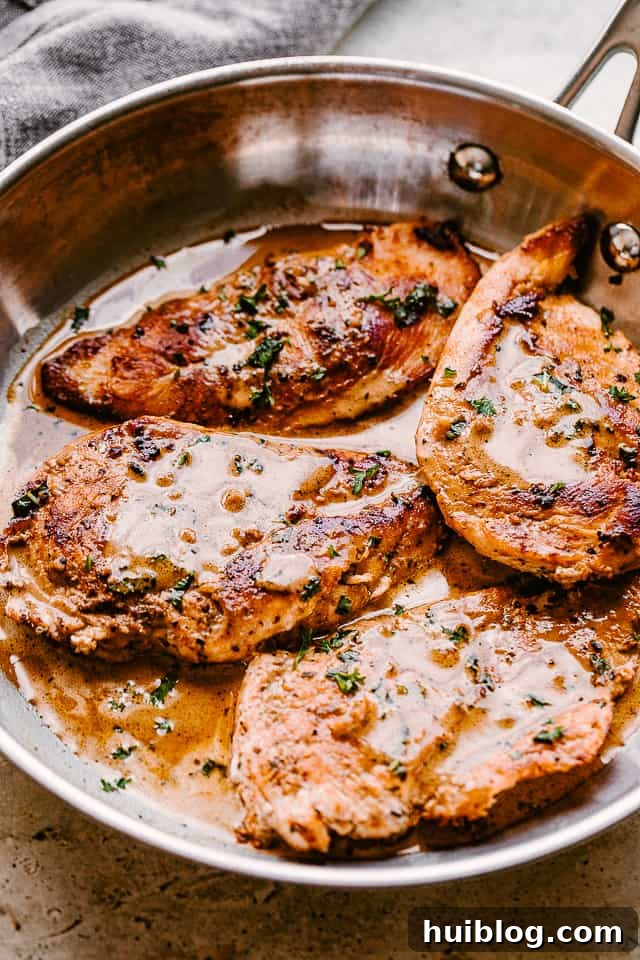
Unlock the secret to effortless weeknight dinners with these incredibly juicy and tender Skillet Balsamic Chicken Breasts. Crafted in a single pan and ready in a mere 30 minutes, this recipe is destined to become your ultimate go-to for delicious, stress-free meals. Imagine perfectly seared chicken enveloped in a rich, sweet, and tangy balsamic glaze – it’s a culinary delight that delivers maximum flavor with minimal fuss.
Whether you’re a seasoned chef or a kitchen novice, this balsamic chicken recipe is designed for simplicity without compromising on taste. Its vibrant flavors and quick preparation make it an ideal choice for those hectic evenings when you crave something extraordinary but are short on time. Forget endless dishes and complicated steps; this one-pan wonder brings gourmet taste to your table with remarkable ease. For more inspiring and easy dinner ideas, explore my recipes for Alice Springs Chicken and Chicken Madeira.
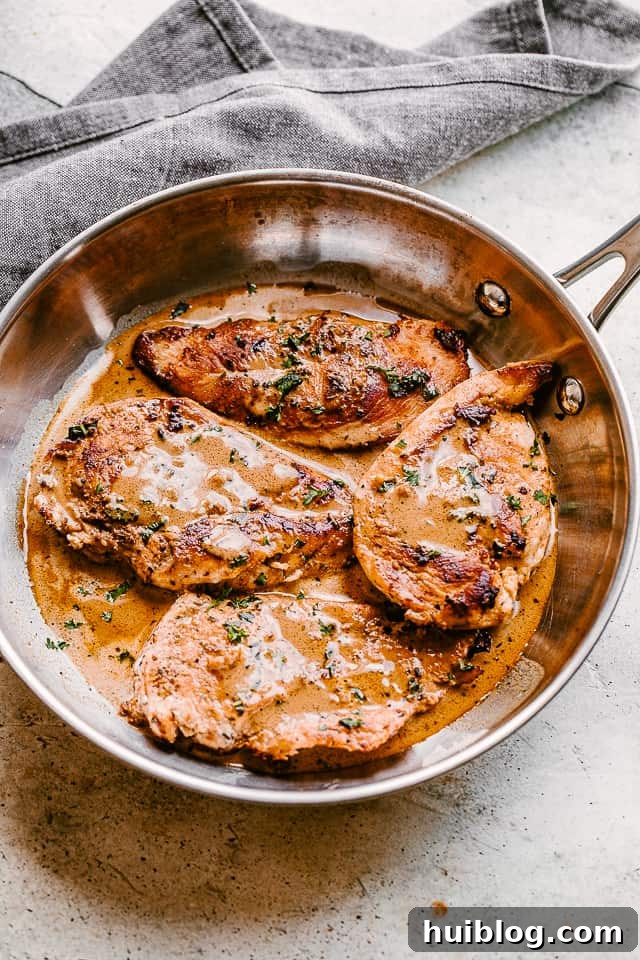
There’s nothing quite like the satisfaction of turning simple ingredients into a show-stopping meal, especially when time is of the essence. Stovetop chicken breasts have always been my secret weapon for those moments when inspiration strikes, or when I find myself with thawed chicken and no dinner plan. This very recipe for Skillet Balsamic Chicken Breasts was born from such an occasion – a delightful accident that quickly evolved into a beloved family favorite. It embodies the essence of great home cooking: uncomplicated, flavorful, and incredibly satisfying. Get ready to add this amazing dish to your regular rotation!
Why You’ll Love This Skillet Balsamic Chicken Recipe
This Skillet Balsamic Chicken isn’t just another dinner recipe; it’s a game-changer for busy households and anyone craving a delicious meal without the fuss. Here’s why it deserves a permanent spot in your recipe collection:
- Unbeatable Speed & Convenience: Life moves fast, and your dinner shouldn’t slow it down. This recipe is a true 30-minute marvel, cooking entirely in one skillet. Less time prepping, less time cooking, and significantly less time cleaning up means more time for you and your family.
- Incredibly Versatile & Adaptable: While the balsamic chicken shines brightly on its own, it also serves as a fantastic foundation for a variety of meals. Pair it with anything from crisp roasted vegetables to hearty grains, or twirl it into your favorite pasta dish. It’s incredibly flexible, allowing you to easily adjust it to fit dietary needs or whatever fresh ingredients you have on hand.
- Explosive Flavor Profile: Don’t let the simple preparation fool you – this dish is bursting with flavor. The star is the rich, sweet, and tangy balsamic glaze that coats each tender piece of chicken. Coupled with aromatic garlic, onion, and Italian herbs, every bite is a delightful journey for your taste buds, ensuring a dish that’s not just juicy but profoundly delicious.
- Healthy & Wholesome Meal: Made with lean chicken breasts and fresh ingredients, this recipe offers a wholesome and balanced meal. It’s packed with protein and can be easily paired with a generous serving of vegetables for a complete and nourishing dinner.
Essential Recipe Ingredients
Gathering your ingredients is the first step to creating this delectable Skillet Balsamic Chicken. Each component plays a crucial role in building the layers of flavor that make this dish so special. Here’s what you’ll need, along with some handy substitution ideas:
- Olive Oil: Used for searing the chicken, it provides a healthy fat base and helps achieve a beautiful golden crust. Substitute with canola oil or vegetable oil for a neutral flavor.
- Boneless, Skinless Chicken Breasts: The star of the show. Pounding them to an even thickness ensures quick and uniform cooking, resulting in consistently tender and juicy chicken. This recipe also works wonderfully with boneless pork chops or turkey breasts.
- Salt and Fresh Ground Pepper: Fundamental seasonings that enhance the natural flavors of the chicken and the sauce. Season generously!
- Butter: Adds incredible richness and body to the balsamic sauce, contributing to its creamy texture and decadent flavor. Unsalted butter is preferred to control sodium levels.
- Yellow Onion: Finely chopped onion provides a sweet and savory aromatic base for the sauce. Cook until very soft to release its full flavor. White onion or shallots can be used as alternatives.
- Garlic: A quintessential flavor enhancer, minced garlic brings a pungent warmth to the sauce. If fresh garlic isn’t available, use ½ teaspoon of garlic powder per clove.
- Italian Seasoning: A blend of dried herbs like basil, oregano, rosemary, and thyme that infuses the sauce with classic Mediterranean notes. If you’re out, create your own mix using equal parts dried basil, oregano, and thyme.
- Granulated Sugar: A small amount balances the tanginess of the balsamic vinegar, rounding out the sauce’s flavor profile.
- Balsamic Vinegar: The namesake ingredient, it delivers a complex sweet and tangy acidity that is central to the dish’s identity. A good quality balsamic vinegar will make a noticeable difference in the final taste.
- Chicken Broth: Forms the liquid base for the sauce, adding savory depth. Vegetable broth is a perfectly suitable substitute for a lighter flavor.
- Heavy Cream: This is what gives the sauce its luscious, creamy texture and rich mouthfeel. Half & Half, full-fat coconut milk (for a dairy-free option with a slight coconut flavor), or evaporated milk can also be used.
- Fresh Basil or Parsley (for garnish): A sprinkle of fresh herbs at the end adds a pop of color and a fresh, aromatic finish that brightens the entire dish.
How to Make Skillet Balsamic Chicken Breasts
Creating this flavorful Skillet Balsamic Chicken is straightforward, thanks to its one-pan nature. Follow these simple steps for a perfect meal every time:
- Prepare the Chicken: Begin by heating the olive oil in a large skillet over medium-high heat. While the oil heats, place your boneless, skinless chicken breasts on a cutting board. Using a meat mallet, gently pound them to an even 1-inch thickness. This ensures they cook quickly and evenly. Season both sides generously with salt and fresh ground black pepper.
- Sear the Chicken: Carefully add the seasoned chicken breasts to the hot skillet. Cook them undisturbed for 5 minutes. This initial sear creates a beautiful golden crust and locks in the juices.
- Finish Cooking the Chicken: Flip the chicken breasts over. Add 1 tablespoon of butter to the skillet, allowing it to melt around the chicken. Continue cooking for another 4 to 5 minutes, or until the chicken is cooked through and reaches an internal temperature of 165°F (74°C).
- Rest the Chicken: Once cooked, remove the chicken breasts from the skillet and set them aside on a plate. Cover them loosely with foil to keep them warm and allow the juices to redistribute, ensuring maximum tenderness.
- Build the Sauce Base: Add the remaining 1 tablespoon of butter to the same skillet. Stir in the finely diced yellow onions and cook for about 6-8 minutes over medium heat, stirring frequently, until they become very soft and translucent. Be careful not to burn them; reduce heat if needed.
- Aromatics and Seasoning: Stir in the minced garlic and cook for just 20 seconds until fragrant. Immediately add the Italian seasoning, granulated sugar, and balsamic vinegar. Cook for 2 minutes, allowing the vinegar to reduce slightly and its flavors to concentrate.
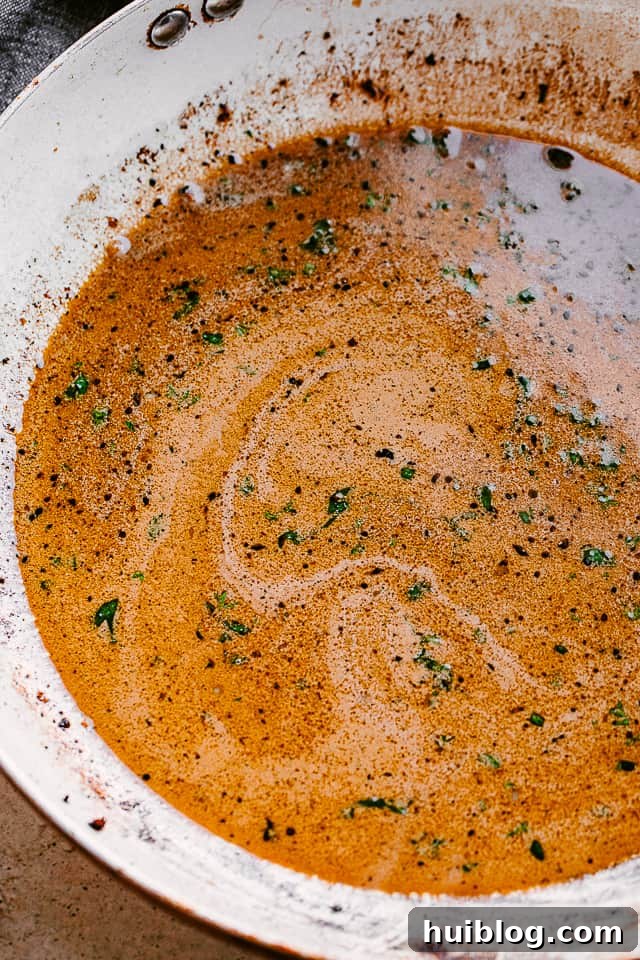
- Deglaze and Reduce: Whisk in the chicken broth, making sure to scrape up any browned bits (fond) from the bottom of the skillet. These bits are packed with flavor and are essential for a rich sauce. Increase the heat to high and cook for 2 to 3 minutes, or until the liquid has reduced slightly and thickened.
- Create the Creamy Sauce: Lower the heat to medium. Whisk in the heavy cream continually for about 30 seconds. It’s important to whisk gently and consistently to prevent the sauce from boiling rapidly, which can cause it to separate. Let the sauce come to a gentle simmer.
- Combine and Serve: Return the rested chicken breasts to the skillet, nestling them into the simmering balsamic cream sauce. Cook for 1 to 2 minutes, just until the chicken is heated through. Remove the skillet from the heat. The sauce will continue to thicken slightly as it cools. Garnish with fresh basil ribbons or chopped parsley and serve immediately.
Expert Tips for Perfect Balsamic Chicken
Achieving restaurant-quality Skillet Balsamic Chicken at home is simple with these pro tips:
- The Power of Pounding: Pounding your chicken breasts to an even 1-inch thickness is critical. This ensures uniform cooking, preventing one part from drying out while another is still undercooked. Use a meat mallet or a heavy rolling pin.
- Resist the Urge to Touch: When you first place the chicken in the hot skillet, let it cook undisturbed for the initial 5 minutes. This allows a beautiful, golden-brown crust to form, which adds layers of flavor and texture.
- Embrace the Fond: The browned bits at the bottom of the pan after searing the chicken (known as “fond”) are flavor gold! When making the sauce, use your whisk to aggressively scrape up these bits as you add the liquids. This deglazing technique is key to a deeply flavorful sauce.
- Mind the Cream’s Temperature: When whisking in the heavy cream, do so gently over medium-low heat. Avoid bringing the sauce to a rapid boil after adding the cream, as this can sometimes cause the sauce to split or curdle. A gentle simmer is all you need for thickening.
- Taste and Adjust: Always taste your sauce before serving. Balsamic vinegars can vary in sweetness and acidity. Adjust with a pinch more sugar if it’s too tart, or a splash more broth if it’s too sweet. A little extra salt and pepper can also make a big difference.
- Fresh Herbs are Key: While dried Italian seasoning builds the base flavor, a final flourish of fresh basil or parsley truly elevates the dish. Fresh herbs add a vibrant aroma and a burst of fresh flavor that complements the rich sauce beautifully. Basil, with its peppery sweetness, is particularly wonderful with balsamic.
Serving Suggestions: What to Pair with Balsamic Chicken
This creamy Skillet Balsamic Chicken is incredibly versatile and pairs beautifully with a wide array of side dishes. Here are some of my favorite ways to complete this satisfying meal:
Hearty & Comforting Sides:
- Creamy Mashed Potatoes: My creamy baked mashed potatoes provide the perfect vehicle to soak up every drop of that luscious balsamic sauce.
- Rice or Grains: A simple bed of fluffy white rice, brown rice, or quinoa is excellent for absorbing the rich flavors. Try my Instant Pot Mexican rice for an added twist.
- Noodles or Pasta: Serve the chicken and sauce over your favorite noodles, like egg noodles, or a light pasta such as linguine or fettuccine.
- Potatoes in Various Forms: Beyond mashed, consider Instant Pot baked potatoes or crispy grilled potato wedges for a satisfying starch.
Lighter & Vegetable-Focused Sides:
- Roasted Vegetables: A medley of roasted Brussels sprouts and radishes, asparagus, or broccoli adds a healthy crunch and vibrant color.
- Fresh Salads: A crisp green salad with a light vinaigrette offers a refreshing contrast. For something more substantial, try a spaghetti salad or even a Big Mac salad for a fun, deconstructed option.
- Zucchini Fries: For a lighter, crispy alternative to traditional fries, these air fryer parmesan zucchini fries are a fantastic choice.
And to truly round out that meal with a sweet flourish, my family’s favorite banana pudding cupcakes make for an unforgettable dessert!
How to Store and Reheat Leftovers
One of the beauties of this Skillet Balsamic Chicken is how well it keeps, making it perfect for meal prepping or enjoying delicious leftovers. Proper storage ensures maximum freshness and flavor:
- Storing in the Refrigerator: Allow the cooked chicken breasts and sauce to cool completely to room temperature (within two hours of cooking). Transfer them to an airtight container, ensuring the chicken is submerged in or generously coated with the sauce to prevent it from drying out. Store in the refrigerator for up to 3 to 4 days.
- Freezing for Longer Storage: For longer preservation, this dish freezes beautifully. Once cooled, place the chicken and sauce in a freezer-safe airtight container or a heavy-duty freezer bag. Freeze for up to 3 months. Thaw overnight in the refrigerator before reheating.
- Reheating Instructions: To reheat, gently return the chicken and sauce to a skillet over low to medium-low heat. Cook, stirring occasionally, until the chicken is heated through and the sauce is bubbling gently. If the sauce has thickened too much during storage, you can add a tablespoon or two of chicken broth or water to achieve your desired consistency. Avoid high heat to prevent the chicken from becoming tough or the sauce from separating. You can also reheat individual portions in the microwave, using short bursts and stirring in between.
More Easy Chicken Recipes for Weeknights
If you loved the simplicity and flavor of these Skillet Balsamic Chicken Breasts, you’re in for a treat! Here are more of my go-to easy chicken recipes that promise delicious results with minimal effort, perfect for any weeknight:
- Zesty Lemon Chicken Breasts: Bright, fresh, and incredibly simple, these lemon chicken breasts are a burst of sunshine on a plate.
- Crispy Coconut Chicken Breast Tenders: A tropical twist on a family favorite, these tenders are crunchy on the outside and wonderfully juicy within.
- Instant Pot Honey Garlic Chicken: Speedy, savory, and subtly sweet, this one-pot meal is a lifesaver on busy nights.
- Creamed Spinach Chicken: Indulgent and comforting, this dish combines tender chicken with a rich, creamy spinach sauce.
Recipe Card: Skillet Balsamic Chicken Breasts
Whip up these juicy, tender, and creamy skillet balsamic chicken breasts in just 30 minutes using only one pan.
Recipe Details
- Author: Katerina | Easy Weeknight Recipes
- Prep Time: 10 minutes
- Cook Time: 25 minutes
- Total Time: 35 minutes
- Servings: 4
Ingredients
- 2 tablespoons olive oil
- 4 boneless, skinless chicken breasts, pounded to 1-inch thickness
- Salt and fresh ground black pepper, to taste
- 2 tablespoons butter, divided
- 1 small yellow onion, finely chopped
- 3 cloves garlic, minced
- ½ teaspoon Italian seasoning
- 1 teaspoon granulated sugar
- 2 teaspoons balsamic vinegar
- ½ cup chicken broth
- ½ cup heavy cream
- Chopped fresh basil or parsley, for garnish
Instructions
- Heat the olive oil in a large skillet set over medium-high heat.
- Pound the chicken breasts down to 1-inch thickness and season them with salt and pepper; add them to the heated oil and cook for 5 minutes, undisturbed.
- Flip the chicken breasts over; add 1 tablespoon butter and continue to cook for 4 to 5 more minutes, or until cooked through. Internal temperature should register at 165˚F (74°C).
- Remove chicken breasts from skillet and set aside; keep them covered.
- Add remaining butter to the skillet. Stir in diced onions and cook for about 6 to 8 minutes, or until very soft. Stir frequently. If they start to burn, lower the heat.
- Stir in the garlic and cook for 20 seconds. Stir in Italian seasoning, sugar, and balsamic vinegar; cook for 2 minutes.
- Whisk in the chicken broth; continue to whisk and scrape up all the browned bits from the bottom of the skillet.
- Increase the heat to High and cook for about 2 to 3 minutes, or until the liquid has reduced a bit.
- Lower heat to medium and whisk in the cream; whisk continually for about 30 seconds so that the sauce doesn’t start to boil.
- Let sauce come to a simmer; add the chicken breasts back to the skillet. Cook for 1 to 2 minutes, or just until chicken is heated through.
- Remove from heat. Sauce will thicken as it stands.
- Garnish with basil and serve.
Equipment
- Large Skillet
Nutrition (Estimated Per Serving)
- Calories: 351kcal
- Carbohydrates: 6g
- Protein: 25g
- Fat: 25g
- Saturated Fat: 12g
- Cholesterol: 128mg
- Sodium: 303mg
- Potassium: 515mg
- Fiber: 1g
- Sugar: 3g
- Vitamin A: 646IU
- Vitamin C: 6mg
- Calcium: 39mg
- Iron: 1mg
Nutritional information is an estimate and provided as a courtesy. Values may vary according to the ingredients and tools used. Please use your preferred nutritional calculator for more detailed information.