
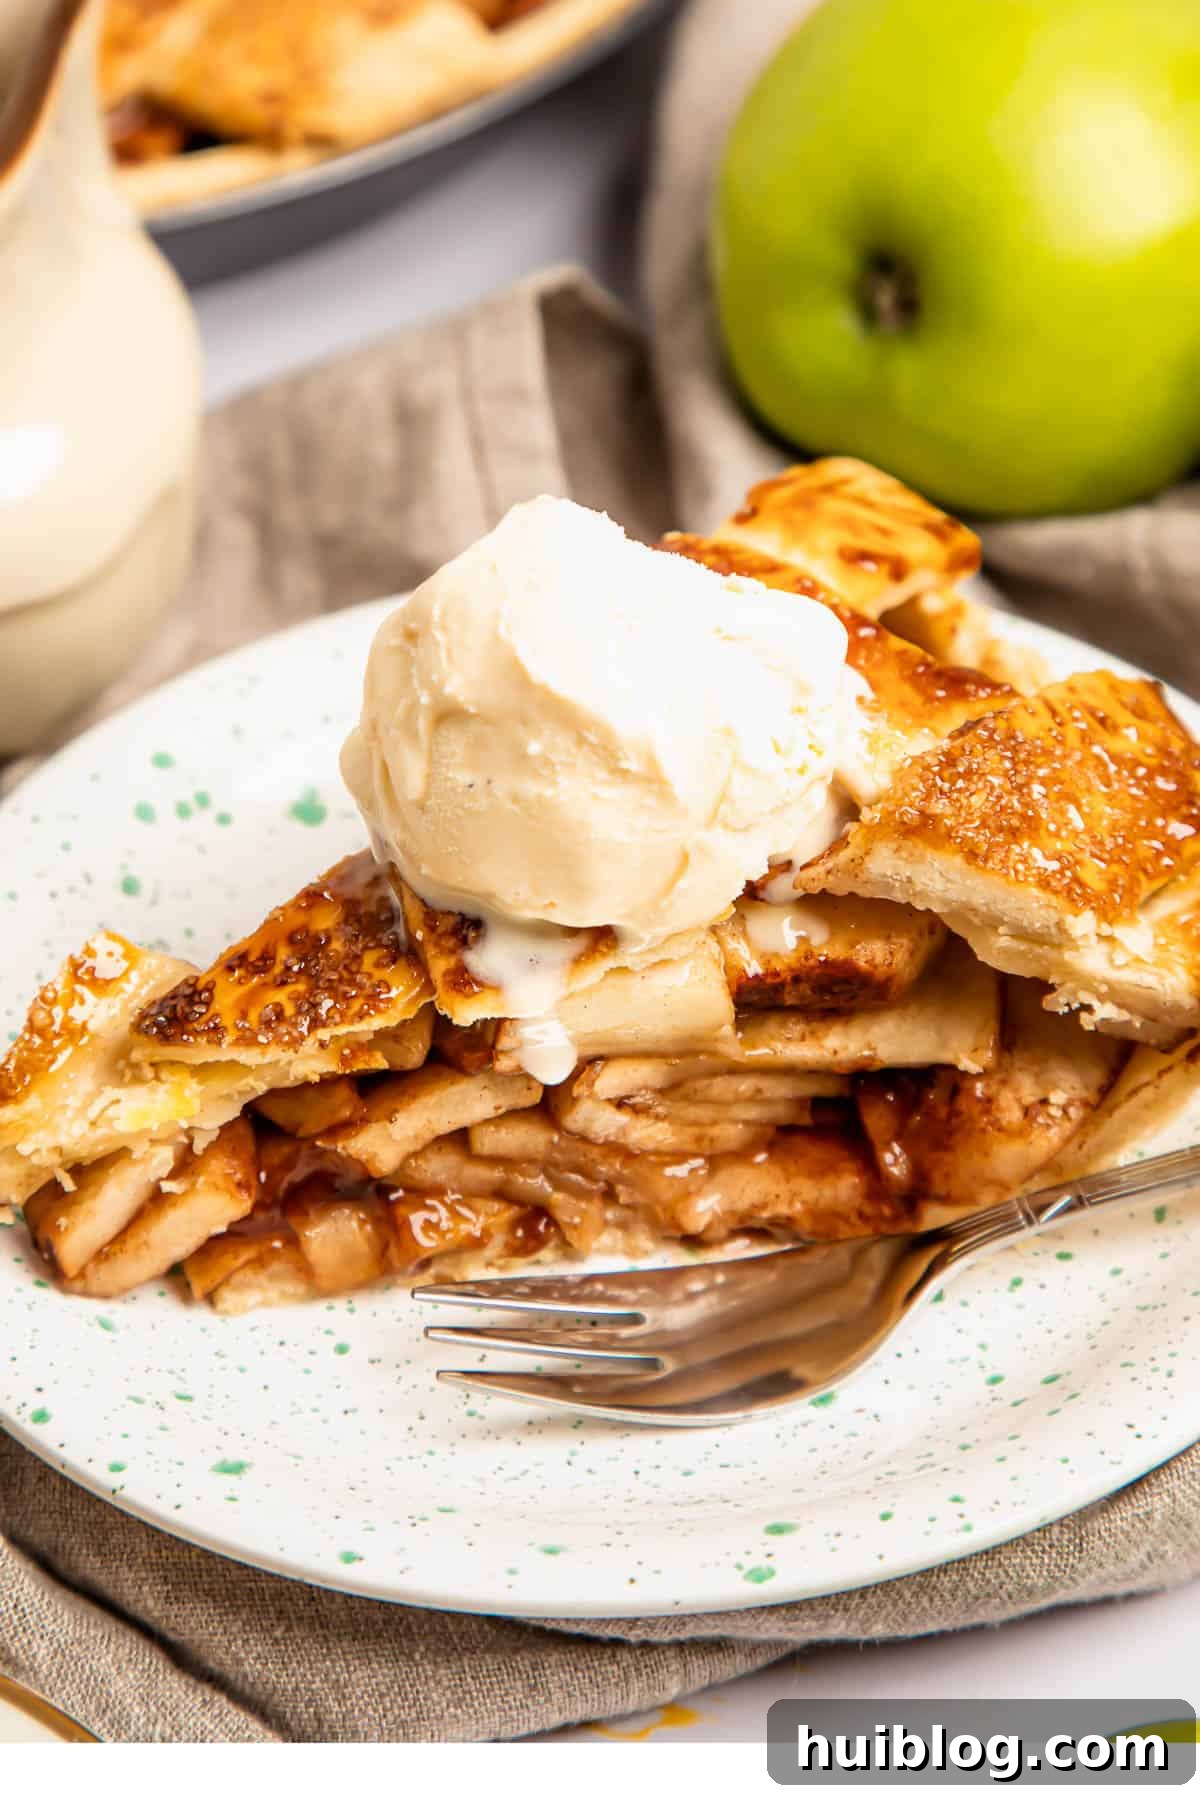
There’s nothing quite like the comforting aroma and delightful taste of a homemade Apple Pie. This cherished dessert, deeply woven into culinary traditions, promises warmth, flavor, and a touch of nostalgia with every bite. Our easy-to-follow recipe guides you through creating a masterpiece from scratch, featuring a perfectly simple, buttery, flaky homemade pie crust, generously filled with tender, spiced fresh apple slices, and sweetened with just the right amount of brown sugar. Get ready to bake a pie that tastes like home and becomes an instant family favorite!
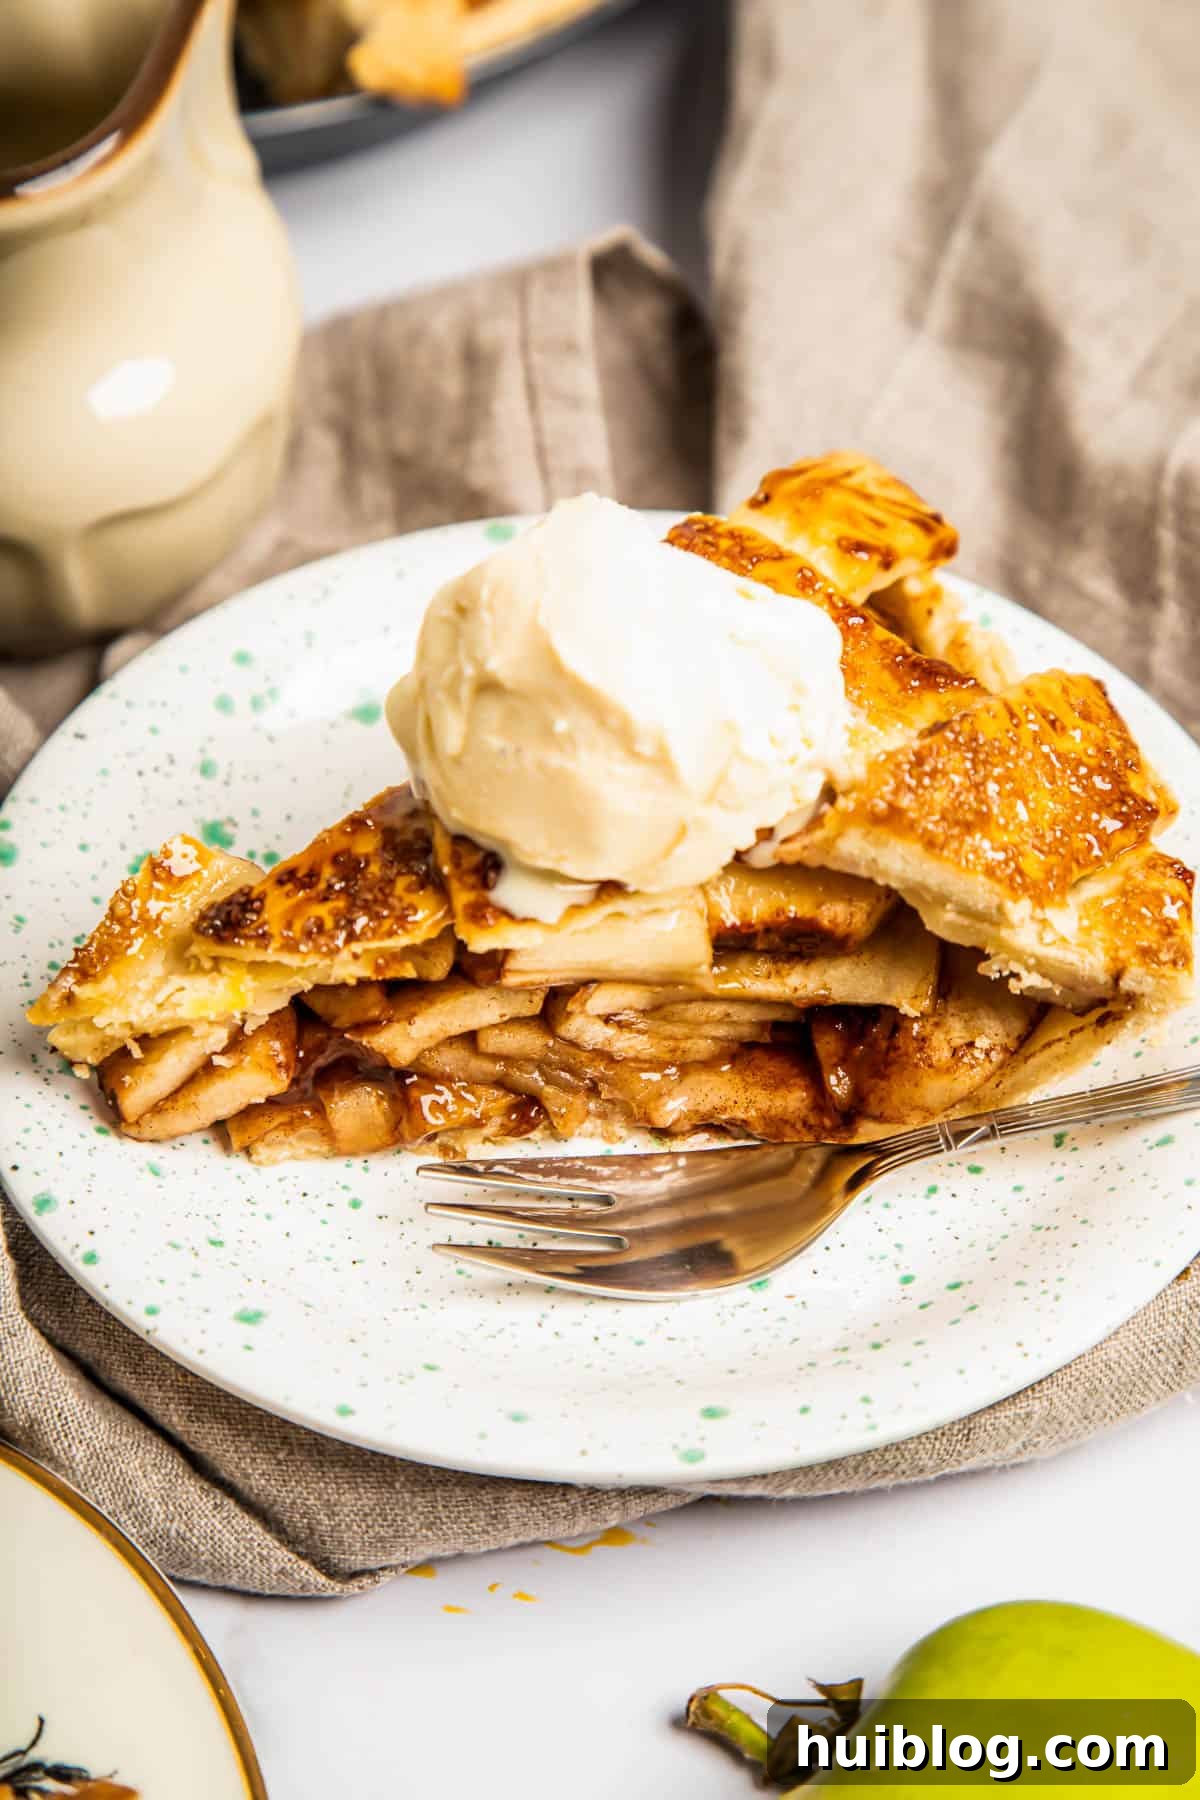
The Ultimate Classic Homemade Apple Pie Recipe: A Step-by-Step Guide
Few desserts evoke such universal adoration and fond memories as a classic apple pie. It’s more than just a sweet treat; it’s a symbol of comfort, tradition, and culinary craftsmanship that has earned its place as an iconic American dessert. With its luscious, golden-baked apple filling, fragrant with cinnamon and other warm spices, all encased in a tender, flaky pastry, this pie is truly a dish to behold and savor. The mere thought of a bubbling, spiced apple filling under a perfectly golden crust is enough to bring a smile to anyone’s face.
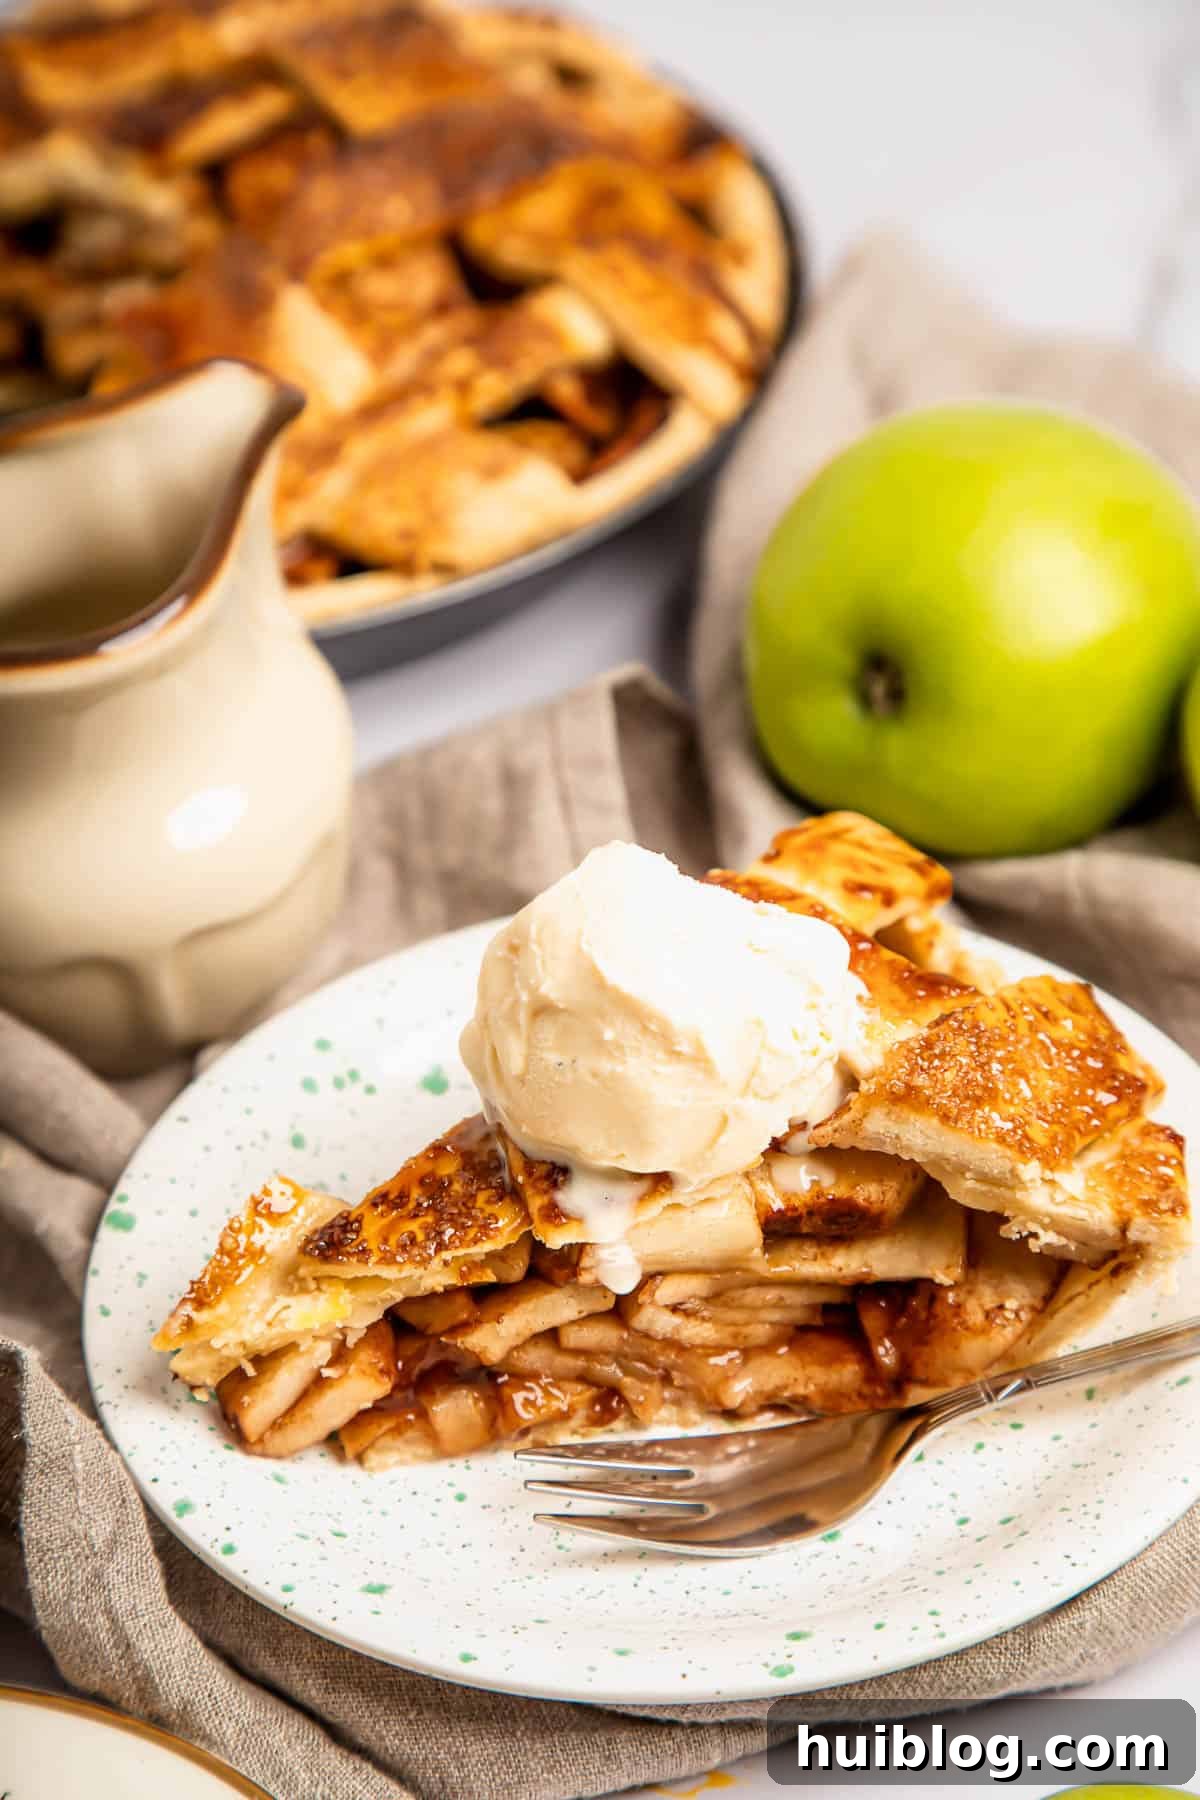
The enduring love for apple pie runs so deep that its enjoyment extends beyond the traditional dessert course. Depending on personal preference or regional customs, it can be served warm or cold, for breakfast, as a satisfying snack, or even alongside unexpected companions like a sharp wedge of cheddar cheese – a surprisingly delicious pairing that balances the pie’s sweetness. More commonly, it’s elevated with a dollop of fresh whipped cream or, most famously, a generous scoop of melting vanilla ice cream, turning a simple slice into an indulgent experience. Each pairing offers a unique flavor experience, highlighting the pie’s versatility and timeless appeal across various meal times and occasions.
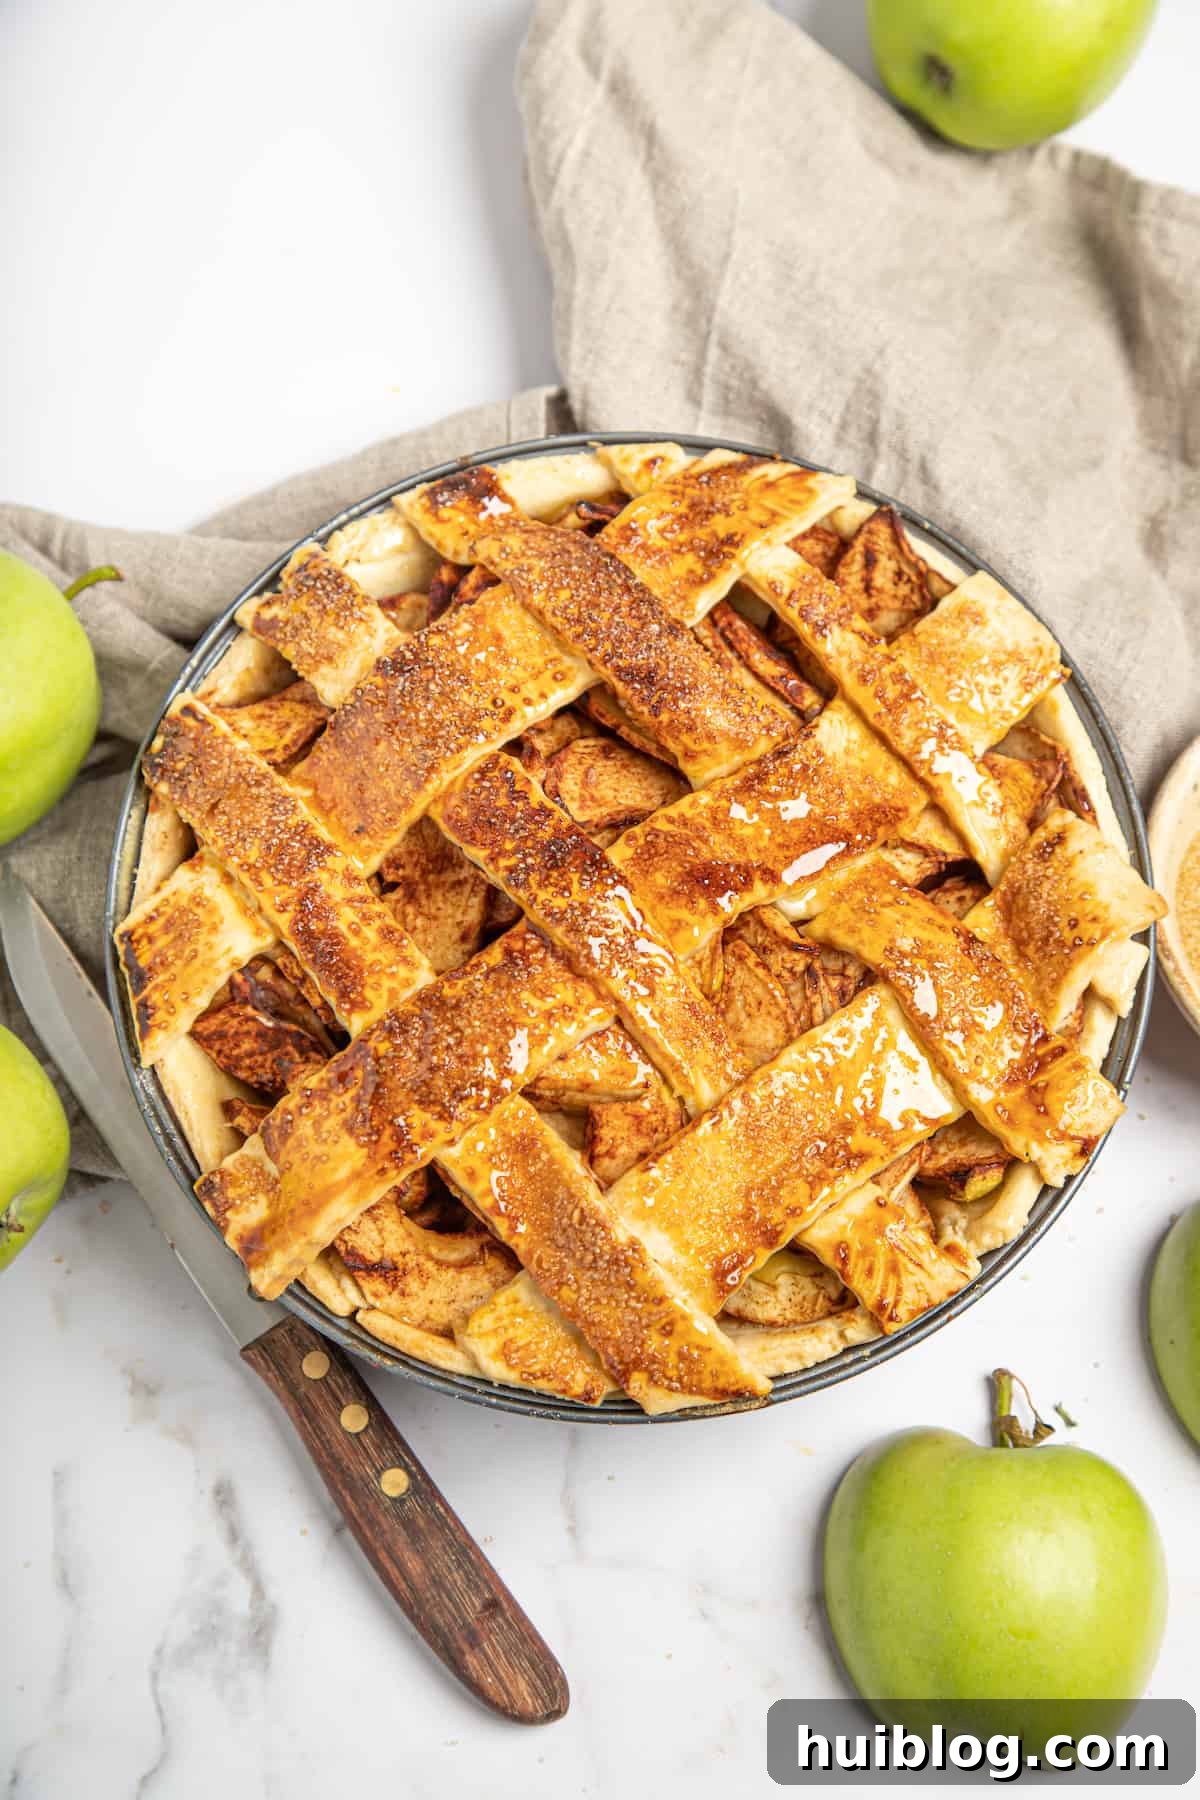
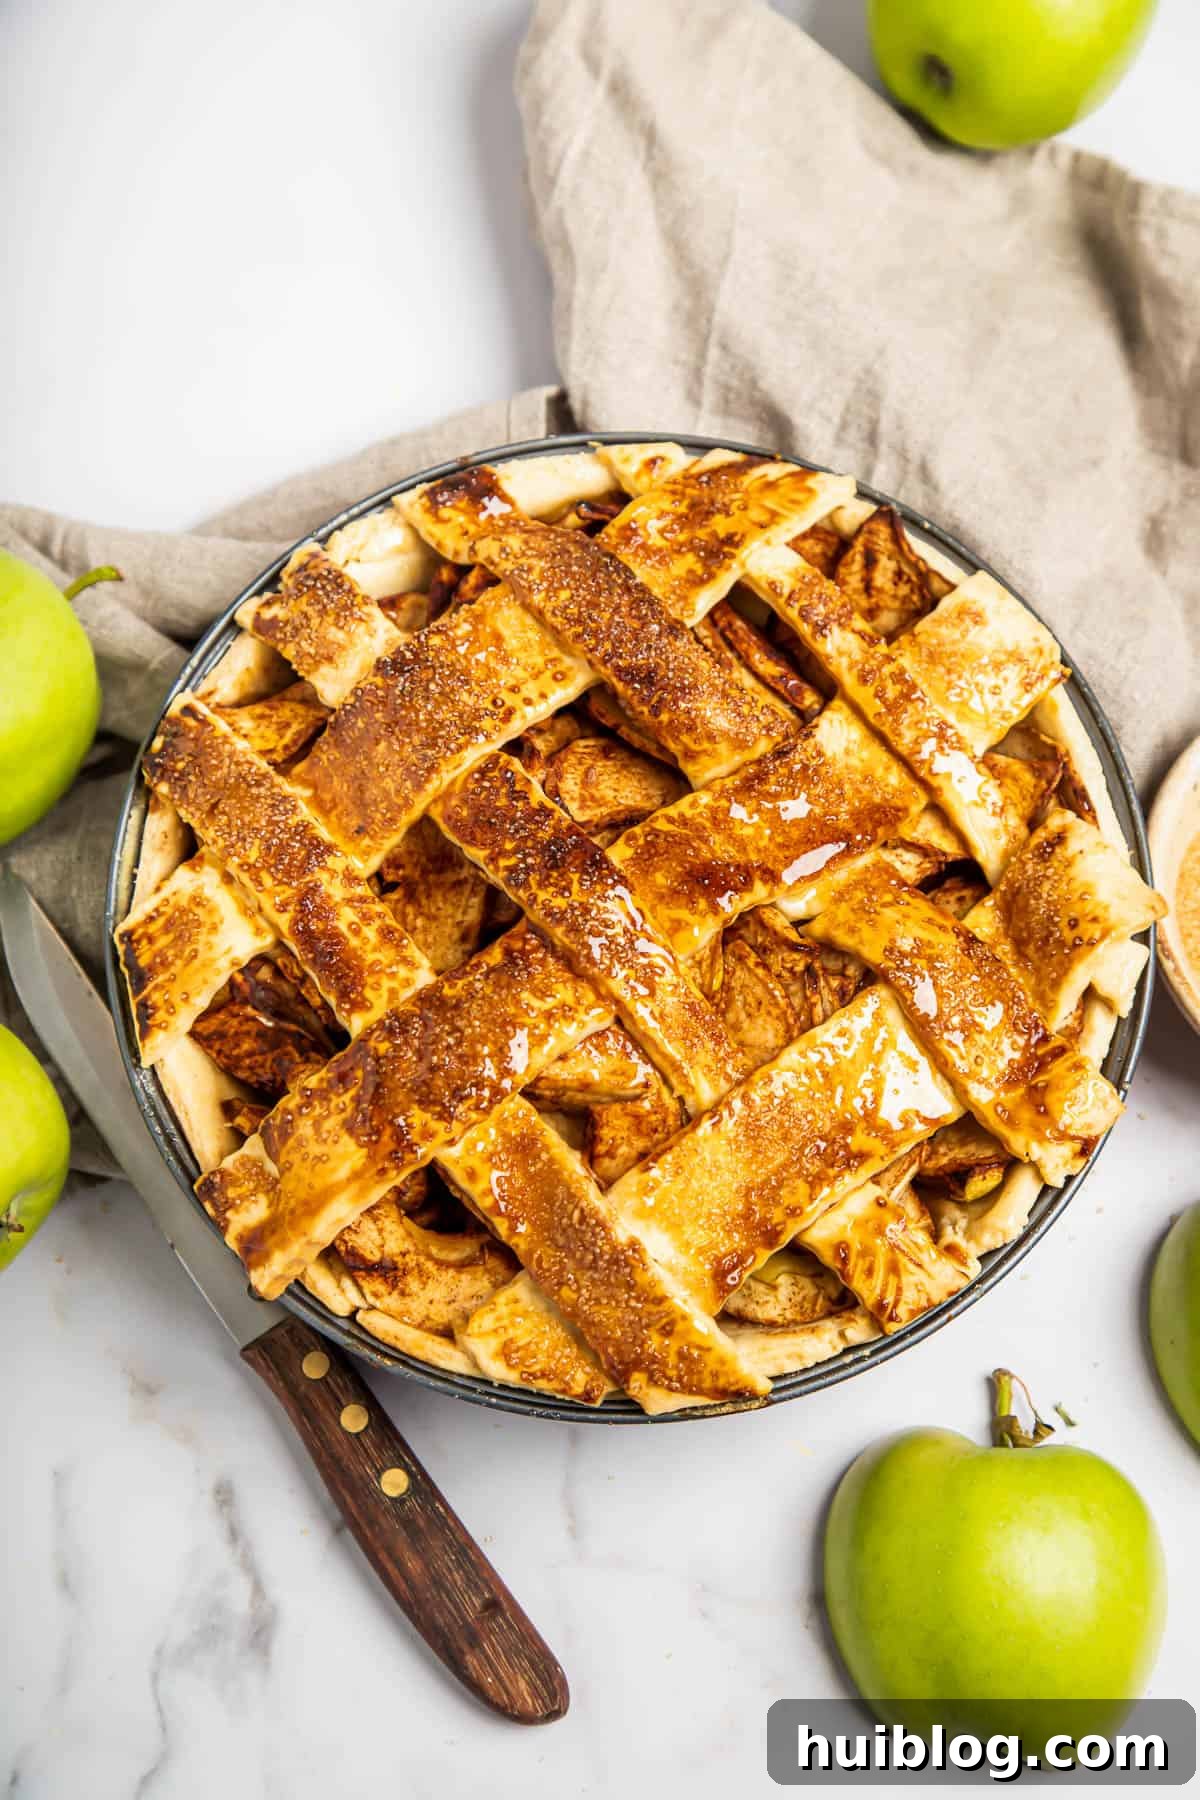
My personal favorite rendition of apple pie boasts a beautifully rustic lattice top, showcasing the glorious golden apples beneath. This recipe prioritizes crisp, fresh raw apples – ideally, those vibrant, sweet-tart varieties picked fresh during the bountiful autumn harvest – perfectly balanced with a touch of sweet brown sugar that caramelizes slightly during baking, adding depth and richness to the filling. This guide is designed to make the baking process straightforward and incredibly rewarding, guaranteeing a delicious result that you’ll be eager to recreate season after season. Prepare to fill your home with an irresistible aroma and your table with a dessert that tastes profoundly of homemade love.
The Irresistible Appeal of Homemade Apple Pie
While store-bought pies offer undeniable convenience, they simply cannot compare to the depth of flavor, exquisite texture, and sheer joy derived from a homemade apple pie. When you take the time to bake from scratch, you gain complete control over every ingredient. This means selecting the freshest, highest-quality apples, ensuring pure, rich butter forms the foundation of your flaky crust, and crafting a custom blend of warm spices to perfectly suit your palate. The sensory experience begins long before the first bite; the enchanting aroma that fills your kitchen as the pie bakes is an experience in itself, creating lasting memories and a truly special dessert that simply cannot be replicated by anything from a box or freezer aisle.
What You’ll Need: Essential Ingredients for Your Apple Pie
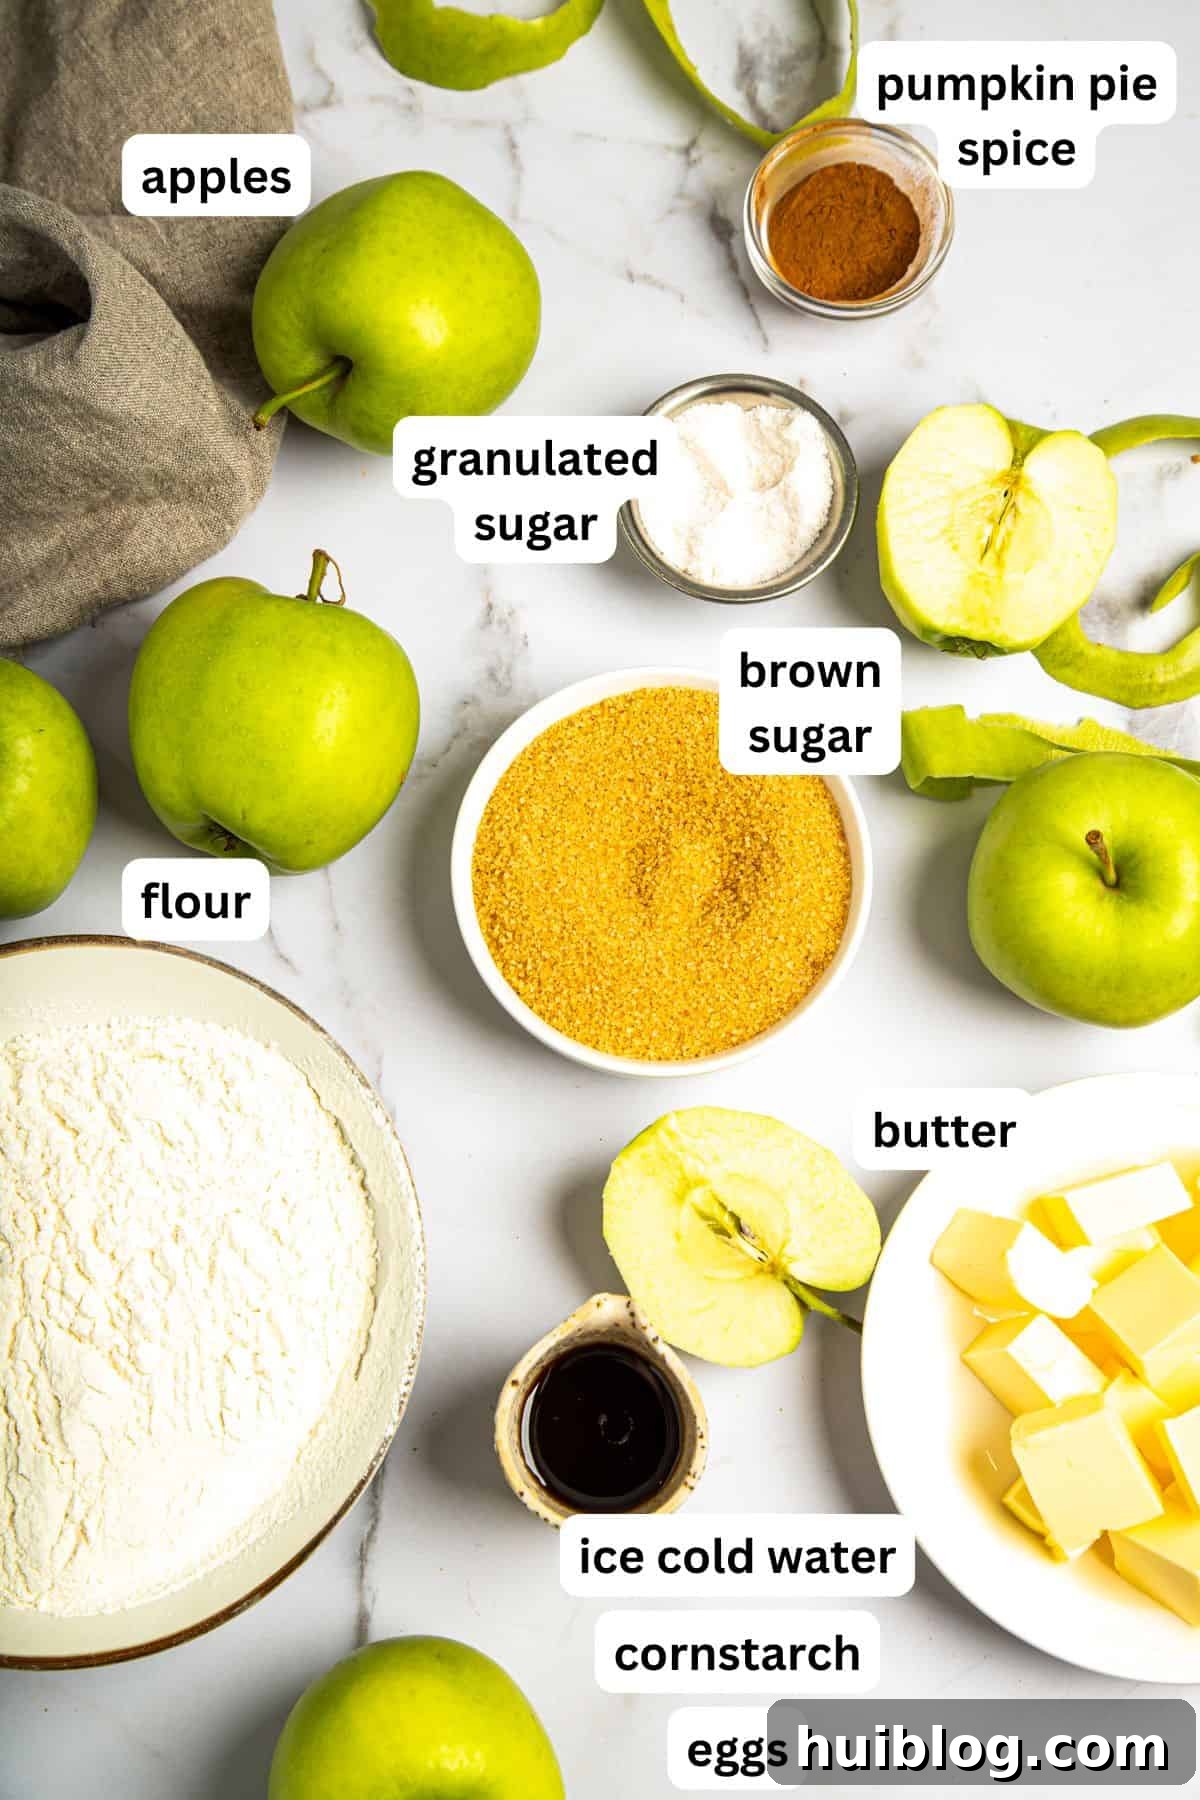
Crafting this delightful apple pie relies on a simple yet highly effective method: a raw apple pie filling mixture is nestled directly into your homemade pie crust. The magic truly happens in the oven, where a small amount of cornstarch expertly combines with the natural, delicious juices released by the apples. This crucial interaction transforms what would otherwise be a watery filling into a wonderfully sweet, thick, and syrupy consistency that holds its shape beautifully once cooled, making for perfect slices every time.
For the Irresistible Apple Pie Filling
- Apples: For this recipe, we recommend approximately 2 pounds of apples, which typically translates to about 6-8 medium-sized apples. Don’t feel pressured to be overly precise with the exact weight; the primary goal is to have enough thinly sliced apples to generously fill your pie crust, creating that satisfying mound. The type and quality of apple you choose, as detailed in our tips below, are far more significant than an exact measurement.
- Sugar: We achieve the perfect balance of sweetness and depth by using a combination of granulated sugar and brown sugar. Brown sugar introduces a subtle molasses note and a richer, more complex flavor that wonderfully complements the tartness of the apples. Feel free to adjust the sugar content slightly based on the natural sweetness or tartness of your chosen apple varieties and your personal taste preference.
- Spices: While traditional apple pie spice is a fantastic go-to, don’t hesitate to experiment! Pumpkin pie spice, with its balanced blend of cinnamon, nutmeg, ginger, and cloves, offers a warm and comforting flavor profile that harmonizes exquisitely with apples. Alternatively, a generous amount of ground cinnamon on its own is always a beloved classic, and you can easily add a pinch of freshly grated nutmeg, ground cloves, or allspice for extra aromatic depth and complexity.
- Cornstarch: This essential ingredient is our secret weapon for a perfectly set, syrupy filling. It acts as a reliable thickening agent, ensuring your pie slices are clean and the filling isn’t watery. For those seeking a gluten-free alternative, arrowroot powder is an excellent substitute, providing similar thickening properties without altering the flavor or texture.
For the Flaky Homemade Pie Crust
- All-Purpose Flour: This forms the robust and tender foundation of our pie crust. If you’re catering to dietary restrictions or simply exploring alternatives, a high-quality 1:1 gluten-free all-purpose flour blend can be successfully substituted, often yielding excellent results with minor adjustments.
- Unsalted Butter: The undisputed secret to achieving that coveted flaky, rich, and melt-in-your-mouth crust. It is absolutely crucial that your butter is well-chilled – almost rock hard – and cut into small, even cubes. This meticulous preparation prevents the butter from fully incorporating into the flour, instead creating tiny pockets within the dough. During baking, these butter pockets release steam, which separates the dough layers, resulting in those wonderfully light and flaky strata.
- Ice-Cold Water: Absolutely non-negotiable! Keeping the water as cold as possible (even adding a few ice cubes to your measuring cup before adding the water) is vital. Cold water helps prevent the butter from melting prematurely while you’re working the dough. It also minimizes gluten development, which is key to a tender, rather than tough, crust.
- Granulated Sugar (optional): While not strictly essential for the structural integrity of the crust, a small amount of granulated sugar adds a subtle touch of sweetness that enhances the overall flavor of the pie and contributes to that beautiful golden-brown color during baking.
- Salt: Just a small pinch of salt is incredibly important, as it enhances all the other flavors in the crust, preventing it from tasting bland and bringing out the richness of the butter.
- Egg Wash: A single large egg, lightly beaten with a tablespoon of water or milk, is brushed over the top crust before baking. This simple step provides a gorgeous golden sheen and a professional-looking finish, making your homemade pie truly show-stopping.
How to Make the Perfect Apple Pie: A Detailed Step-by-Step Guide
Baking a homemade apple pie is a deeply rewarding culinary journey that combines artistry with delicious science. You have the creative freedom to adorn your pie with a beautifully intricate lattice top, as demonstrated in our visual guide, or opt for a classic full top crust, simply cutting a few small slits in the center to allow essential steam to vent efficiently during baking.
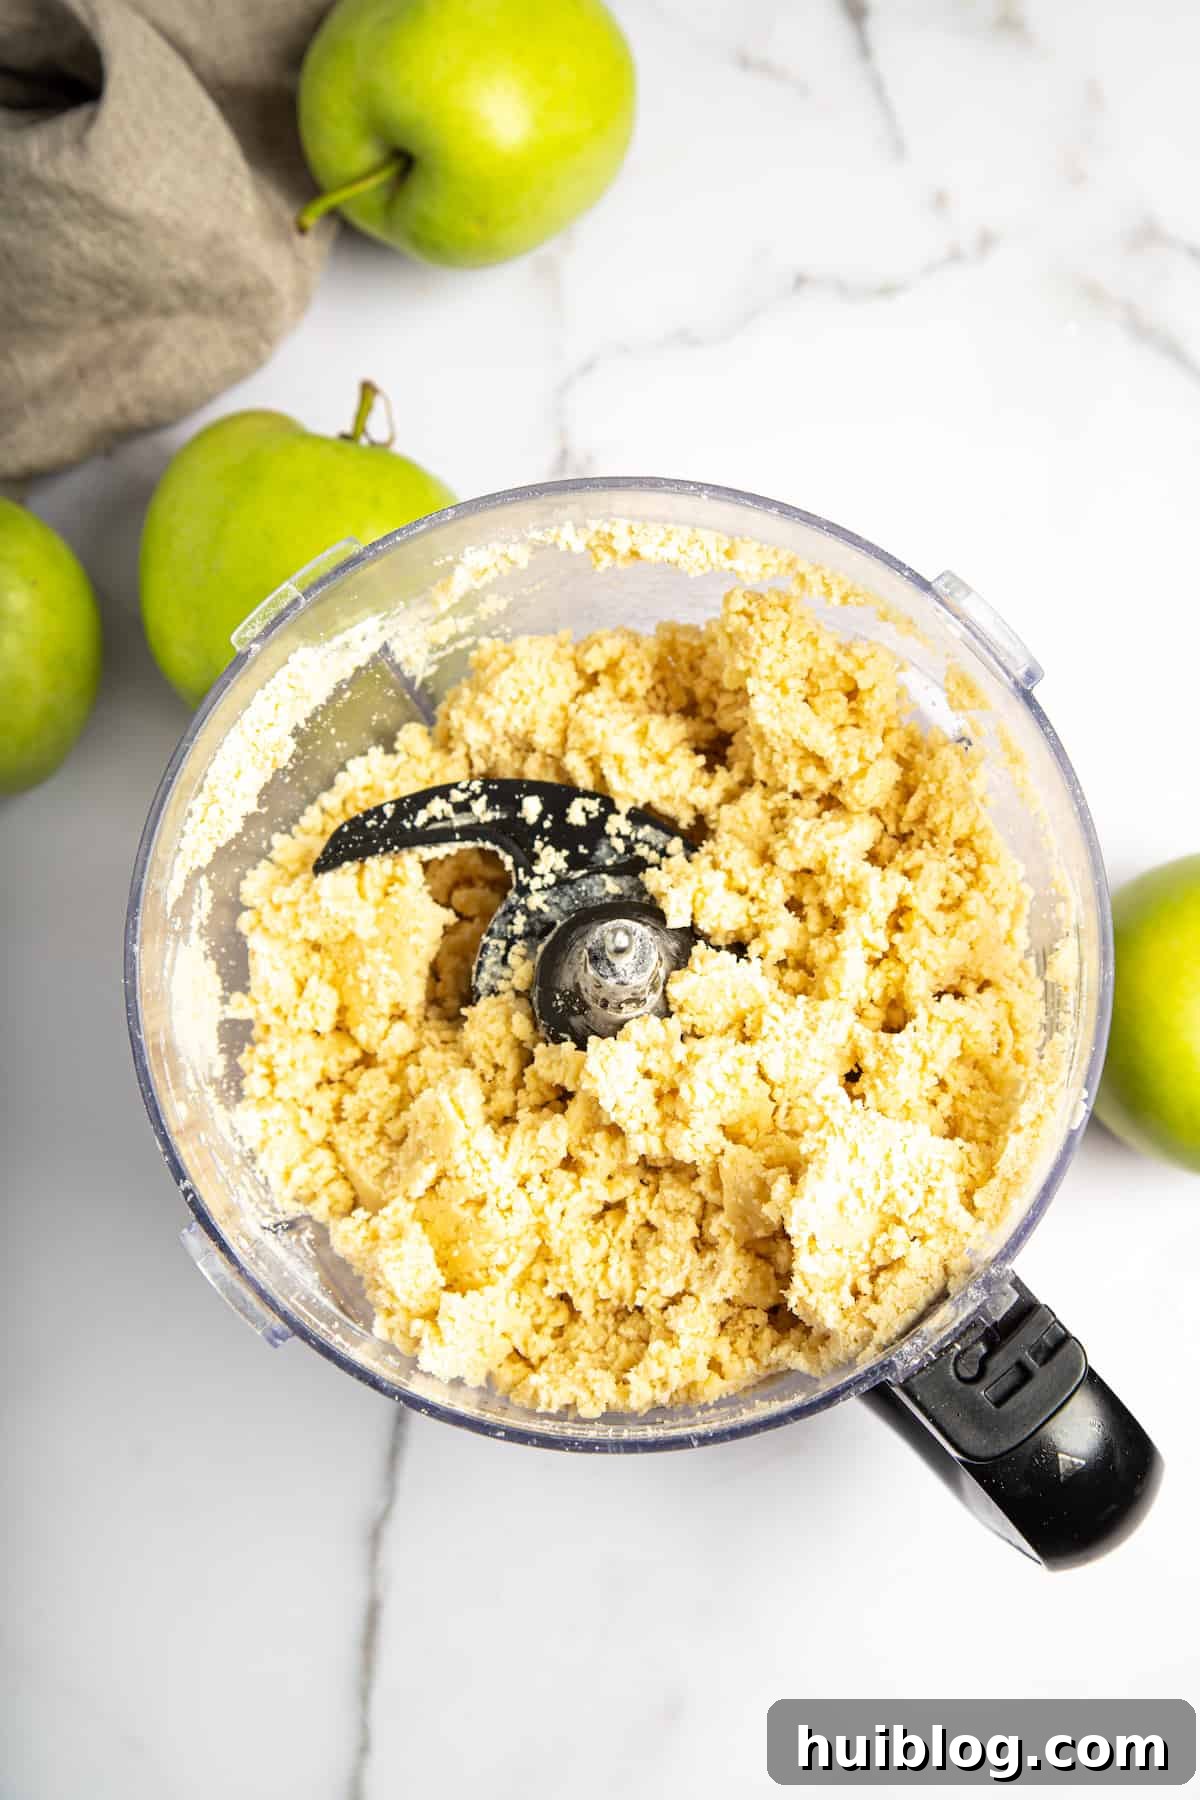
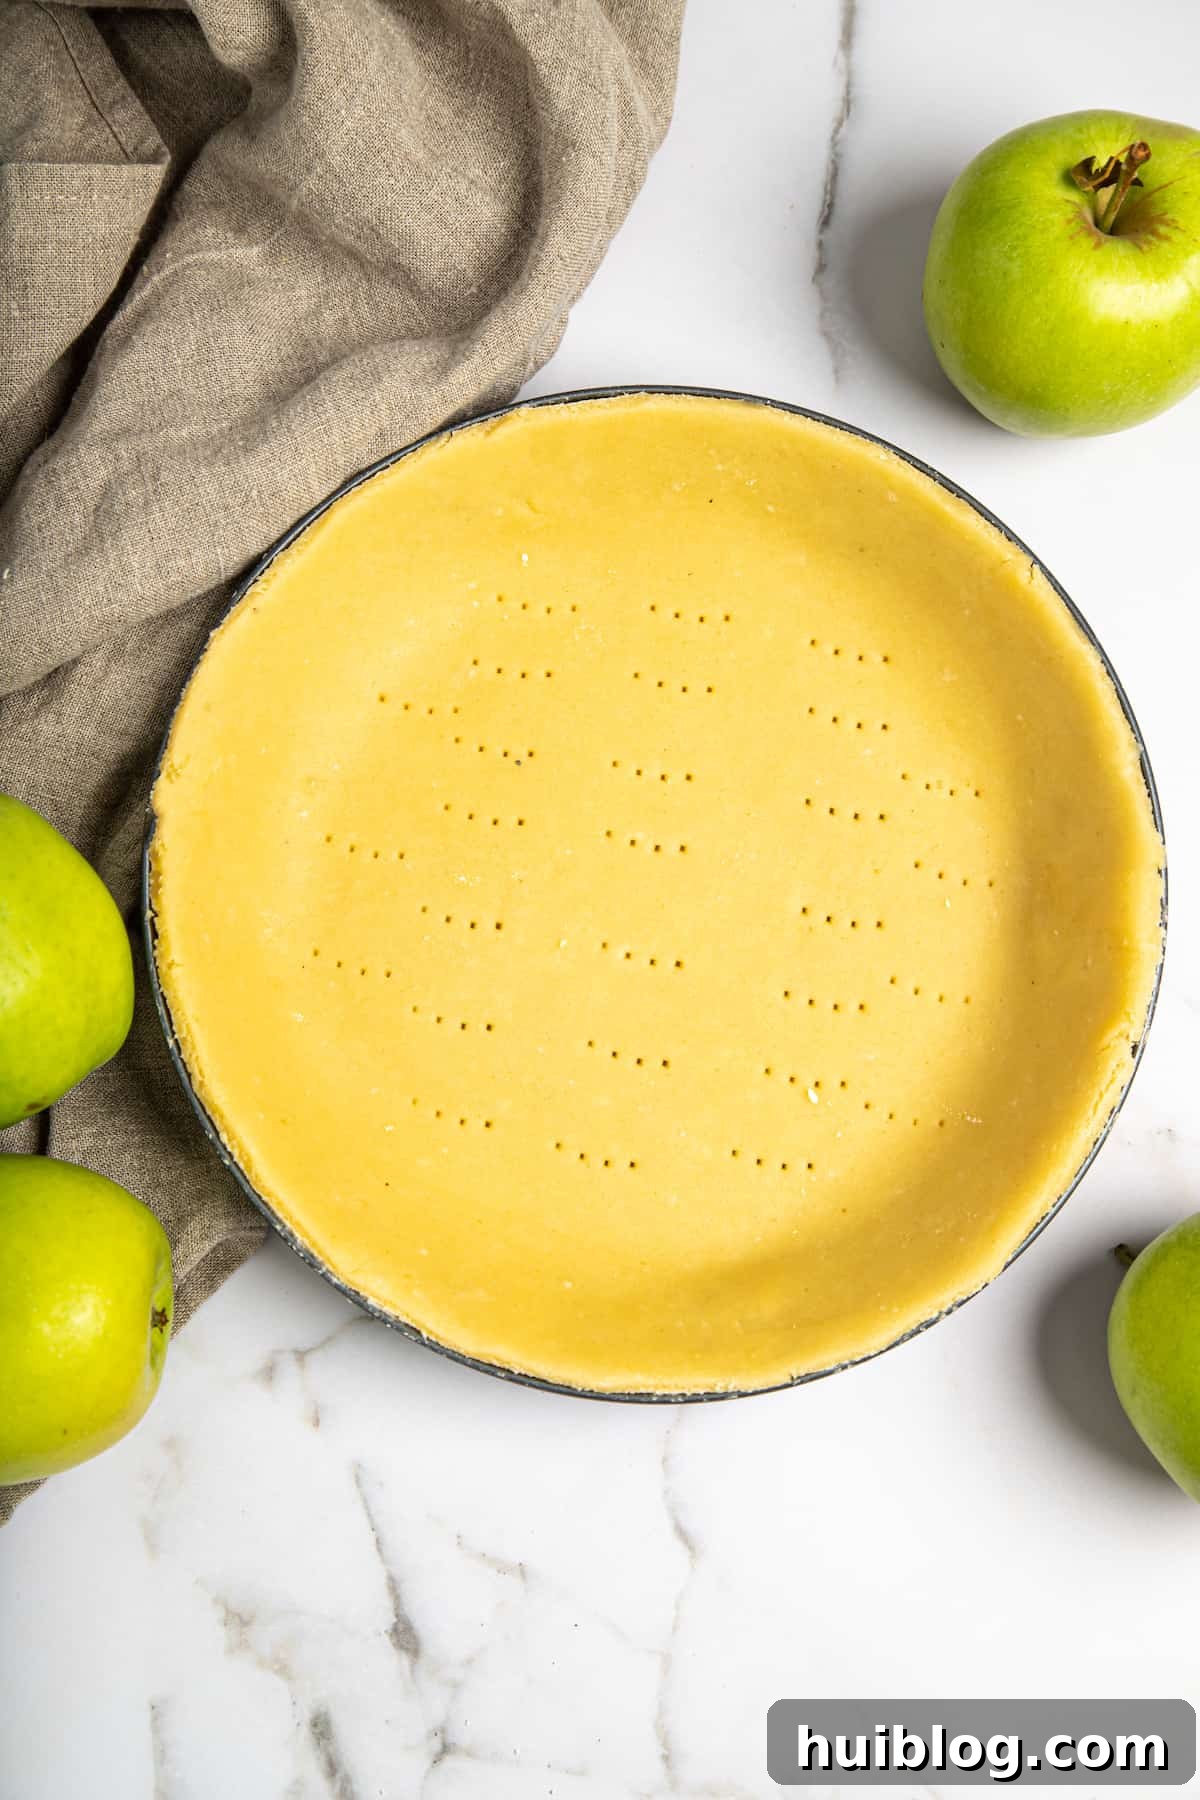
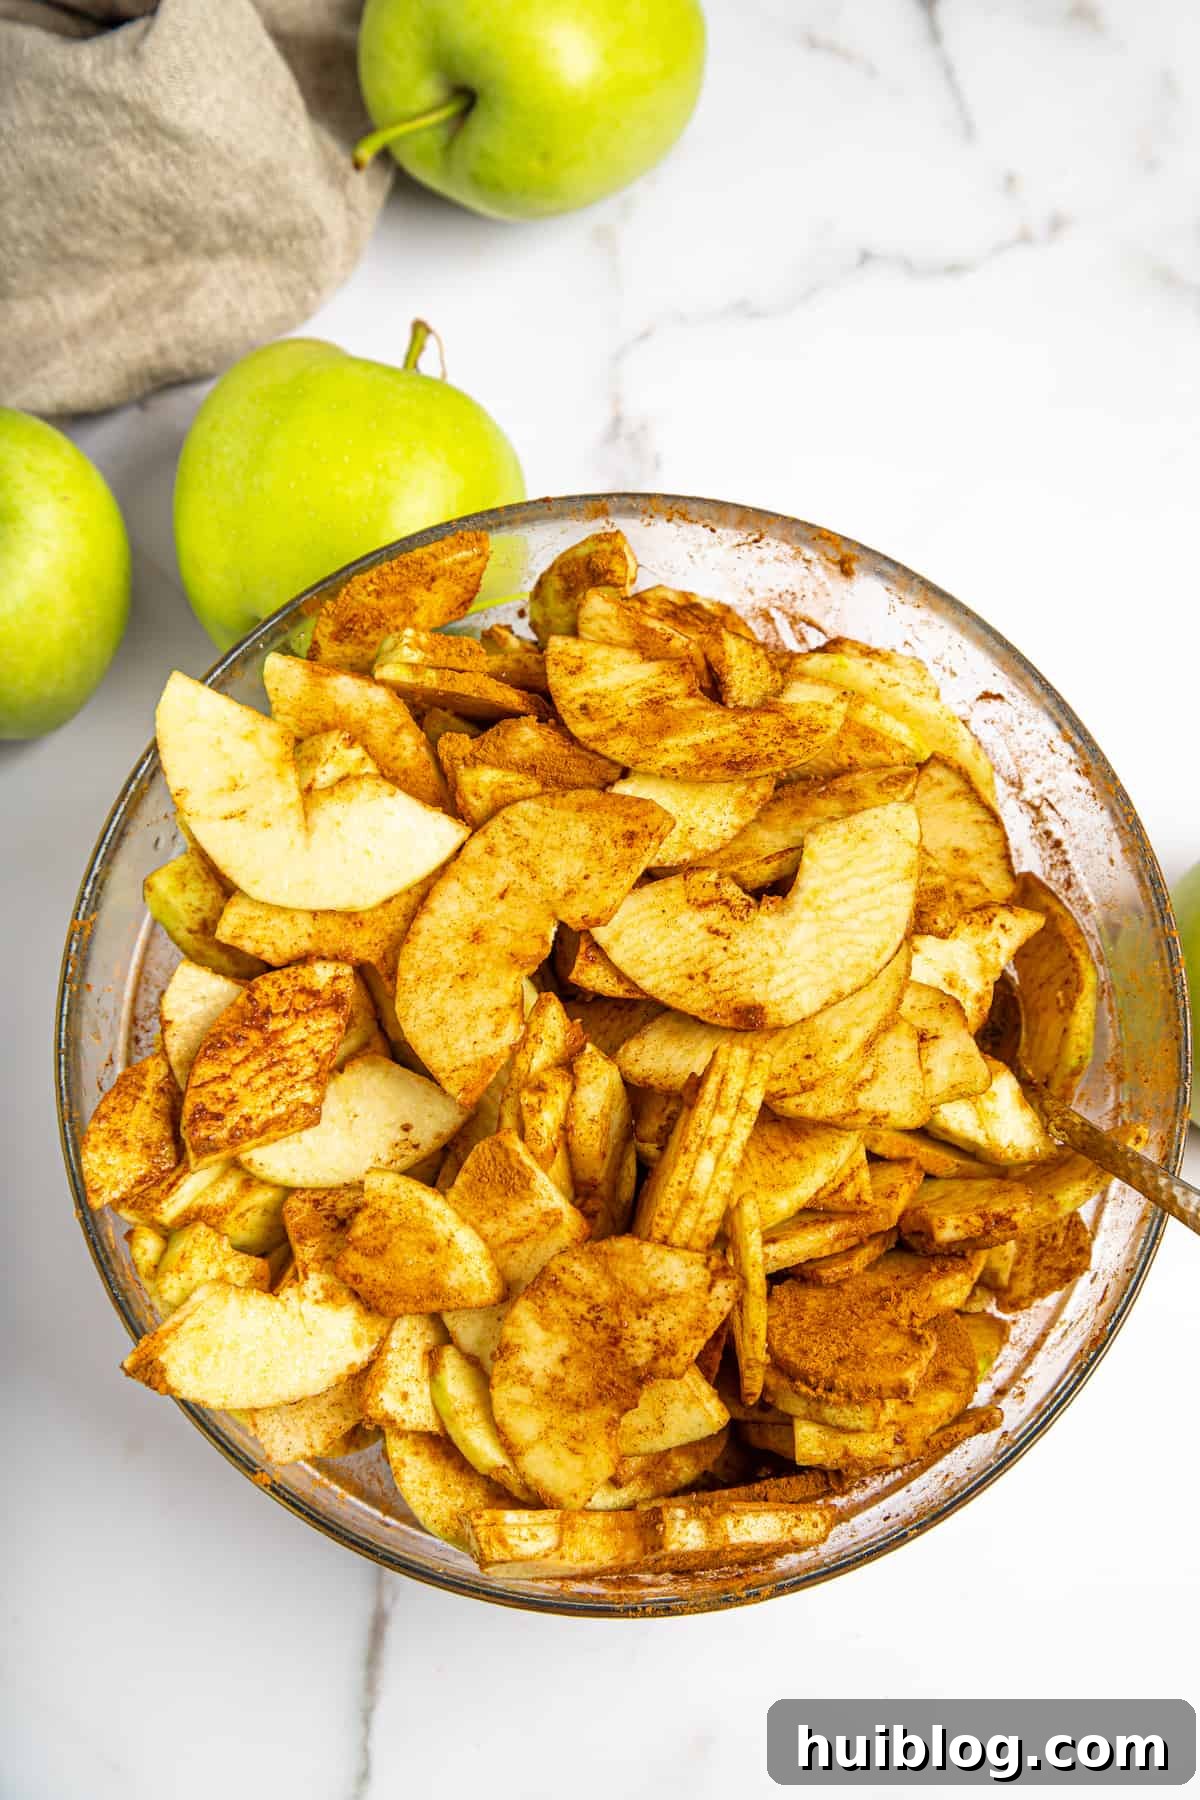
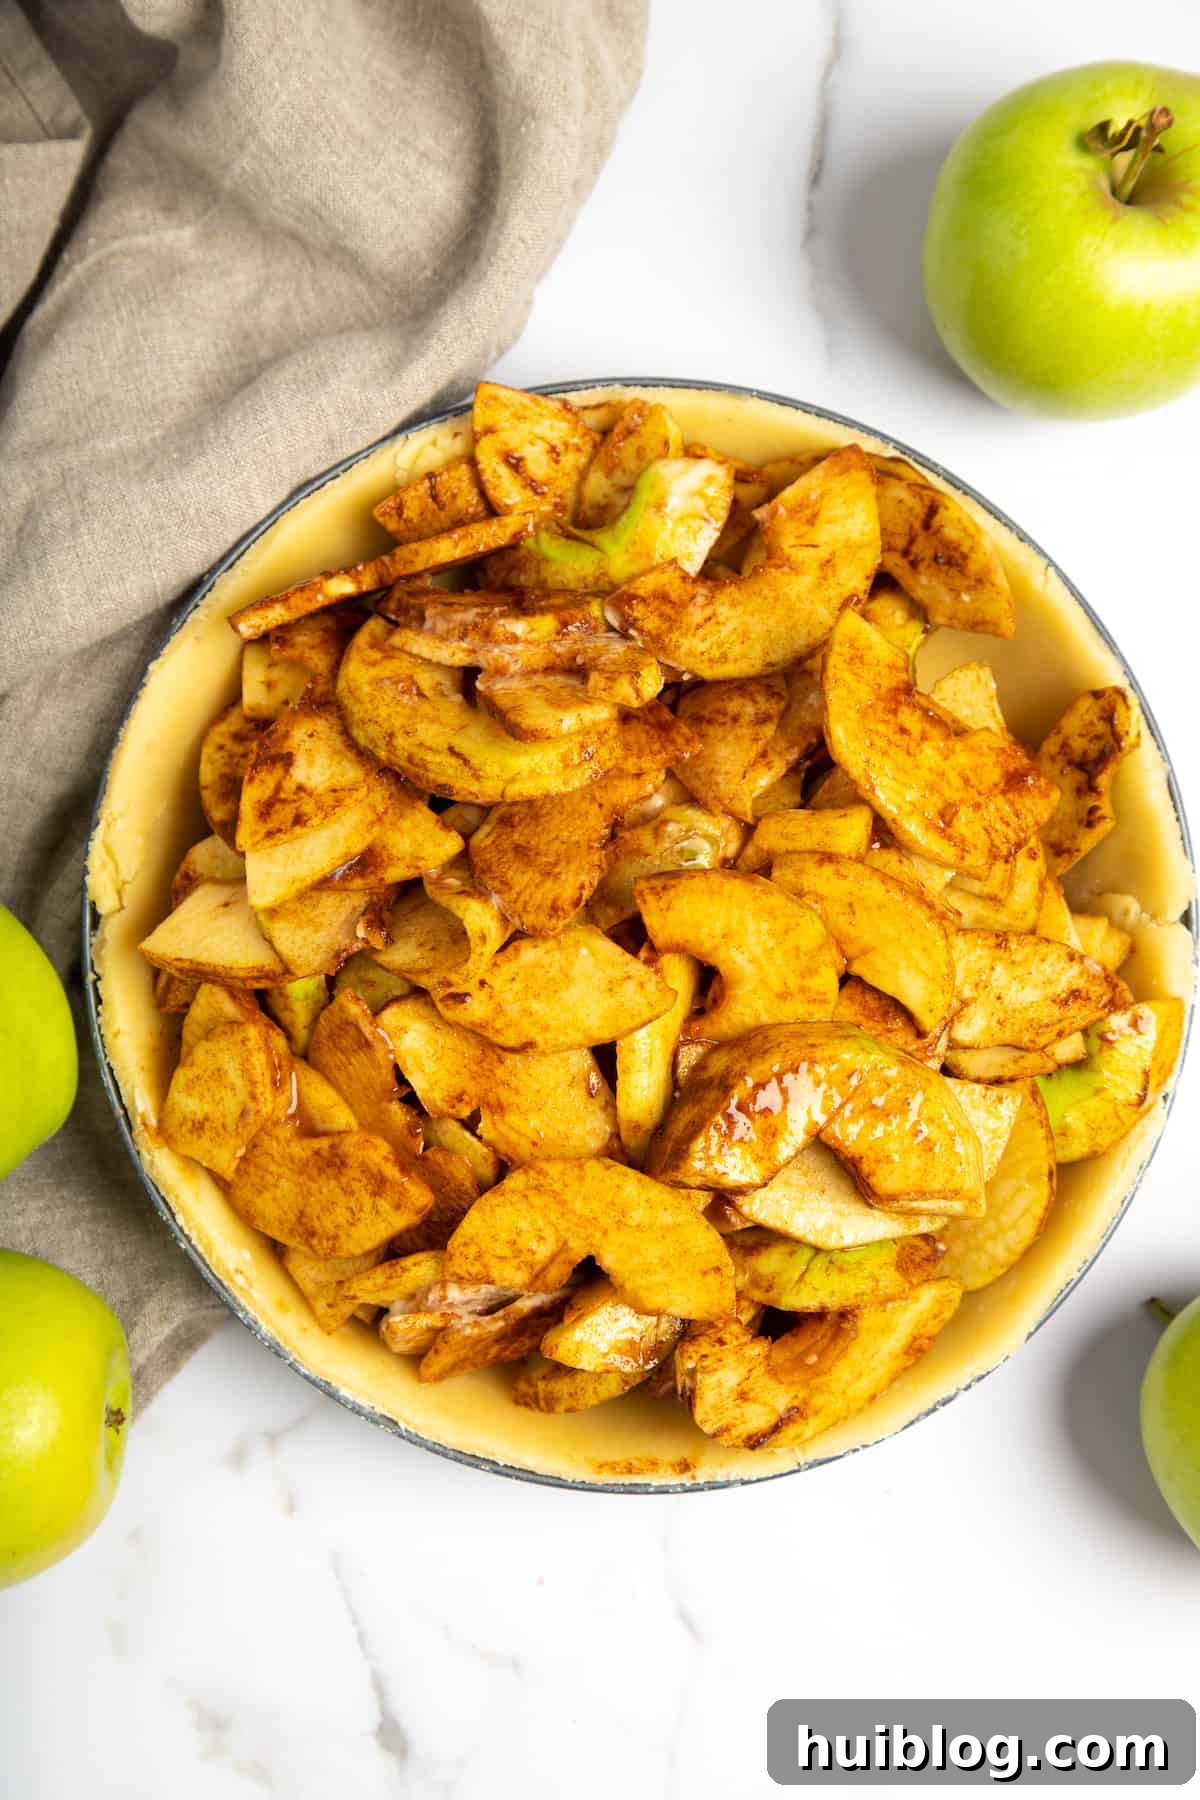
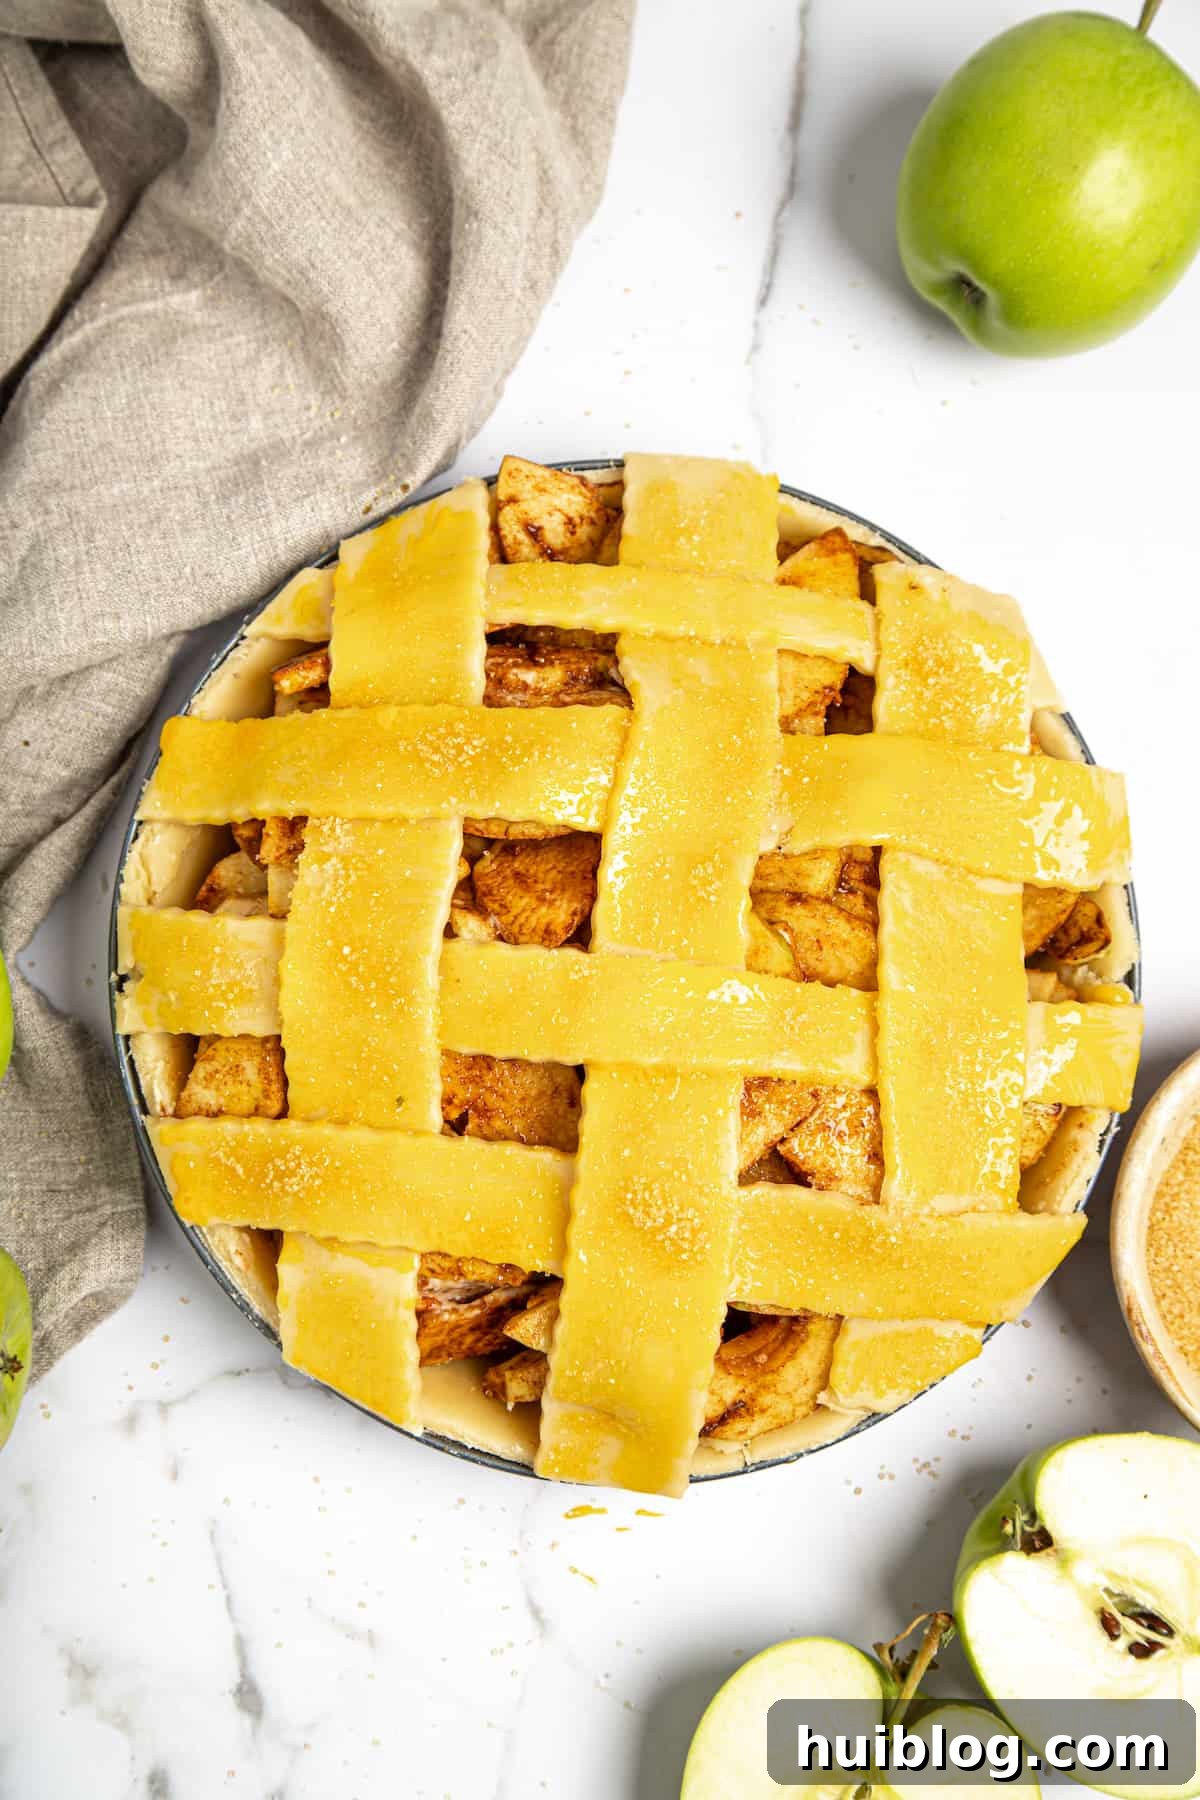
- Prepare the Flaky Pie Crust: Begin by combining the all-purpose flour, cubed cold unsalted butter, and a generous pinch of salt in a food processor. Pulse in short bursts until the mixture resembles coarse breadcrumbs, with distinct pea-sized pieces of butter still visible. Gradually add five tablespoons of ice-cold water, pulsing just a few times until the dough barely begins to come together into a shaggy ball. If the mixture appears too dry and crumbly to cohere, add additional ice water, one tablespoon at a time, pulsing briefly after each addition, until a cohesive dough forms. Be careful not to overmix, as this can develop too much gluten and result in a tough crust. Divide the dough into two equal discs, gently flatten each, wrap them tightly in plastic, and chill in the refrigerator for at least 30-40 minutes, or until the dough is firm to the touch. This chilling time is absolutely crucial for achieving that desired flaky texture.
- Craft the Aromatic Apple Filling: While your pie crust chills, prepare the star of the show: the apples. Peel, core, and thinly slice your chosen apples (refer to our apple recommendations below for the best varieties). In a large mixing bowl, whisk together the granulated sugar, your preferred pie spice blend (such as pumpkin pie spice, classic apple pie spice, or pure ground cinnamon), and the cornstarch until they are thoroughly combined. Add the thinly sliced apples to the bowl and toss them gently but thoroughly until every single slice is evenly coated with the fragrant sugar and spice mixture. Set this bowl aside to allow the flavors to meld slightly.
- Assemble the Bottom Pie Crust: Now is the perfect moment to preheat your oven to a robust 400°F (200°C). Remove one disc of chilled pastry dough from the refrigerator. On a lightly floured work surface, roll it out evenly into an approximately 11-inch circle, ensuring it’s large enough to comfortably fit your 9-inch pie plate with a slight overhang. Lightly spray the pie plate with cooking spray for easy release, then carefully transfer the rolled-out crust to the pan. Gently press it into the bottom and up the sides, ensuring there are no air pockets. Trim any excess dough even with the rim of the pie plate, and then use a fork to prick the bottom of the crust all over. This prevents the crust from puffing up excessively during baking, combating the dreaded “soggy bottom.”
- Fill and Top the Pie: Spoon the prepared apple mixture generously into the bottom pie crust, mounding it slightly in the center to account for apple shrinkage during baking. Retrieve the second chilled pie crust disc. Roll it out into another 11-inch circle. Now, decide on your topping: you can either place this entire crust over the apples (cutting a few small slits in the center for steam to escape) or cut it into 1-inch wide strips to create a beautiful and classic lattice top. If you opt for a lattice, weave the strips over and under each other, creating an attractive pattern, then gently press and tuck the ends of the strips underneath the edge of the bottom crust, crimping to seal. In a small bowl, beat the large egg to create an egg wash. Brush this egg wash evenly over the entire top crust (whether it’s a lattice or a full top), then sprinkle generously with a little extra brown sugar for a glistening, caramelized finish that adds both visual appeal and a touch of sweetness.
- Bake to Golden Perfection: Carefully place the assembled pie onto a baking sheet (this is a crucial step to catch any potential drips and keep your oven clean) and transfer it to your preheated oven. Bake for approximately 45-55 minutes, or until the crust is a beautiful deep golden brown and the filling is visibly bubbling, indicating the apples are tender and the juices have thickened. To check for doneness, you can insert a thin knife through a vent – if it slides in easily, the apples are cooked. If you notice the crust browning too quickly before the filling is fully cooked, loosely cover the edges or the entire pie with aluminum foil to prevent over-browning.
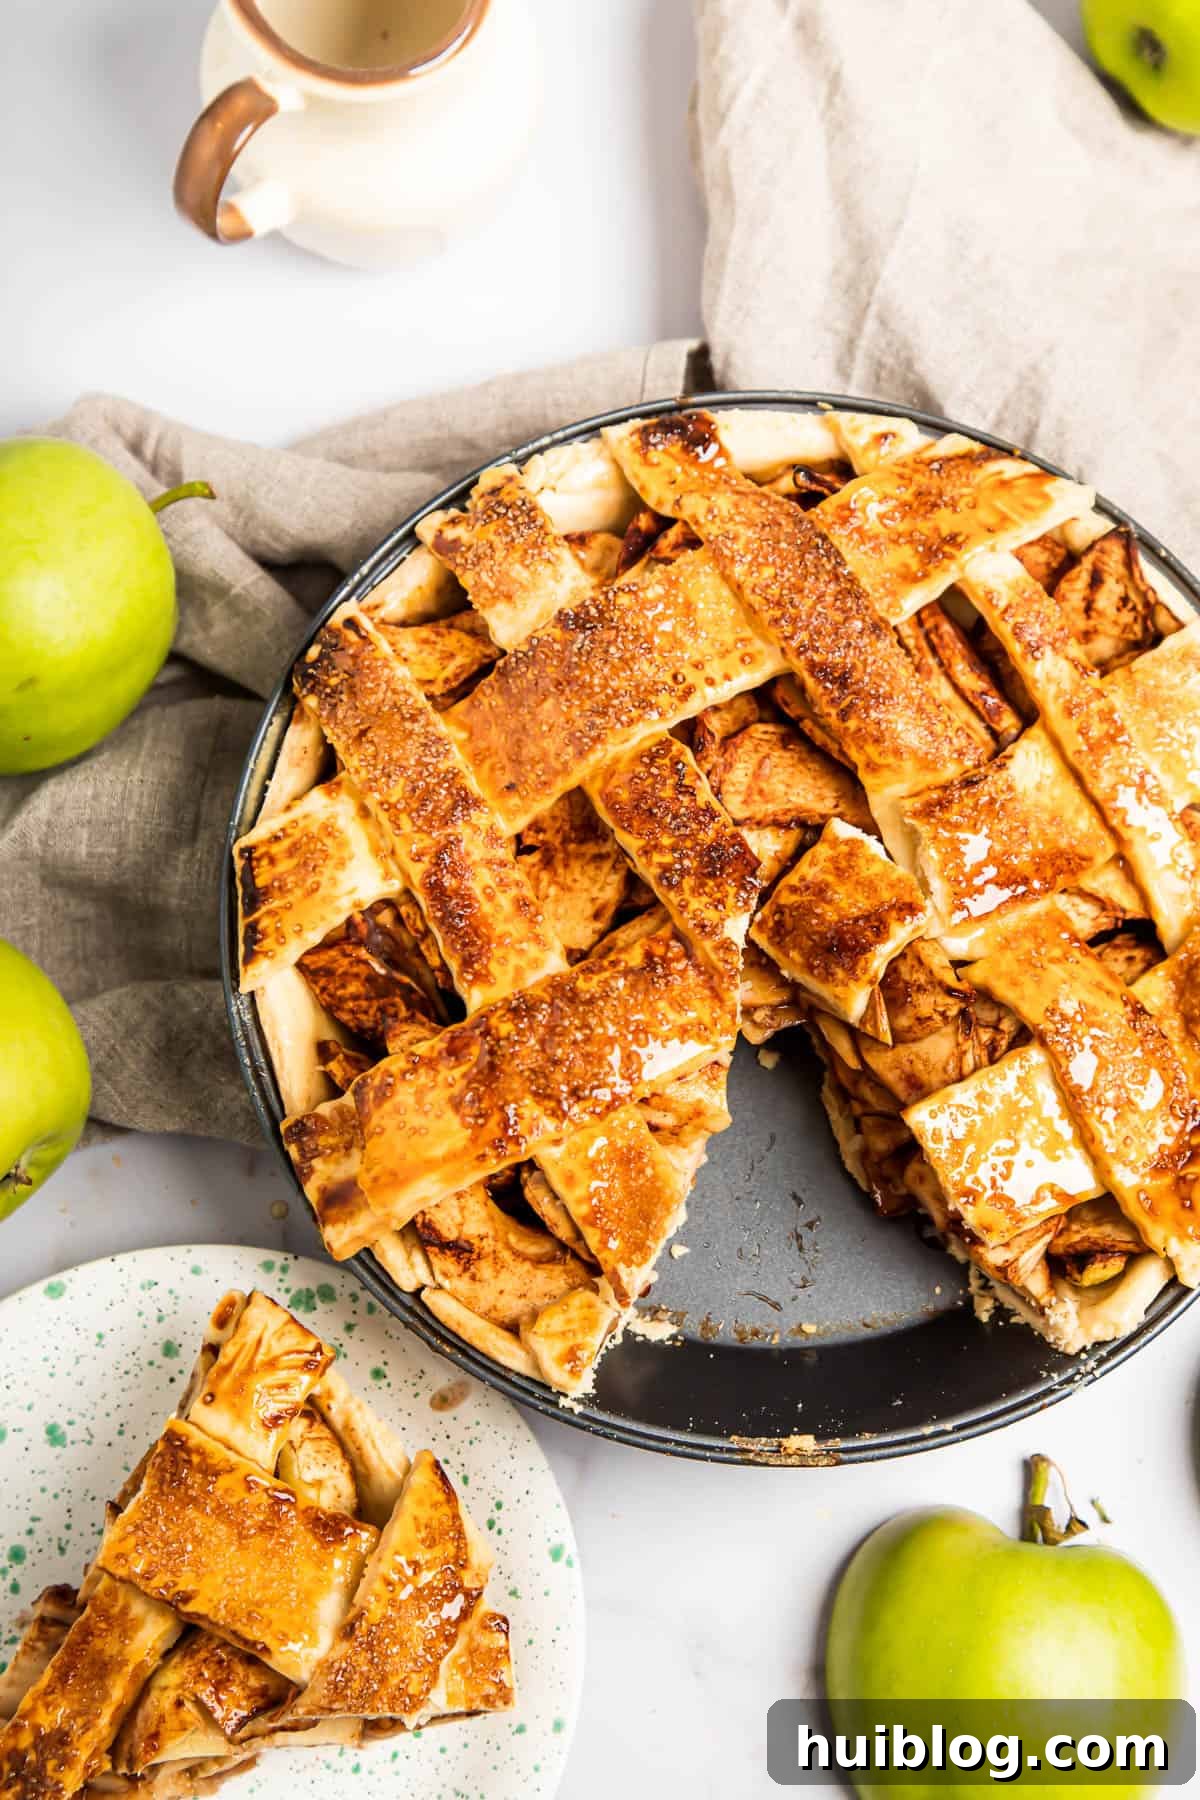
- Cool and Savor: Once baked, carefully transfer the hot pie from the oven to a wire rack. It is absolutely crucial to allow the pie to cool completely, or at the very least for several hours (minimum 3-4 hours), before attempting to slice it. This extended cooling period allows the filling to fully set and firm up, preventing a runny, messy slice and ensuring a perfectly structured pie.
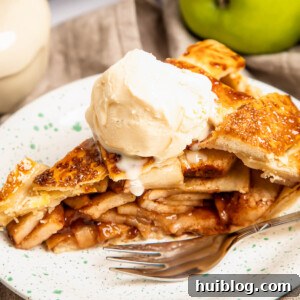
- Enjoy! Serve your magnificent homemade apple pie warm, ideally with a generous scoop of creamy vanilla ice cream that slowly melts into the spiced apples, a dollop of freshly whipped cream, or for a unique twist, a thin slice of sharp cheddar cheese.
Choosing the Best Apples for Your Pie
Selecting the right apples is one of the most critical factors for a truly successful and delicious apple pie. You need apples that are firm enough to hold their shape during the baking process, flavorful enough to shine through the spices and sweetness, and possess a good balance of tartness to prevent the pie from tasting cloyingly sweet. Using bland or mushy apples will inevitably result in a disappointing pie. Here are some of our top recommendations for baking, often best used in a mix:
- Granny Smith: A classic and widely favored choice, renowned for its exceptionally firm texture and pronounced tartness. This acidity beautifully balances the sweetness of the pie, preventing it from being overly sugary.
- Honeycrisp: Offers a delightful crispness and a perfectly balanced sweet-tart flavor. These apples retain their shape remarkably well, contributing a lovely bite to the cooked filling.
- Braeburn: Known for its firm, crisp texture and a wonderful balance of sweet and tart flavors, making it an excellent all-around apple for baking that holds up beautifully.
- Pink Lady (Cripps Pink): These apples are sweet, tart, and very crisp. They maintain their structural integrity during baking, providing a pleasant texture in the pie.
- Jonathan: A juicy, slightly tart apple with a fragrant aroma. It softens nicely in the oven without turning into a complete mush, adding a lovely complexity.
- Cortland: Valued for its sweet-tart flavor and a unique quality of not browning quickly once sliced. It holds its shape well, making it a reliable choice.
- McIntosh: While a softer apple, the McIntosh boasts a distinctive, aromatic flavor that is beloved by many. If using, it’s often best paired with one or two firmer apple varieties to ensure a good textural contrast.
For the most complex and appealing results, consider using a thoughtful mix of two or three different apple varieties. This blend will provide a more nuanced flavor profile and a satisfying variation in textures within your pie filling, creating a truly gourmet experience.
Expert Recipe Tips, Tricks, & Creative Variations for Your Best Apple Pie
Master the art of apple pie baking and personalize your creation with these expert tips and creative variations, ensuring every pie you make is your best one yet:
- Conquering the Soggy Bottom: This is a common and often frustrating pie predicament! To combat it effectively, consider “blind baking” your bottom crust. After arranging it in the pie pan and pricking it with a fork, pre-bake it for about 10-15 minutes at 375°F (190°C) before adding the filling. This crucial step helps to dry out and firm up the crust, creating a barrier against the wet apple filling. Alternatively, sprinkling a thin layer of fine breadcrumbs, crushed cornflakes, or even a tablespoon of quick-cooking oats on the bottom crust before adding the filling can absorb excess moisture.
- Prepare the Filling in Advance: To streamline your baking process, you can prepare the apple filling ahead of time. Lightly pre-cook the sliced apples with the sugar and spices in a saucepan over low heat until they are just tender-crisp, but not fully soft. This helps to reduce the moisture content and soften the apples slightly before baking. Allow the cooked filling to cool completely, then transfer it to an airtight container and store it in the refrigerator for up to 4-5 days. Assemble and bake the pie as directed when ready.
- Delightful Streusel Topping: For a wonderful textural contrast and a less traditional look, you can completely omit the top pie crust (you can halve the crust recipe or save one disc for another delectable use). Instead, prepare a crumbly streusel topping: in a bowl, combine ¾ cup granulated sugar, ¾ cup all-purpose flour, ⅔ cup softened unsalted butter, and 1 teaspoon ground cinnamon. Use your fingers or a pastry blender to mix these ingredients until they form a soft-crumbly texture. Sprinkle this mixture generously and evenly over the apple filling before baking.
- Adjusting Filling Thickness: If you prefer an extra-thick and robust filling, you can slightly increase the amount of cornstarch by about ½ to 1 teaspoon. Conversely, if your chosen apples are exceptionally juicy, you might find that a little extra cornstarch (an additional ½ teaspoon) is beneficial to ensure the filling sets perfectly.
- Achieving a Perfect Golden Crust: Always ensure your oven is fully preheated to the specified temperature before placing the pie inside; an adequately hot oven ensures the crust starts cooking immediately. For an even richer golden color and a delightful slight crunch, make sure to brush your top crust with an egg wash (a beaten egg mixed with a splash of water or milk) and sprinkle it generously with coarse sugar, such as turbinado or demerara sugar, just before sliding it into the oven.
Serving Suggestions for Your Magnificent Homemade Apple Pie
Apple pie is an incredibly versatile dessert that pairs beautifully with a wide array of meals and other sweet treats, making it the perfect grand finale to almost any gathering, casual or formal. For me, it’s the quintessential sweet ending after a hearty, traditional American dinner. Imagine the delight of serving this warm, spiced pie after a tender and juicy Instant Pot pot roast, a savory, comforting meal that effortlessly comes together. Or perhaps it could follow a succulent whole roast chicken with vibrant fall vegetables, a beloved family classic featuring buttery-rich chicken and perfectly seasoned veggies that create a truly satisfying experience.
For a slightly lighter, yet equally delicious, autumn evening meal, consider these maple mustard salmon fillets. They are super easy to prepare, offering a wonderful savory counterpoint that complements the warmth and sweetness of apple pie beautifully. Serve this delightful fish dish with a crisp green salad and fluffy baked potatoes, and, of course, conclude your meal with a generous, comforting slice of your homemade apple pie!
If you’re planning a grand holiday feast or a special dessert spread, let your homemade apple pie take center stage alongside other festive favorites. Prop it right next to a rich and easy pecan pie, with its buttery, nutty goodness, and a creamy, tangy southern buttermilk pie. Be warned: preparing such an array of deliciousness means you’ll have all your guests eagerly asking for your secret recipes!
How to Store and Reheat Leftovers Apple Pie
- To maintain its freshness and robust flavor, any leftover apple pie should be stored properly. Allow the pie to cool completely to room temperature before covering it loosely with aluminum foil or plastic wrap. Alternatively, place slices or the entire pie in an airtight container. Refrigerate for 3 to 5 days for optimal freshness and safety.
- When you’re ready to enjoy a leftover slice, there are several reheating options. For individual portions, a quick warm-up in the microwave works well, though it may soften the crust. For a crispier crust that mimics freshly baked, place slices of pie on a baking sheet in a preheated 350°F (175°C) oven for about 10-15 minutes, or until warmed through. If the crust begins to brown too much, loosely cover it with foil.
Can I Freeze Apple Pie for Future Enjoyment? Absolutely!
- Yes, apple pie freezes wonderfully, making it an excellent make-ahead option for busy times, unexpected guests, or special occasions. You have two primary options for freezing:
- Unbaked Pie: Assemble the entire pie – both bottom and top crusts with the filling – but do not bake it. Wrap the unbaked pie tightly in several layers of plastic wrap, followed by a layer of heavy-duty aluminum foil, to prevent freezer burn. Label it with the date. It can be stored in the freezer for up to 2 months. When you’re ready to bake, there’s no need to thaw the pie! Baking it directly from frozen often results in a flakier, less soggy crust due to the rapid heat transfer. Simply preheat your oven to 400°F (200°C) and bake as directed, adding an additional 30 to 50 minutes to the baking time. Keep a close eye on the crust and loosely cover with foil if it starts to brown too quickly.
- Baked Pie: A completely baked apple pie can also be frozen for up to 3 months. Ensure the pie is entirely cooled to room temperature after baking. You can freeze individual slices or the whole pie. Wrap it tightly in plastic wrap and then aluminum foil. To enjoy, thaw the pie in the refrigerator overnight. Reheat slices in the oven as described above for a crispy crust.
More Apple Desserts to Delight Your Taste Buds
If you’ve fallen in love with the sweet and versatile apple after mastering this pie, here are more delightful apple-centric dessert recipes to explore and enjoy throughout the year:
- Blueberry Apple Baked Oatmeal: A wholesome and incredibly delicious breakfast or brunch option, perfect for a cozy morning.
- Baked Apple Cider Doughnuts: Capture the essence of fall in every soft, moist, and wonderfully spiced bite, without the fuss of frying.
- Homemade Candy Apples: A fun, festive, and brightly colored treat that’s perfect for holidays, carnivals, or any celebratory gathering.
- Slow Cooker Apple Cider Punch: A warm, inviting, and aromatic beverage that’s ideal for cozy evenings or entertaining guests during the cooler months.
More Cozy Dessert Recipes for Comfort and Joy
Beyond the lusciousness of apples, sometimes you just need a comforting dessert to perfectly complete a meal, warm your soul, or satisfy a sweet craving. Explore these other beloved cozy favorites that promise warmth and delight:
- Perfect Pumpkin Pie: The quintessential holiday dessert, renowned for its rich, creamy, and spiced custardy filling, encased in a tender crust.
- Monkey Bread: A wonderfully fun and addictive pull-apart delight, featuring sticky, sweet, cinnamon-sugar coated dough pieces – incredibly satisfying to eat.
- Fudgy Homemade Brownies: The ultimate chocolate indulgence, dense, intensely rich, and decadently moist for true chocoholics.
- Hot Chocolate Sugar Cookies: A creative and delightful twist on a classic, combining the beloved flavors of hot chocolate with a soft, chewy sugar cookie.
Recipe Card: Homemade Apple Pie from Scratch
Prep Time: 45 minutes
Cook Time: 45-55 minutes
Resting Time: 30 minutes (for dough chilling)
Total Time: Approximately 2 hours (plus crucial cooling time)
Servings: 8
Ingredients
For the Apple Pie Filling:
- 2 pounds apples (about 6-8 medium, see recommendations for best varieties above)
- ½ cup granulated sugar
- 1 teaspoon pumpkin pie spice (or apple pie spice/cinnamon blend)
- 2½ teaspoons cornstarch (or arrowroot powder for gluten-free option)
For the Homemade Pie Crust (Double Crust):
- 3 cups all-purpose flour
- 8 ounces (2 sticks) unsalted butter, very cold and cut into small cubes
- 5 tablespoons ice-cold water (you may need up to 1-2 more tablespoons)
- 2 tablespoons brown sugar (optional, for a slightly sweeter crust)
- Pinch of salt
- 1 large egg, lightly beaten (for egg wash)
Instructions
- Make the Pie Crust: In a food processor, pulse flour, cold butter cubes, and salt until mixture resembles coarse breadcrumbs with pea-sized butter pieces. Add 5 tablespoons ice-cold water; pulse until dough just begins to clump. Add more water 1 tablespoon at a time if too dry. Divide dough into two discs, wrap, and chill for 30-40 minutes.
- Prepare the Apple Filling: Peel, core, and thinly slice apples. In a large bowl, mix sugar, pie spice, and cornstarch. Add apples and toss gently to coat evenly.
- Preheat Oven & Assemble Bottom Crust: Preheat oven to 400°F (200°C). Roll out one chilled dough disc into an 11-inch circle. Place in a 9-inch pie plate (lightly sprayed). Trim edges even, then prick bottom crust with a fork.
- Fill the Pie: Spoon the apple filling into the prepared bottom pie crust, mounding it in the center.
- Top the Pie: Roll out the second dough disc into an 11-inch circle. Cut into 1-inch strips for a lattice top, or place whole over the filling (cutting a few slits for vents). If latticing, weave strips over apples, then gently press and tuck ends under the bottom crust.
- Egg Wash & Sugar: Brush the top crust with beaten egg wash and sprinkle generously with brown sugar for a golden, caramelized finish.
- Bake the Pie: Place pie on a baking sheet and bake in the preheated oven for 45-55 minutes, or until crust is golden brown and filling is bubbly. If crust browns too quickly, loosely cover with foil.
- Cool Completely: Transfer baked pie to a wire rack and allow to cool for several hours before slicing. This is crucial for the filling to set properly.
- Serve: Enjoy your warm homemade apple pie, ideally with a scoop of vanilla ice cream or a dollop of whipped cream.
Nutrition Information (Estimated Per Serving)
Calories: 504kcal | Carbohydrates: 68g | Protein: 6g | Fat: 24g | Saturated Fat: 15g | Polyunsaturated Fat: 1g | Monounsaturated Fat: 6g | Trans Fat: 1g | Cholesterol: 81mg | Sodium: 214mg | Potassium: 192mg | Fiber: 4g | Sugar: 27g | Vitamin A: 800IU | Vitamin C: 5mg | Calcium: 28mg | Iron: 2mg
Nutritional information provided is an estimate and serves as a courtesy. Values may vary significantly based on specific ingredients used (brands, types of apples, etc.) and preparation methods. Please use your preferred nutritional calculator for more precise and detailed information tailored to your exact ingredients.