
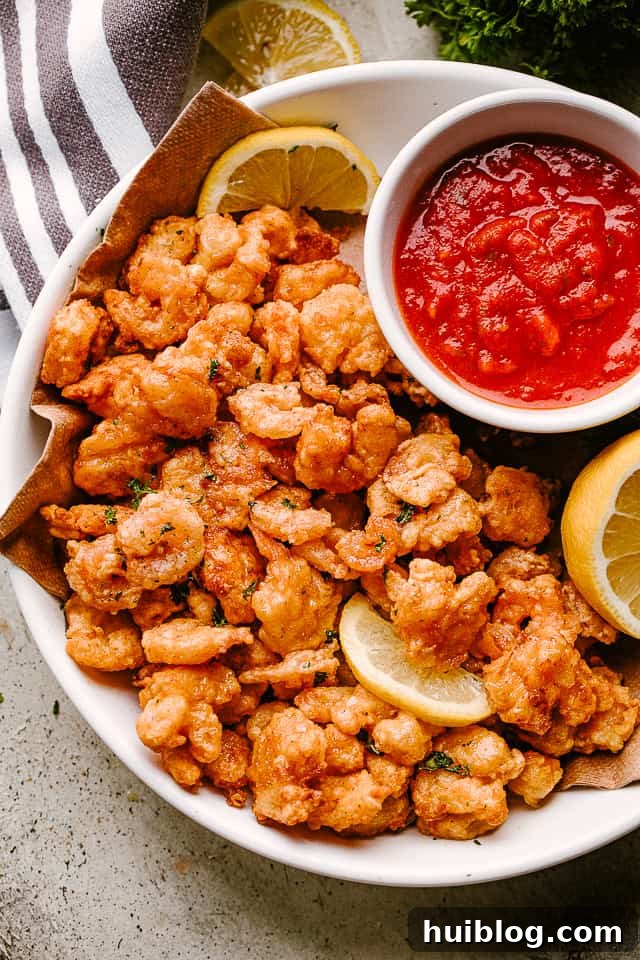
There’s nothing quite like the irresistible crunch of perfectly cooked, golden-brown Crispy Popcorn Shrimp. Forget the frozen alternatives from the grocery store – this homemade recipe elevates a classic appetizer to gourmet levels, promising a burst of fresh flavor and a satisfying texture that store-bought versions simply can’t match. Ideal for any gathering, from casual weeknight dinners to festive holiday parties, these tiny treasures are quick to prepare and guaranteed to be a crowd-pleaser. With just 30 minutes standing between you and a platter of crispy perfection, complete with your favorite dipping sauces, you’re about to discover your new go-to recipe for sensational seafood bites.
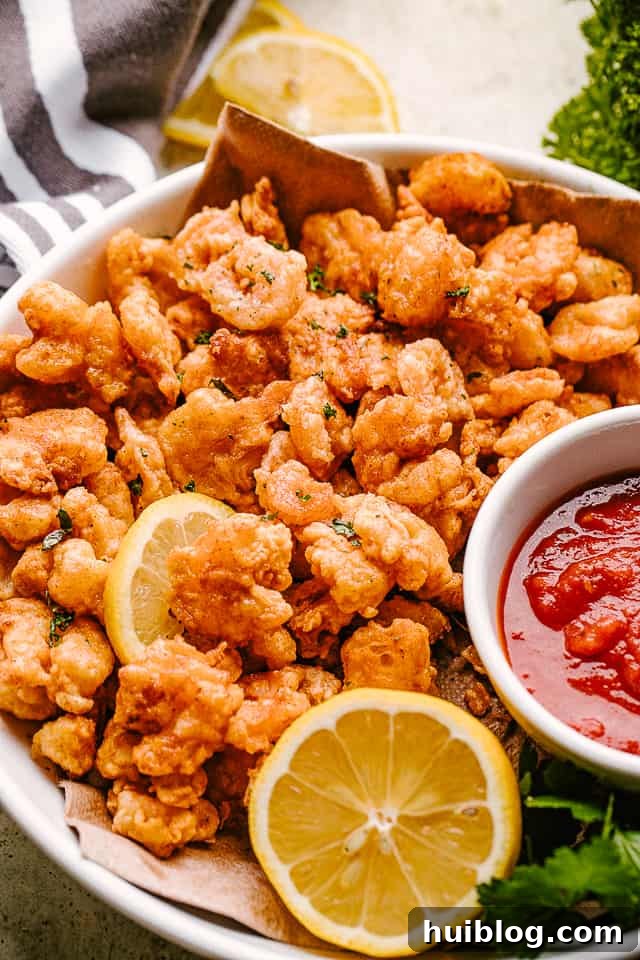
Why This Homemade Popcorn Shrimp Recipe is a Must-Try
If you’re searching for an appetizer that consistently delivers on taste, ease, and wow-factor, look no further than this exceptional popcorn shrimp recipe. It brings together several compelling benefits, making it a standout choice for home cooks and entertainers alike.
- Unbeatably Quick and Easy: While frozen options promise speed, nothing beats the fresh taste and simple process of making popcorn shrimp from scratch. This recipe is designed for efficiency, allowing you to whip up a batch in under 30 minutes. You’ll love knowing exactly what goes into your food, using high-quality shrimp rather than a mystery protein laden with excessive breading. It’s a truly satisfying treat that guests (and family members!) will eagerly fight over for the last piece.
- The Ultimate Party Food: When it comes to party food ideas, these tiny, tantalizing shrimp are guaranteed to be a hit. Their small size makes them perfect for dipping, encouraging interaction and enjoyment. Set up an exciting dipping station with a variety of sauces, and watch as these crispy morsels become the first to disappear from your spread. They add a touch of elegance and fun to any event, from game nights to sophisticated cocktail parties.
- Fantastic Make-Ahead Potential: One of the most beloved features of this recipe is its make-ahead capability. You can easily prepare and bread the shrimp in advance. Simply spread the breaded shrimp on a baking sheet, freeze them for about 30 minutes until firm, then transfer them to a freezer bag. Stored properly, they’ll keep in the freezer for up to 3 months, making them the perfect emergency appetizer for unexpected guests or a spontaneous craving. This clever trick ensures you’re always ready to serve something delicious and impressive.
- Customizable Flavor Profile: Unlike pre-packaged options, making your own popcorn shrimp allows for endless customization. You can easily adjust the seasoning to suit your taste, whether you prefer a spicy kick, a smoky undertone, or a mild, herby finish. This versatility means you can tailor the dish to any occasion or preference, ensuring a unique culinary experience every time.
- Superior Quality and Taste: The difference between homemade and frozen popcorn shrimp is night and day. Fresh shrimp offer a sweeter, more tender texture, and when coated in a perfectly seasoned, crispy batter, they deliver an explosion of flavor that pre-made alternatives simply cannot replicate. You’ll taste the quality in every bite, making it well worth the minimal effort.
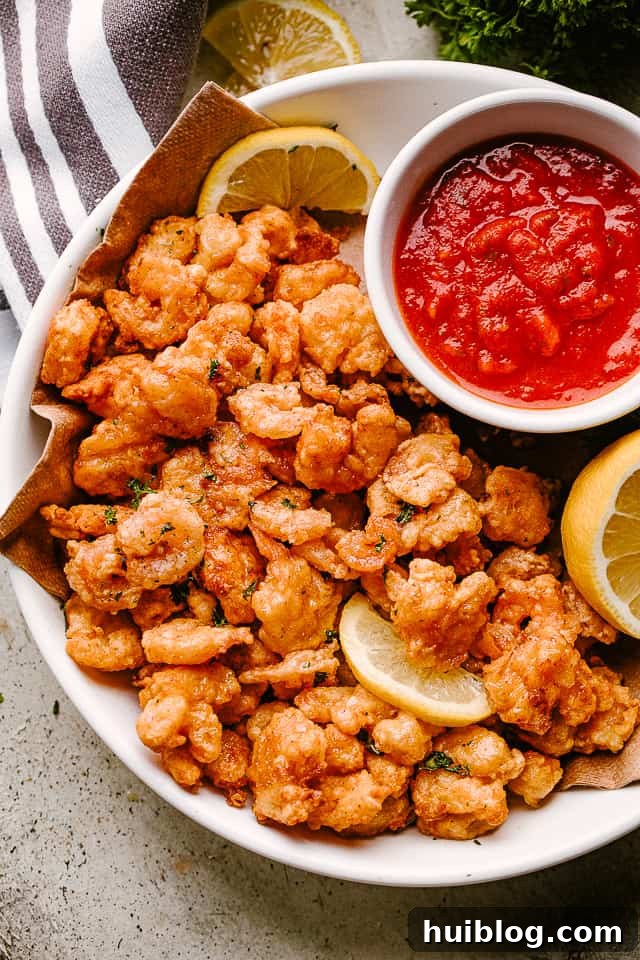
Essential Ingredients for Perfect Popcorn Shrimp
Creating mouthwatering popcorn shrimp starts with a few simple, high-quality ingredients. Here’s what you’ll need to gather:
- Shrimp: The star of the show! For authentic popcorn shrimp, opt for small or medium-sized shrimp. Look for fresh, raw, peeled, and deveined shrimp whenever possible. If using frozen shrimp, ensure they are fully thawed and patted completely dry before breading to avoid a soggy result. Fresh shrimp offer the best flavor and texture.
- Vegetable Oil for Frying: A good frying oil is crucial for achieving that irresistible crispness without imparting unwanted flavors. Choose an oil with a high smoke point, such as vegetable oil, canola oil, peanut oil, or sunflower oil. Avoid olive oil, as its lower smoke point makes it unsuitable for deep frying.
- All-Purpose Flour: The base for our crispy coating. Standard all-purpose flour works perfectly. For an extra crisp texture, you can experiment with adding a tablespoon of cornstarch to the flour mixture.
- Egg: Acts as the binding agent, helping the flour mixture adhere to the shrimp. One large egg is usually sufficient.
- Milk: When combined with the egg, milk creates a wet batter that facilitates the adhesion of the dry coating. Any type of milk (dairy or non-dairy) will work.
- Seasoning: This is where the flavor magic happens!
- Cajun Seasoning: Provides a robust, zesty, and slightly spicy kick. It’s a cornerstone of classic popcorn shrimp flavor.
- Salt and Pepper: Essential for enhancing all the other flavors and ensuring the shrimp aren’t bland. Adjust to your personal preference.
- Optional Enhancements: Consider adding garlic powder, onion powder, paprika for color and warmth, or a pinch of cayenne pepper if you desire more heat. Old Bay seasoning is an excellent alternative to Cajun seasoning, offering a distinctively savory and herby profile.
Step-by-Step Guide: Crafting Your Crispy Popcorn Shrimp
Making homemade popcorn shrimp is surprisingly straightforward. Follow these steps for perfectly golden and crispy results every time:
- 1. Prepare Your Frying Station: Begin by pouring 3-4 inches of a high smoke point oil (like vegetable or canola oil) into a deep, heavy-bottomed pot or Dutch oven. Heat the oil to 350°F (175°C). For accuracy, an instant-read thermometer or candy thermometer is highly recommended to maintain the ideal temperature. While the oil heats, prepare your dredging station. In one shallow bowl, combine the all-purpose flour with your Cajun seasoning, salt, and pepper. In a separate shallow bowl, whisk together the egg and milk until well combined.
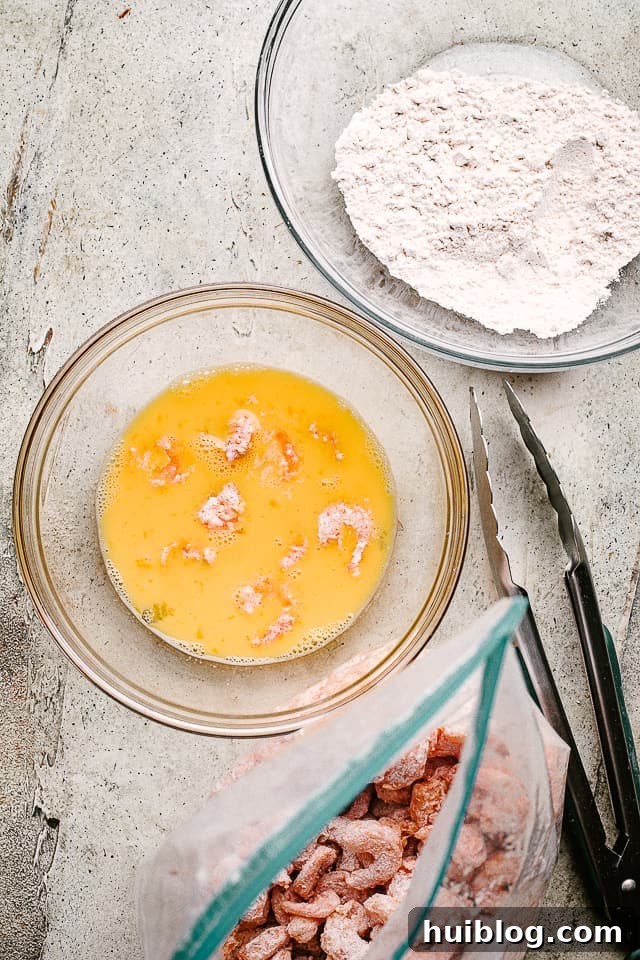
- 2. Breading the Shrimp: For optimal crispiness and even coating, we’ll use a simple double-dredging technique.
- Take half of your seasoned flour mixture and place it in a large resealable plastic bag. Add a batch of shrimp (about half the total amount) to the bag and shake vigorously until each shrimp is thoroughly coated.
- Remove the flour-coated shrimp from the bag and gently dip them into the egg and milk mixture, ensuring they are fully submerged. Allow any excess liquid to drip off.
- Finally, dredge the wet shrimp in the remaining seasoned flour mixture that you have in the bowl. Press gently to ensure a thick, even coating. Set the breaded shrimp aside on a clean plate or wire rack while you repeat the process with the remaining shrimp. This structured approach helps keep your hands clean and ensures consistent breading.
- 3. Frying to Golden Perfection: Once your oil reaches 350°F (175°C), it’s time to fry! Carefully place 5-6 breaded shrimp into the hot oil at a time, being careful not to overcrowd the pot. Overcrowding will drop the oil temperature and result in greasy, less crispy shrimp. Fry the shrimp for 2-3 minutes, turning occasionally, until they are beautifully golden brown and crispy on all sides, and cooked through. The shrimp will curl into a C-shape when perfectly cooked.
- 4. Drain and Repeat: Using a slotted spoon or spider, carefully remove the cooked shrimp from the oil. Transfer them to a plate lined with paper towels to drain any excess oil. This step is crucial for maintaining crispness. Repeat the frying process with the remaining breaded shrimp, monitoring the oil temperature and adjusting the heat as needed to keep it at a consistent 350°F (175°C).
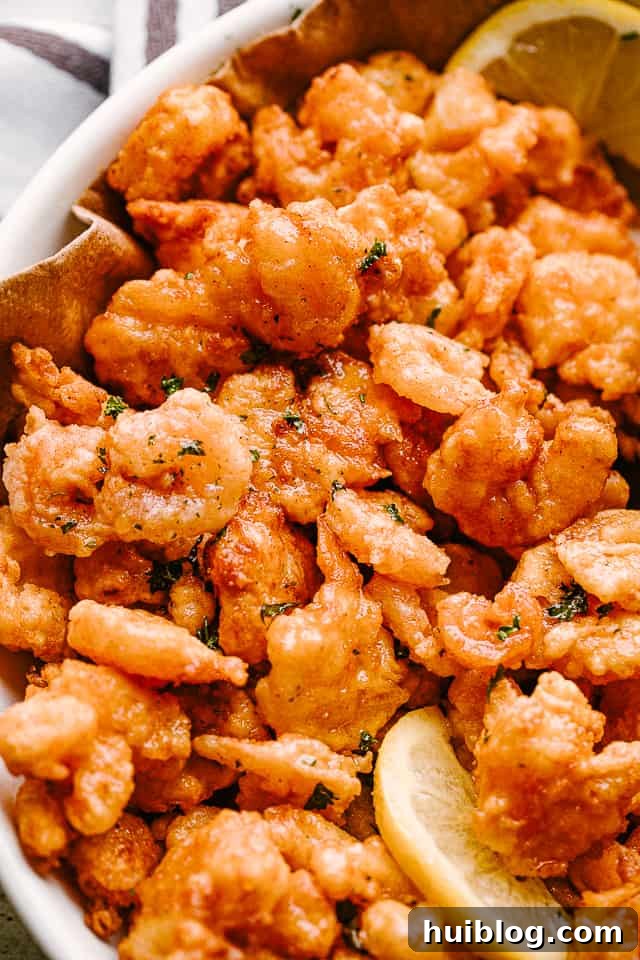
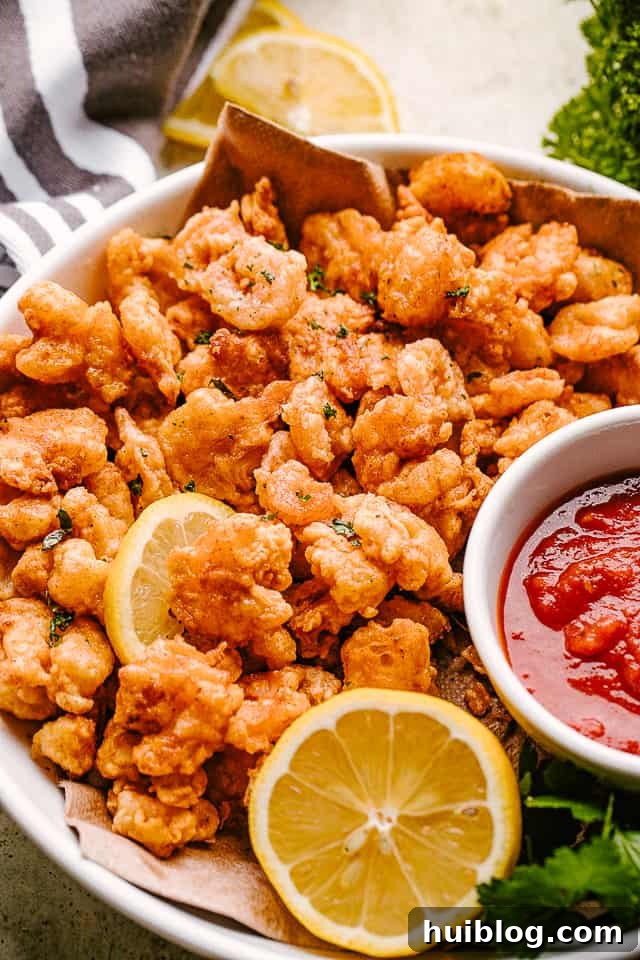
- 5. Serve and Savor: Once all the shrimp are cooked, arrange them attractively on a platter. Garnish with a sprinkle of fresh chopped parsley and a few lemon wedges for a bright, zesty touch. Serve immediately with an assortment of your favorite dipping sauces. Get ready to enjoy the ultimate crispy popcorn shrimp experience!
Expert Tips & Creative Variations for Your Popcorn Shrimp
Achieving restaurant-quality popcorn shrimp at home is easier than you think with these helpful tips and exciting variations:
- Master the Dredging Station: An organized dredging station is key to a smooth and mess-free breading process. Arrange your bowls from left to right: first, the dry seasoned flour, then the wet egg mixture, and finally, the remaining dry seasoned flour. Use one hand exclusively for the wet ingredients and the other for the dry. This prevents clumping and ensures a clean, even coating on every shrimp.
- Choose the Right Oil for Frying: Always use an oil with a high smoke point (e.g., vegetable, canola, peanut, or sunflower oil) for deep frying. Oils like olive oil have a lower smoke point and can burn, imparting a bitter taste and producing unwanted smoke. A grease guard over your pan can help prevent hot oil splatters, and wearing long sleeves offers an extra layer of protection against accidental burns.
- Maintain Consistent Oil Temperature: The golden rule of frying is a consistent oil temperature of 350°F (175°C). If the oil gets too hot, the breading will burn before the shrimp cooks through. If it’s too cool, the shrimp will absorb too much oil, resulting in a greasy, soggy product. Use an instant-read thermometer and adjust your stove’s heat as needed. Fry in small batches to prevent the oil temperature from dropping too drastically.
- Seasoning Substitutions and Enhancements:
- Cajun Alternative: No Cajun seasoning? No problem! Old Bay seasoning is an excellent substitute, offering a similar blend of savory spices.
- Spice It Up: For a spicier kick, add a pinch of cayenne pepper or a dash of hot sauce to the egg mixture.
- Herbaceous Twist: Incorporate dried herbs like thyme, oregano, or a touch of rosemary into the flour mixture for an aromatic flavor.
- Lemon-Pepper Flair: A tablespoon of lemon-pepper seasoning blended with the flour can give your shrimp a bright, zesty profile.
- Prioritize Quality Shrimp: The fresher the shrimp, the better the final taste. Whenever possible, purchase raw, peeled, and deveined shrimp from a reputable source. If using frozen, ensure they are thawed completely in the refrigerator and patted thoroughly dry with paper towels to remove excess moisture, which can lead to a less crispy coating.
- Don’t Overcrowd the Pot: Frying too many shrimp at once significantly lowers the oil temperature, leading to undercooked or greasy results. Fry in small batches to maintain optimal temperature and ensure each piece cooks evenly and crisps up beautifully.
- Consider Air Frying or Baking (for a lighter option): While deep-frying yields the crispiest results, you can adapt this recipe for healthier alternatives.
- Air Fryer Method: Lightly spray the breaded shrimp with cooking oil, then air fry at 375°F (190°C) for 8-12 minutes, shaking the basket halfway through, until golden and cooked.
- Oven Baking Method: Place breaded shrimp on a wire rack set on a baking sheet. Lightly spray with cooking oil and bake at 400°F (200°C) for 15-20 minutes, flipping halfway, until golden and crisp. Note that these methods may not achieve the same level of crispiness as deep frying.
Creative Ways to Serve Your Crispy Popcorn Shrimp
Crispy popcorn shrimp are incredibly versatile and pair well with a multitude of flavors and dishes. Here are some delightful ways to serve them:
- Dipping Sauce Extravaganza: The simplest and most popular way to enjoy popcorn shrimp is with an array of dipping sauces. Set up a “dipping bar” with various options to cater to all tastes. Some fantastic choices include:
- Our irresistible Yum Yum Sauce (you’ll literally be saying “YUM!”).
- A rich and aromatic homemade Garlic Butter Sauce.
- Sweet and tangy Honey Mustard Sauce.
- The timeless classic Cocktail Sauce, for a bold, zesty kick.
- Tartar sauce, for a creamy, briny complement.
- Sweet chili sauce, for a touch of Asian-inspired sweetness and heat.
- Ranch dressing, a familiar favorite for all ages.
- Elevate Your Salads: Popcorn shrimp make an excellent protein topping for salads, adding crunch and flavor. Imagine a vibrant Cobb salad or a zesty Buffalo-style salad featuring these crispy bites. You could also create an Asian-inspired salad with a sesame ginger dressing or a classic Caesar salad with a delightful seafood twist.
- Delicious Wraps and Tacos: Transform your popcorn shrimp into a quick and satisfying lunch or light dinner. Wrap them in warm tortillas with shredded lettuce, diced tomatoes, a drizzle of your favorite sauce, and perhaps some avocado for a shrimp taco or a flavorful wrap. They also make fantastic sliders!
- Complete Meal Pairings: For a more substantial meal, serve your popcorn shrimp alongside complementary side dishes. They pair beautifully with light and fresh options like grilled vegetables or a crisp coleslaw. For a heartier meal, try them with garlic parmesan rice, fluffy mashed potatoes, or classic French fries. The possibilities are endless!
- Garnishes for Freshness: A simple garnish can enhance both the presentation and flavor. Fresh parsley, thinly sliced scallions, or bright lemon wedges are perfect for adding a touch of color and a burst of freshness just before serving.
Storing and Reheating Your Popcorn Shrimp
While it’s highly unlikely you’ll have any leftovers of these delectable crispy shrimp, it’s always good to know how to properly store and reheat them to maintain their deliciousness, even if they won’t be quite as crispy as fresh from the fryer.
- Storing Leftovers: If you do happen to have any leftover cooked popcorn shrimp, allow them to cool completely to room temperature. Then, transfer them to an airtight container and store them in the refrigerator for 2-3 days. While they will lose some of their initial crispiness, they will still be flavorful.
- Freezing Cooked Shrimp: For longer storage, you can freeze cooled, cooked shrimp in an airtight container for 3-5 months. Please note that once frozen and reheated, they will not retain their original crispy texture. They will likely be softer, but still delicious, making them great for adding to salads or wraps.
- Freezing Uncooked, Breaded Shrimp (Make-Ahead Method): This is an excellent option for meal prepping! After breading the raw shrimp, spread them in a single layer on a baking sheet and freeze for about 30 minutes, or until they are firm enough not to stick together. Once firm, transfer them to a freezer-safe bag or airtight container. They can be stored in the freezer for up to 3 months. When ready to cook, fry them directly from frozen (they may require an extra minute or two of cooking time). This method ensures maximum crispiness upon cooking.
- Reheating Leftovers for Best Results: To bring back some of their crispness, avoid the microwave, which will make them soggy. Instead:
- Oven Method: Preheat your oven to 375°F (190°C). Arrange the popcorn shrimp in a single layer on a baking sheet. Heat for 8-12 minutes, or until warmed through and lightly re-crisped.
- Air Fryer Method: This is arguably the best method for reheating! Preheat your air fryer to 350°F (175°C). Place the shrimp in a single layer in the air fryer basket (do not overcrowd) and cook for 4-6 minutes, shaking the basket halfway, until hot and crispy again.
Explore More Delicious Shrimp Recipes
If you’ve fallen in love with the versatility and flavor of shrimp, you’re in for a treat! We have a wide array of easy-to-make shrimp recipes that are perfect for any occasion. From savory main courses to light and refreshing salads, these dishes highlight the deliciousness of this popular seafood:
- Shrimp Enchiladas: A delightful fusion dish that brings together tender shrimp with rich, savory enchilada flavors.
- Grilled Bacon Wrapped Shrimp: Indulge in the perfect combination of smoky bacon and succulent grilled shrimp – an ideal appetizer or light meal.
- Shrimp Tempura: Master the art of crispy, lightly battered shrimp, a Japanese classic that’s surprisingly simple to make at home.
- Coconut Shrimp Cakes: A tropical twist on crab cakes, these savory patties are packed with flavorful coconut and shrimp.
- Creamy Shrimp Pasta Salad: A refreshing and satisfying salad, perfect for potlucks, picnics, or a light summer lunch.
Crispy Popcorn Shrimp Recipe
Rating: 5 out of 5 stars (Based on 5 votes)
Crispy Popcorn Shrimp are one of my favorite party food ideas! Perfectly cooked and golden brown, they’re heads and shoulders above any frozen alternative you can buy. Set up with your favorite dipping sauces and enjoy!
Prep Time: 10 minutes
Cook Time: 20 minutes
Total Time: 30 minutes
Servings: 4 servings
Ingredients
Main Ingredients
- 1 pound small or medium shrimp, deveined and peeled
- Vegetable oil for frying (ensure it has a high smoke point, like canola or peanut oil; do not use olive oil)
For the Seasoned Flour
- 1 cup all-purpose flour
- 1 tbsp Cajun seasoning (or Old Bay seasoning)
- Salt and pepper, to taste
For the Egg Mixture
- 1 large egg
- ¼ cup milk
Instructions
- Pour 3-4 inches of vegetable oil into a deep saucepan or pot. Heat the oil to a consistent 350˚F (175˚C). Use an instant-read thermometer for best temperature control.
- In a shallow mixing bowl, combine the all-purpose flour, Cajun seasoning, salt, and pepper. Mix thoroughly.
- In a separate shallow bowl, whisk together the egg and milk until well combined. Set aside.
- Take about half of the prepared seasoned flour mixture and pour it into a large resealable plastic bag.
- Add a batch of shrimp (about half) to the bag and shake vigorously until the shrimp are completely coated with the flour mixture.
- Remove the flour-coated shrimp from the bag and dredge them thoroughly in the egg mixture, allowing any excess to drip off.
- Immediately coat the wet shrimp with the remaining fresh seasoned flour mixture from the bowl, pressing gently to ensure an even, thick coating. Repeat with the remaining shrimp.
- Carefully fry shrimp, about 5 to 6 at a time, in the preheated oil for 2 to 3 minutes, or until they are golden brown, crispy, and cooked through. Do not overcrowd the pot.
- Using a slotted spoon, remove the cooked shrimp from the oil and place them on a plate lined with paper towels to drain excess oil.
- Continue the frying process with the rest of the breaded shrimp, monitoring and adjusting the oil temperature as needed.
- Garnish the finished popcorn shrimp with fresh parsley and serve immediately with your favorite dipping sauces. Enjoy!
Nutrition
Calories: 289 kcal | Carbohydrates: 26g | Protein: 27g | Fat: 8g | Saturated Fat: 5g | Cholesterol: 288mg | Sodium: 890mg | Potassium: 184mg | Fiber: 1g | Sugar: 1g | Vitamin A: 887IU | Vitamin C: 5mg | Calcium: 190mg | Iron: 4mg
Nutritional info is an estimate and provided as courtesy. Values may vary according to the ingredients and tools used. Please use your preferred nutritional calculator for more detailed info.