
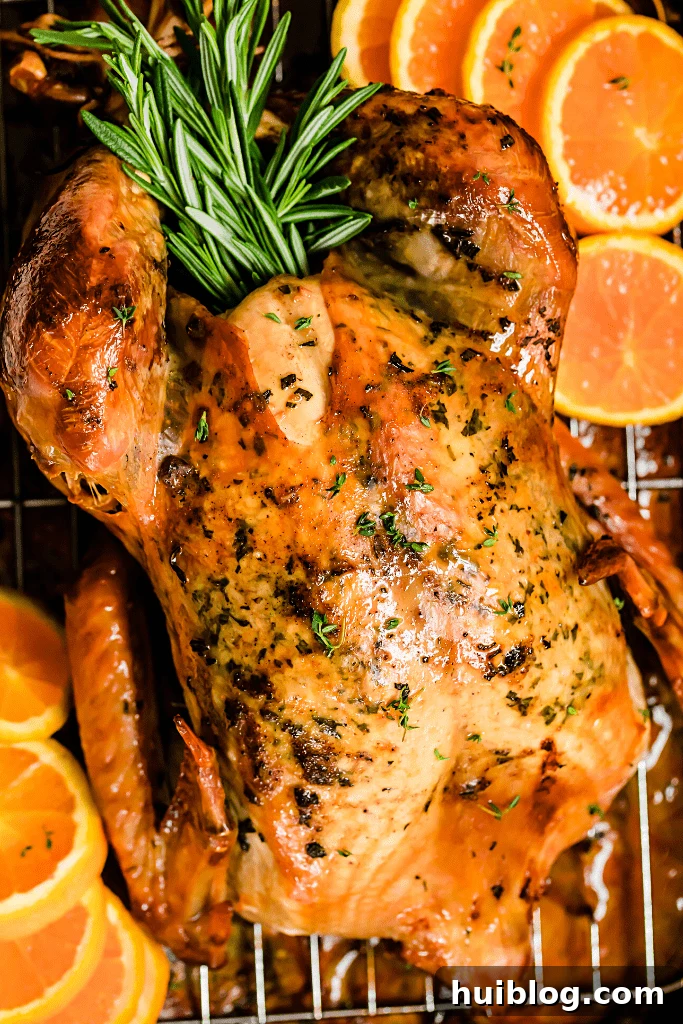
Thanksgiving, a time for gratitude, family, and most importantly, a magnificent feast. At the heart of this cherished tradition lies the iconic Whole Roast Turkey. This guide will walk you through crafting a truly spectacular turkey that is not only incredibly flavorful but also surprisingly easy to prepare. Infused with the bright zest of fresh lemon, aromatic rosemary, rich butter, and pungent garlic, this recipe promises a juicy, tender bird that will become the star of your holiday table and earn rave reviews from everyone gathered.
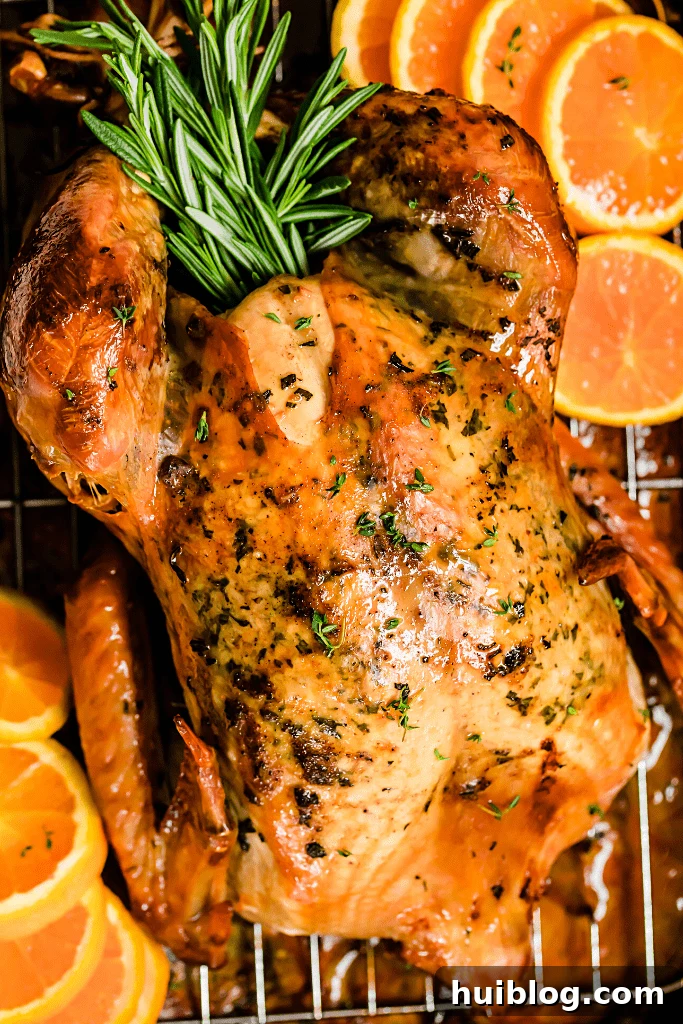
Crafting the Perfect Thanksgiving Turkey: A Timeless Approach
While the culinary world abounds with innovative and often complex roast turkey recipes, my enduring preference leans towards a beautifully traditional, yet effortlessly elegant, rendition. This method strips away unnecessary fuss, allowing the inherent flavors of the turkey to shine through, perfectly complemented by a thoughtful selection of fresh ingredients.
In this recipe, the turkey itself is undeniably the centerpiece. Its natural richness is elevated by the creamy notes of high-quality butter, the vibrant, zesty punch of fresh lemon, and the earthy, fragrant embrace of rosemary. This harmonious flavor profile creates not just a meal, but an experience. As it roasts, your home will be filled with an intoxicating aroma, setting the perfect festive mood and promising a delightful culinary journey for your friends and family.
Beyond its incredible taste, this recipe is designed for accessibility. It minimizes stress and maximizes flavor, making it an ideal choice for both seasoned holiday hosts and those embarking on their first Thanksgiving turkey adventure. The simple yet impactful steps ensure a moist interior and a beautifully golden, crispy skin every single time, transforming a potentially daunting task into a rewarding and enjoyable part of your holiday preparations.
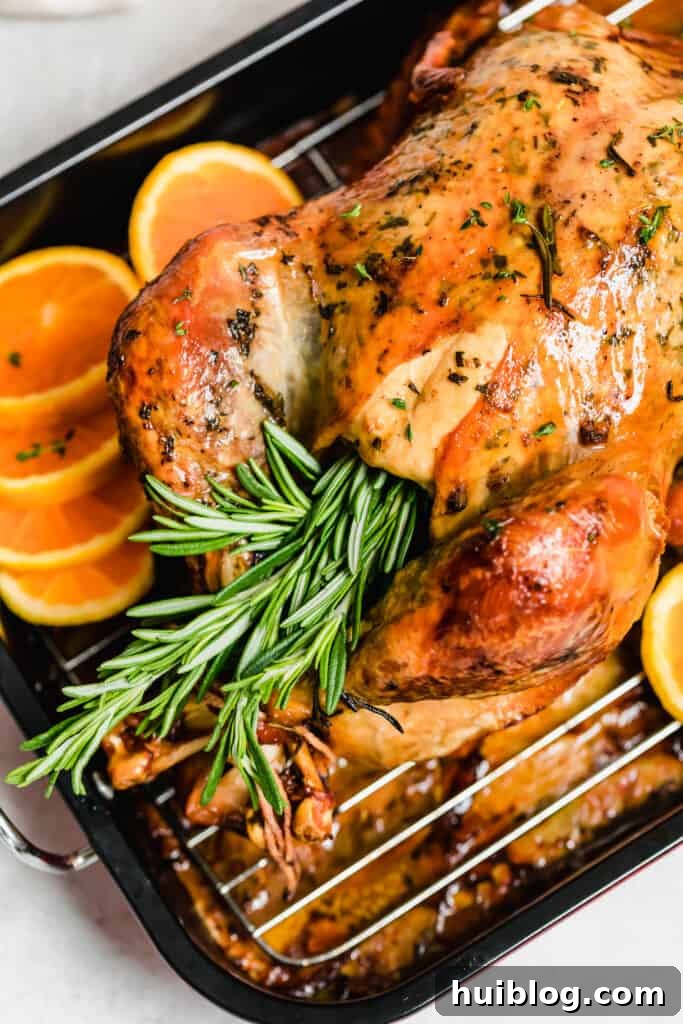
Selecting the Perfect Turkey for Your Holiday Feast
The foundation of an exceptional roast turkey begins long before it enters the oven: it starts with choosing the right bird. Navigating the poultry aisle can sometimes feel overwhelming with various options. These essential tips will help you make an informed decision and confidently select the ideal turkey for your special occasion.
- Determine the Right Size: A common guideline for serving portions is to budget approximately one pound of turkey per person. This generous estimate accounts for both a satisfying meal and delicious leftovers. If you anticipate particularly hearty appetites or simply desire more turkey for post-holiday sandwiches and soups, consider adding an extra pound or two to your calculation. For instance, a gathering of 10 people would typically require a 10-12 pound turkey, while 15 guests might call for a 15-18 pound bird. Always err on the side of caution; a little extra turkey is far better than not enough!
- Frozen or Fresh: Considerations of Cost and Convenience: The choice between a frozen and a fresh turkey often boils down to two key factors: cost and time.
- Frozen Turkeys: These are generally more budget-friendly and widely available. However, they demand a significant thawing period. Plan for roughly 24 hours of thawing time in the refrigerator for every five pounds of turkey. A 15-pound turkey, for example, would need three full days to thaw completely. While requiring more foresight, the cost savings can be substantial, making it a popular choice for many.
- Fresh Turkeys: Offering unparalleled convenience, fresh turkeys eliminate the need for thawing. They can be purchased closer to your cooking date, saving valuable refrigerator space and reducing prep time. However, this convenience often comes at a higher price point. If your schedule is tight and ease of preparation is a priority, a fresh turkey might be your best option. Whichever you choose, ensure you acquire your turkey well in advance to avoid last-minute stress.
- Understanding Special Labels and Classifications: As you browse, you’ll encounter various labels such as “Kosher,” “Organic,” “Free-Range,” “All-Natural,” and more. Each label signifies specific raising practices and processing methods, which can impact the turkey’s flavor, texture, and price. For example, a Kosher turkey is brined as part of its processing, often resulting in a naturally juicier bird. Organic and free-range birds are raised under specific environmental and dietary conditions, which some believe contributes to a superior taste. Familiarizing yourself with these classifications will empower you to choose a turkey that aligns with your preferences and values.
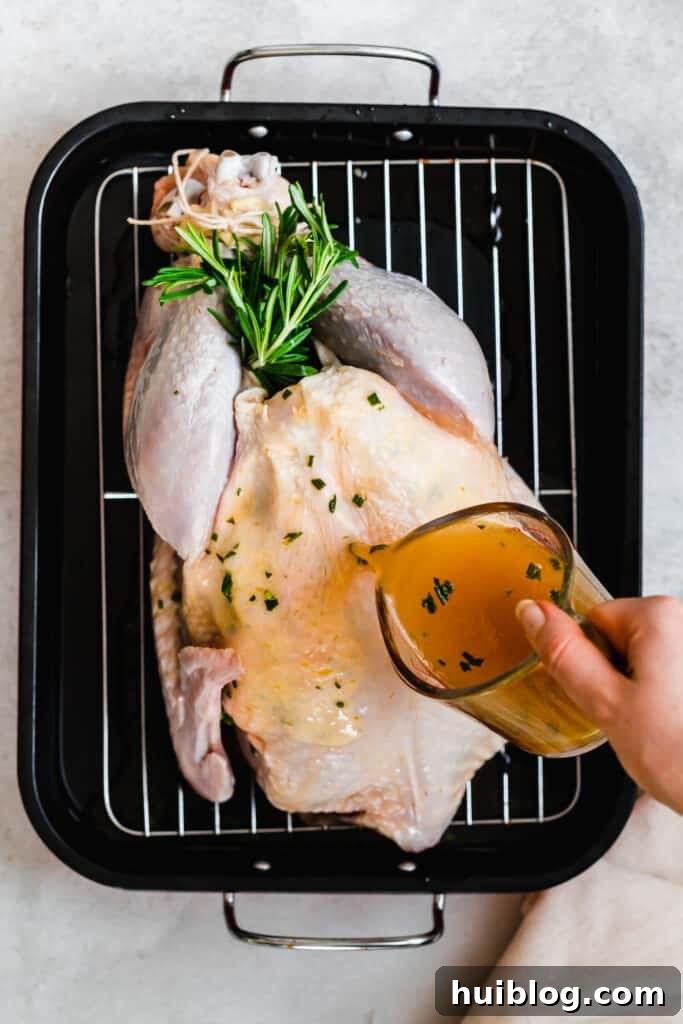
Essential Steps for Prepping Your Turkey for Roasting
Proper preparation is paramount to achieving a tender, moist, and perfectly roasted turkey. Don’t skip these crucial steps, as they lay the groundwork for a truly memorable meal.
- Thawing Your Frozen Turkey Safely: If you’ve opted for a frozen turkey, adequate thawing time is non-negotiable for both food safety and even cooking. The safest method is to thaw it in its original packaging within the refrigerator, allowing approximately 24 hours for every five pounds of turkey. So, a 10-pound bird will require about 48 hours, while a 20-pound turkey needs around four days. Place it on a tray or in a pan to catch any drips and prevent cross-contamination. Begin this process several days before you plan to roast to ensure it’s fully thawed. Never thaw a turkey at room temperature, as this can encourage bacterial growth.
- To Wash or Not to Wash? The Debate Settled: While many home cooks have traditionally rinsed their raw turkey under the faucet, food safety experts now strongly advise against it. Washing raw poultry can inadvertently spread bacteria, such as salmonella, across your kitchen counters, sink, and other surfaces through splashing water. It’s not necessary for hygiene, as the high temperatures during roasting will kill any surface bacteria. Instead, simply remove the giblets and neck from the cavity, then thoroughly pat the turkey dry with paper towels. Discard the giblets if not using them for gravy, and promptly wash your hands with soap and water after handling the raw bird.
- Brining for Ultimate Juiciness and Flavor: If you have the luxury of time, brining your turkey is a game-changer. Brining involves submerging the turkey in a solution of salted water, herbs, and spices for several hours or overnight. This process not only infuses the meat with flavor but, more importantly, helps it retain moisture during roasting, resulting in an incredibly juicy and tender bird. You can choose a simple wet brine or a dry brine (rubbing salt and seasonings directly onto the turkey). For a wet brine, ensure the turkey is completely submerged in a food-grade bucket or brining bag and kept chilled in the refrigerator. A good brining tutorial can offer specific ratios and timing, but generally, a ratio of 1 cup of salt per gallon of water, with added aromatics, works well.
- Trussing for Even Cooking and Presentation: Trussing refers to tying the turkey’s legs together and tucking its wings underneath. This simple step is beneficial for a few reasons. First, it helps the turkey cook more evenly by keeping the breast and thigh areas from overcooking or drying out before the rest of the bird is done. Second, it creates a more compact shape, which is aesthetically pleasing for presentation at the dinner table. For this recipe, a basic truss is sufficient: after placing the cavity ingredients inside, use kitchen twine to tie the drumsticks together, then tuck the wing tips behind the turkey’s back. This simple technique contributes significantly to both the functionality and beauty of your roast.
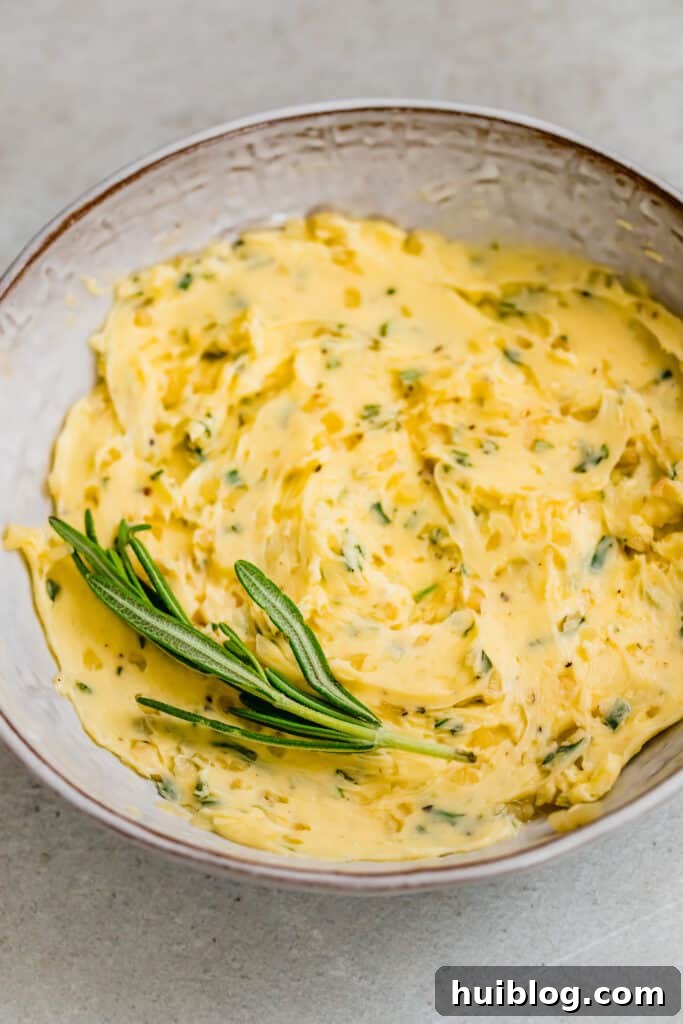
The Essential Ingredients for Your Flavorful Roast Turkey
The magic of this recipe lies in its simple yet impactful ingredients, each playing a vital role in creating a deeply flavored and succulent turkey. For a 10-12 pound bird, here’s what you’ll need:
- Whole Turkey: A 10-12 pound turkey, fully thawed if frozen. This size is ideal for feeding 8-10 people with some leftovers.
- Unsalted Butter: You’ll need one stick (½ cup) of unsalted butter, softened to room temperature. Butter is crucial for crisping the skin and infusing the meat with rich flavor and moisture.
- Fresh Rosemary: One sprig of fresh rosemary, with two tablespoons finely chopped (stems removed), and the remaining sprigs left whole for the cavity. Rosemary’s piney, earthy notes are a classic pairing with poultry.
- Fresh Garlic: Mince 3 cloves for the herb butter and leave 5 whole cloves for the cavity. Garlic adds a pungent depth of flavor that complements the turkey beautifully.
- Lemon: The zest of one whole lemon. Lemon zest provides a bright, citrusy aroma and helps tenderize the meat, cutting through the richness of the butter and turkey.
- Onion: One large onion, halved for the cavity, and two tablespoons of minced onion to enhance the chicken stock. Onions contribute a savory sweetness as they roast.
- Chicken Stock: Four cups of low-sodium chicken broth, homemade stock, or even bone broth. The stock in the pan creates a moist roasting environment and forms the base for pan drippings and gravy.
- Seasoning Salt: Two tablespoons of your favorite seasoning salt. This could be a pre-made blend or your own combination of salt, pepper, paprika, garlic powder, and onion powder, ensuring a well-seasoned exterior.
These ingredients, combined with careful preparation, promise a turkey that is not only visually stunning but also bursting with harmonious flavors.
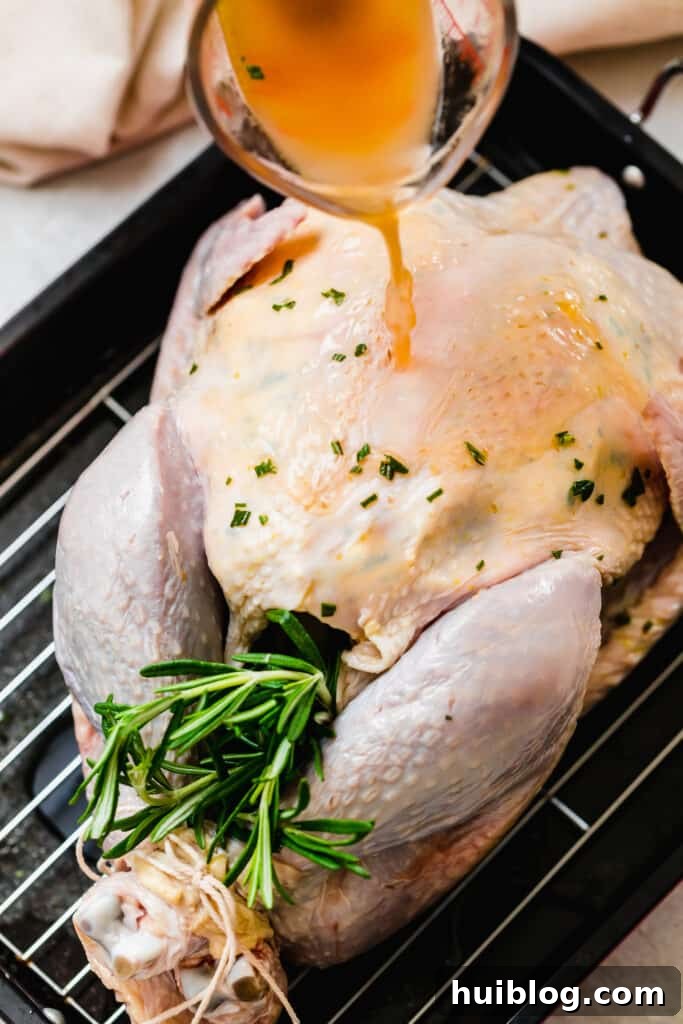
To Stuff or Not to Stuff: A Culinary Conundrum
The question of whether to stuff your turkey cavity is a long-standing debate among home cooks, and ultimately, it comes down to personal preference, tradition, and crucially, food safety. While some swear by the flavor that stuffing absorbs from the bird, others opt for a separate preparation for practical and safety reasons.
Stuffing cooked inside the turkey must reach a safe internal temperature of 165°F (74°C) to kill any bacteria that might have seeped in from the raw poultry. This often means the turkey itself can become overcooked and dry by the time the stuffing is safely done. To prevent this, many prefer to cook their stuffing in a separate baking dish. This approach allows both the turkey and the stuffing to cook to their optimal temperatures independently, ensuring a perfectly juicy bird and a wonderfully crispy, fully cooked stuffing.
Cooking stuffing on the side also offers logistical advantages. It makes carving the turkey much easier without having to scoop out hot stuffing, and it allows for a more attractive presentation of the turkey itself. Furthermore, if you have guests with dietary restrictions or preferences, preparing the stuffing separately gives you greater flexibility. For these reasons, I personally prefer to prepare my stuffing on the side, allowing me to achieve both the ideal texture and temperature for both components of the meal.
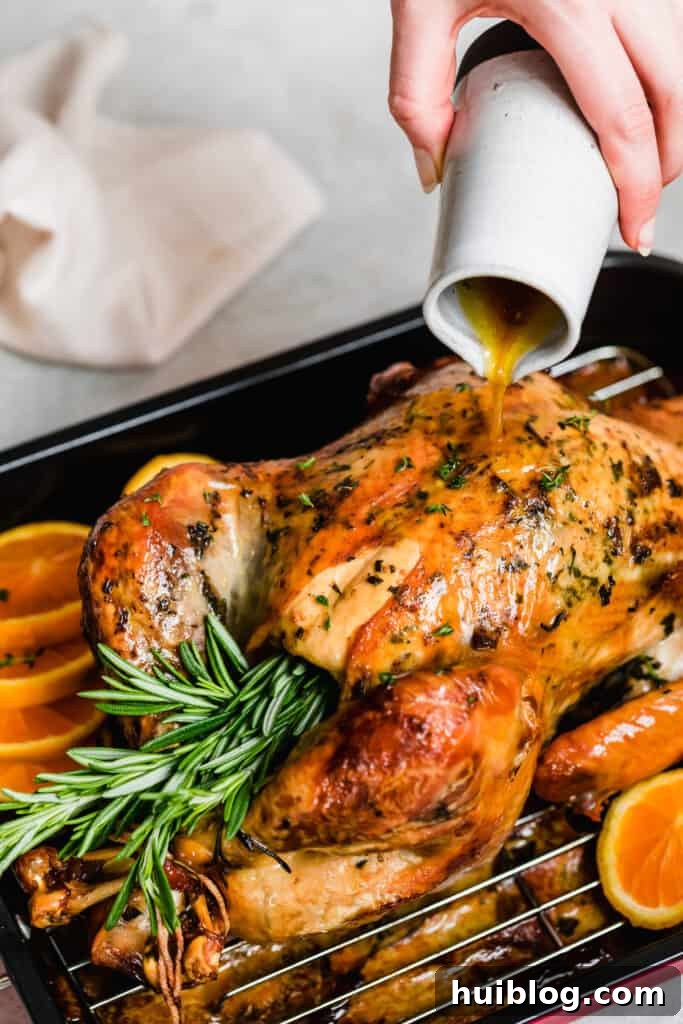
Mastering the Art of Roasting a Juicy Thanksgiving Turkey
Achieving that coveted golden-brown skin and succulent, tender meat is simpler than you might think. Follow these step-by-step instructions for a flawless roast turkey every time.
- Prepare the Turkey: Begin by preheating your oven to 350°F (175°C). Carefully remove the turkey from its packaging. Reach into both cavities (neck and main body) to remove the giblets and neck; save these for gravy if desired, otherwise discard. Thoroughly pat the entire turkey dry, inside and out, with paper towels. A dry surface is crucial for crispy skin. Place the turkey on a roasting rack set inside a sturdy roasting pan. If you don’t have a rack, you can create one with thick-cut vegetables as described in our tips section.
- Infuse with Herbed Butter: In a small bowl, combine the softened butter with the finely chopped fresh rosemary, minced garlic, and lemon zest. Mix thoroughly until well combined. This aromatic butter mixture will be key to both flavor and moisture. Gently separate the skin over the turkey breast from the meat, creating small pockets. Be careful not to tear the skin. Carefully spread about half of the herbed butter mixture into these pockets, pushing it as far down towards the thighs as possible. Rub the remaining butter mixture all over the exterior of the turkey, paying special attention to the breast and legs. This ensures a beautifully seasoned, golden-brown skin.
- Fill the Cavity and Truss: Place the halved onion, the 5 whole garlic cloves, and the remaining whole rosemary sprigs into the turkey’s main cavity. These aromatics will gently perfume the turkey from the inside as it roasts. Using kitchen twine, tie the drumsticks together to keep the legs in a compact position. Tuck the wing tips underneath the turkey’s body to prevent them from burning during roasting. This trussing helps maintain a uniform shape for even cooking and an attractive presentation.
- Add the Flavorful Stock and Seasoning: In a medium bowl, combine the chicken stock, the remaining chopped rosemary (if any), and the minced onion. Pour this stock mixture into the bottom of the roasting pan, around the turkey. This liquid will prevent the pan drippings from burning and create a moist environment, contributing to a juicy bird. Finally, generously sprinkle the seasoning salt all over the entire exterior of the turkey, ensuring every surface is well-coated for maximum flavor.
- Roast to Perfection: Cover the turkey loosely with aluminum foil, creating a tent. This tent helps to prevent the skin from browning too quickly and drying out the breast meat. Place the covered turkey in the preheated oven. Roast for approximately 3½ to 4 hours for a 10-12 pound turkey, or until the internal temperature reaches 170°F (77°C) in the thickest part of the thigh and 160°F (71°C) in the thickest part of the breast. (Note: roasting times will vary significantly based on turkey size; consult our roasting time chart for approximate guidance).
- Baste Regularly: Basting is essential for a moist and flavorful turkey. After about 40-50 minutes of roasting, carefully remove the turkey from the oven (close the oven door quickly to retain heat). Using a baster or large spoon, scoop the juices from the bottom of the roasting pan and pour them over the turkey. Recover the turkey with foil and return it to the oven. Repeat this basting process every 40-50 minutes throughout the roasting time.
- Achieve Golden-Brown Skin: For the final 45 minutes to an hour of roasting, remove the aluminum foil completely. This allows the skin to crisp up and develop that beautiful golden-brown color. Monitor it closely to prevent burning.
- The Crucial Resting Period: Once your meat thermometer registers the correct internal temperatures (170°F in the thigh, 160°F in the breast), remove the turkey from the oven. Transfer it to a large cutting board and loosely tent it with foil. Allow the turkey to rest for at least 30 minutes, and ideally up to an hour, before carving. This resting period is absolutely critical; it allows the juices to redistribute throughout the meat, ensuring every slice is incredibly moist and tender. Carving too soon will result in a dry turkey as all the precious juices will run out onto the board.
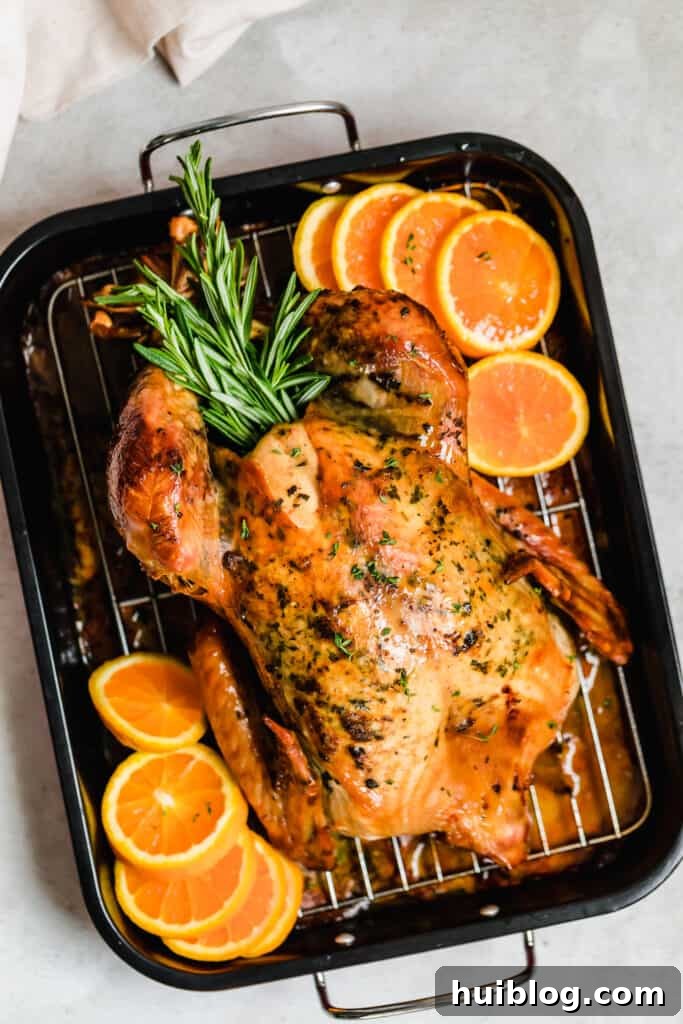
Understanding Turkey Roasting Times for a Perfectly Cooked Bird
The duration required to roast a turkey is not a one-size-fits-all answer; it primarily depends on the weight of your turkey and whether it is stuffed or unstuffed. A general rule of thumb suggests approximately 15-20 minutes of roasting time per pound for an unstuffed turkey at 325°F (160°C). However, using a reliable meat thermometer is the most accurate way to determine doneness, rather than relying solely on time.
Here are approximate roasting times for an unstuffed turkey baked at 350°F (175°C). Please remember these are guidelines, and actual times may vary based on your oven, turkey’s starting temperature, and shape.
Approximate Roasting Times for an Unstuffed Turkey (at 350°F / 175°C)
- 6-8 lbs: 2.5 to 3 hours
- 8-12 lbs: 3 to 4 hours
- 12-16 lbs: 4 to 5 hours
- 16-20 lbs: 5 to 5.5 hours
- 20-24 lbs: 5.5 to 6 hours
Approximate Roasting Times for a Stuffed Turkey (at 350°F / 175°C)
If you choose to stuff your turkey, you will need to increase the roasting time. Ensure the stuffing also reaches a safe internal temperature of 165°F (74°C).
- 6-8 lbs: 3 to 3.5 hours
- 8-12 lbs: 3.5 to 4.5 hours
- 12-16 lbs: 4.5 to 5.5 hours
- 16-20 lbs: 5.5 to 6 hours
- 20-24 lbs: 6 to 6.5 hours
How to Tell Your Turkey is Truly Done
The only reliable method to confirm your turkey is safely cooked and perfectly juicy is by using a high-quality meat thermometer. An instant-read thermometer is highly recommended for quick and accurate readings. Start checking for doneness about 30-45 minutes before the estimated roasting time is complete.
The turkey is done when the internal temperature registers 160°F (71°C) in the thickest part of the breast and 170°F (77°C) in the thickest part of the thigh. When inserting the thermometer into the thigh, be sure to avoid touching the bone, as this can give a misleadingly high reading. Remember, the temperature will continue to rise slightly (carry-over cooking) by 5-10 degrees while the turkey rests, contributing to its juiciness.
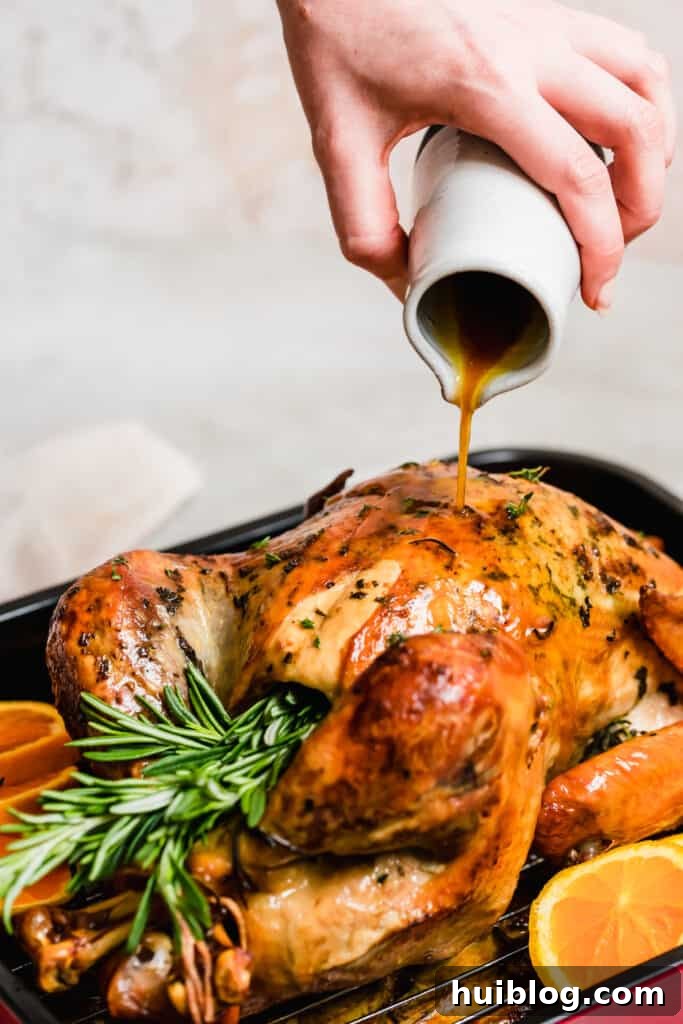
Expert Tips for Your Most Delicious Thanksgiving Turkey Yet
Beyond the recipe steps, a few additional strategies can elevate your roast turkey from great to absolutely unforgettable. These insider tips will help ensure a perfectly cooked, flavorful, and beautifully presented bird.
- The Ingenious Veggie Roasting Rack: While a metal roasting rack is a common tool, you don’t necessarily need one to achieve even cooking and excellent flavor. Instead, create a natural roasting rack using sturdy root vegetables. Line the bottom of your roasting pan with thick wedges of aromatic vegetables such as roughly chopped onions, whole washed carrots, and sturdy celery sticks. This vegetable bed elevates the turkey, allowing hot air to circulate all around it, promoting even cooking and crispy skin on the bottom. As a bonus, these vegetables will slowly caramelize in the turkey drippings, infusing them with incredible flavor, which can then be used as a base for your gravy!
- The Critical Importance of Rest: This tip applies to both you and your turkey! Preparing a Thanksgiving dinner is a marathon, not a sprint, so remember to build in moments for yourself to rest. More importantly, after the turkey comes out of the oven, it is absolutely paramount to let it rest for a minimum of 30 minutes, and ideally up to an hour, before you even think about carving. During the intense heat of roasting, the muscle fibers in the turkey contract, forcing the juices towards the center of the bird. Resting allows these juices to redistribute evenly throughout the meat. If you carve immediately, all those delicious, hard-earned juices will simply run out onto your cutting board, leaving you with dry, less flavorful meat. A good rest ensures that every slice is moist, tender, and bursting with flavor, making the carving process much easier and more enjoyable.
- Don’t Skip the Butter Under the Skin: As highlighted in the recipe, applying butter mixed with herbs and lemon zest directly under the breast skin is a game-changer. This technique not only adds incredible flavor and moisture directly to the breast meat, but the fat from the butter also helps to crisp and brown the skin beautifully, creating that irresistible golden crust.
- Trust Your Thermometer, Not Just the Clock: While roasting time charts provide helpful estimates, remember that every turkey and oven is different. A reliable meat thermometer is your best friend in the kitchen. Checking the internal temperature in multiple spots (breast and thigh) is the only foolproof way to ensure your turkey is perfectly cooked and safe to eat without being overcooked and dry.
Expert Guide: How to Carve Your Roast Turkey Like a Pro
Carving a whole roast turkey can seem daunting, but with a sharp knife and a bit of practice, you can do it with confidence and create a beautiful platter for your guests. Remember to let the turkey rest for at least 30 minutes before carving to ensure maximum juiciness.
- Remove the Legs and Thighs: Begin by carefully cutting between the leg and the body of the turkey. Use the tip of your knife to locate the joint that connects the thigh to the backbone. Slice through this joint, detaching the entire leg (drumstick and thigh) from the body. Repeat on the other side. You can then separate the drumstick from the thigh by slicing through the joint connecting them. Slice the thigh meat away from the bone into serving portions. The drumsticks can be served whole, or saved for leftovers.
- Carve the Breast Meat: Place the turkey breast-side up. Make a long, clean cut along one side of the breastbone, from the neck cavity down to the bottom. Keep your knife as close to the bone as possible. Once you’ve made this initial cut, angle your knife and slice downward, following the curve of the rib cage, to remove one entire breast half in a single piece. Repeat this process for the other breast half. Once both breast halves are removed, place them skin-side up on the cutting board. Slice the breast meat against the grain into uniform slices, about ½ inch thick. Arrange these slices neatly on your serving platter.
- Detach the Wings: Locate the joint where each wing attaches to the body. Carefully cut through these joints to remove the wings. You can choose to serve the wings whole as a separate delicacy or save them for another use, such as making stock.
For a more detailed visual guide, this video tutorial can provide excellent assistance and boost your confidence in carving.
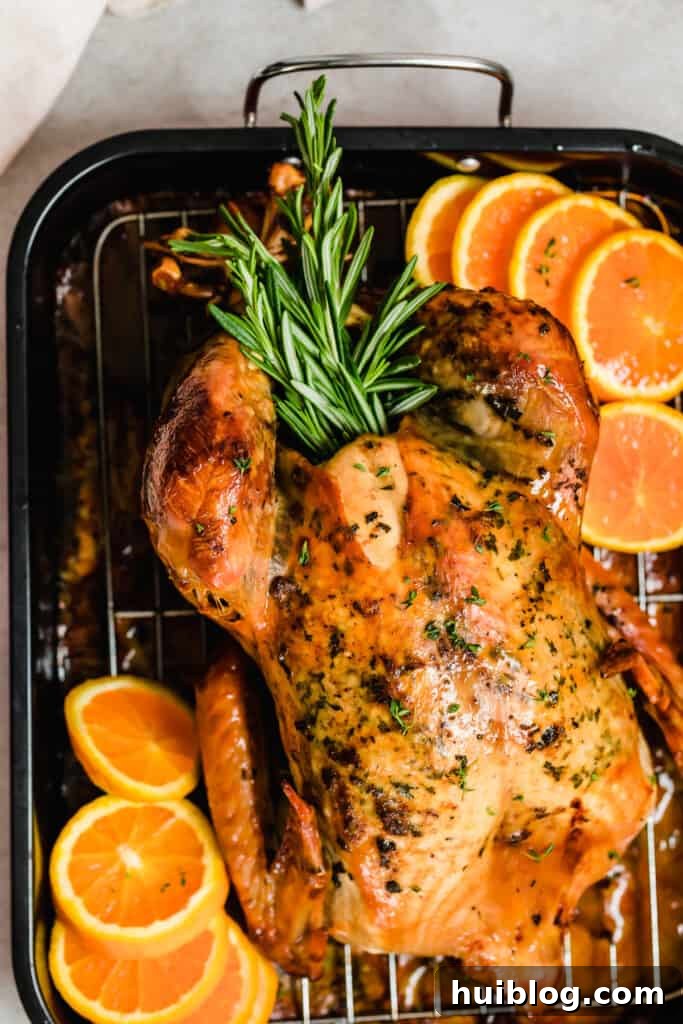
Perfect Pairings: What to Serve with Your Juicy Roast Turkey
A perfectly roasted turkey deserves equally delightful accompaniments. Here are some classic and creative side dishes that will complete your holiday feast and complement the rich flavors of your juicy turkey:
- Delectable Roasted Vegetables: No holiday meal is complete without a vibrant array of roasted vegetables. My Easy Oven Roasted Vegetables recipe is a fantastic choice, featuring a medley of seasonal produce like carrots, Brussels sprouts, bell peppers, and potatoes tossed with olive oil and herbs. Roasting brings out their natural sweetness and creates a wonderful texture contrast to the tender turkey. This dish is not only delicious but also visually appealing, adding a pop of color to your table.
- Comforting Potato Creations: Potatoes are a beloved staple at any holiday gathering, and there are countless ways to prepare them. While mashed potatoes are always a crowd-pleaser, consider elevating your spread with something a little different. These Hedgehog Roasted Potatoes, with their crispy, fanned-out edges and soft interiors, offer a unique texture and presentation that will impress your guests. Their golden crunch provides a delightful contrast to the tender turkey meat.
- A Sweet Grand Finale: Festive Desserts: After a sumptuous savory meal, a comforting and flavorful dessert is the perfect way to conclude your feast. My delicious Carrot Sheet Cake is an excellent choice. This moist, spiced cake, topped with a luscious cream cheese frosting, offers a satisfying sweetness without being overly heavy. It’s designed to feed a crowd and is an absolute delight for anyone with a sweet tooth, balancing the richness of the main course beautifully.
Maximizing Your Leftovers: Storage and Reheating Tips
One of the greatest joys of a Thanksgiving turkey is the promise of delicious leftovers. Proper storage and reheating are key to enjoying your turkey for days to come.
- Storing Leftover Turkey: To maintain freshness and prevent spoilage, it’s crucial to properly store your cooked turkey. Once cooled to room temperature (within two hours of cooking), carve any remaining meat from the bone. Store the turkey meat tightly wrapped in foil, or place it in airtight containers or heavy-duty freezer bags. Separate light meat from dark meat if preferred. This helps protect the turkey from air exposure, which can lead to dryness.
- Shelf Life: Leftover turkey will stay fresh and safe to eat in the refrigerator for up to three days. For longer storage, freeze the cooked turkey. It will maintain its quality in the freezer for up to two months. Label your containers or bags with the date to keep track.
- Reheating for Optimal Taste: To reheat leftover turkey without drying it out, place the desired amount in a covered baking dish. Add a splash of chicken stock or broth to the dish; this moisture will help keep the turkey succulent. Cover the dish tightly with foil to trap steam, and bake at 350°F (175°C) until thoroughly heated through. You can also gently reheat smaller portions in the microwave with a bit of broth, or slice it cold for sandwiches. Avoid high heat or prolonged reheating, as this will inevitably dry out the meat.
Whole Roast Turkey
A classic whole roast turkey recipe, featuring fresh lemon, rosemary, garlic, and butter, promising a juicy and flavorful holiday centerpiece.
Ingredients
- 1 10 to 12 pound whole turkey, thawed
- ½ cup unsalted butter, softened
- 1 tablespoon fresh rosemary, chopped
- 3 cloves garlic, minced
- Zest of 1 lemon
- 1 onion, halved
- 5 garlic cloves, whole
- 3 sprigs of rosemary, whole
- 4 cups chicken stock
- 1 tablespoon fresh rosemary, chopped (for stock)
- 2 tablespoons minced onion (for stock)
- 2 tablespoons seasoning salt
Instructions
- Preheat oven to 350°F (175°C).
- Pat the turkey dry with paper towels and discard the giblets. Place turkey on a rack set in a roasting pan.
- In a small bowl, combine the softened butter, 1 tablespoon chopped fresh rosemary, 3 cloves minced garlic, and lemon zest.
- Gently separate the skin over the breast to make pockets and fill with the butter mixture; rub it all around and towards the thighs.
- Place the halved onion, 5 whole garlic cloves, and 3 whole rosemary sprigs into the turkey cavity.
- Tie the legs together with kitchen twine and tuck the wings under the turkey.
- In a medium bowl, combine the chicken stock, 1 tablespoon chopped rosemary, and 2 tablespoons minced onion.
- Pour the stock mixture over the turkey and then sprinkle generously with the seasoning salt.
- Cover the turkey loosely with foil, and bake at 350°F (175°C) for 3½ to 4 hours, or until the internal temperature of the turkey reaches 170°F (77°C) at the thigh and 160°F (71°C) at the breast. (Roasting time will depend on turkey size – refer to the chart in the post above or notes below.)
- After about 40 minutes, remove the turkey from the oven (close the door to keep the heat in) and baste with the juices in the pan. Cover with foil again and return the turkey to the oven. Repeat basting every 40 minutes.
- For the last 45 minutes to 1 hour, remove the foil completely so the turkey can brown and crisp up.
- Once the turkey has reached the internal temperatures (160°F at the breast, 170°F at the thigh), remove from the oven and cover loosely with foil. Let rest for at least 30 minutes before carving. Do not cut it before resting – if you do, you will lose all the juices and end up with dry turkey meat.
Notes
Approximate Roasting Times for an Unstuffed Turkey (at 350°F / 175°C):
- 6-8lbs = 2.5 to 3 hours
- 8-12lbs = 3 to 4 hours
- 12-16lbs = 4 to 5 hours
- 16-20lbs = 5 to 5.5 hours
- 20-24lbs = 5.5 to 6 hours
For a stuffed turkey, add approximately 30-60 minutes to these times, ensuring stuffing reaches 165°F (74°C).
Nutrition
Carbohydrates: 3g |
Protein: 72g |
Fat: 28g |
Saturated Fat: 11g |
Cholesterol: 256mg |
Sodium: 1866mg |
Potassium: 828mg |
Fiber: 1g |
Sugar: 1g |
Vitamin A: 476IU |
Vitamin C: 2mg |
Calcium: 49mg |
Iron: 3mg
Nutritional info is an estimate and provided as courtesy. Values may vary according to the ingredients and tools used. Please use your preferred nutritional calculator for more detailed info.