
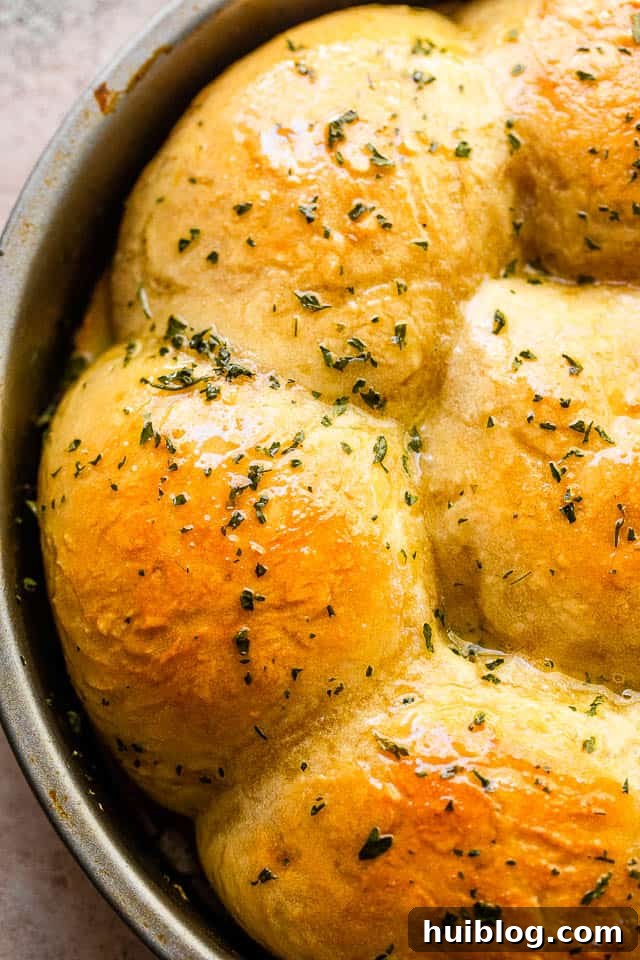
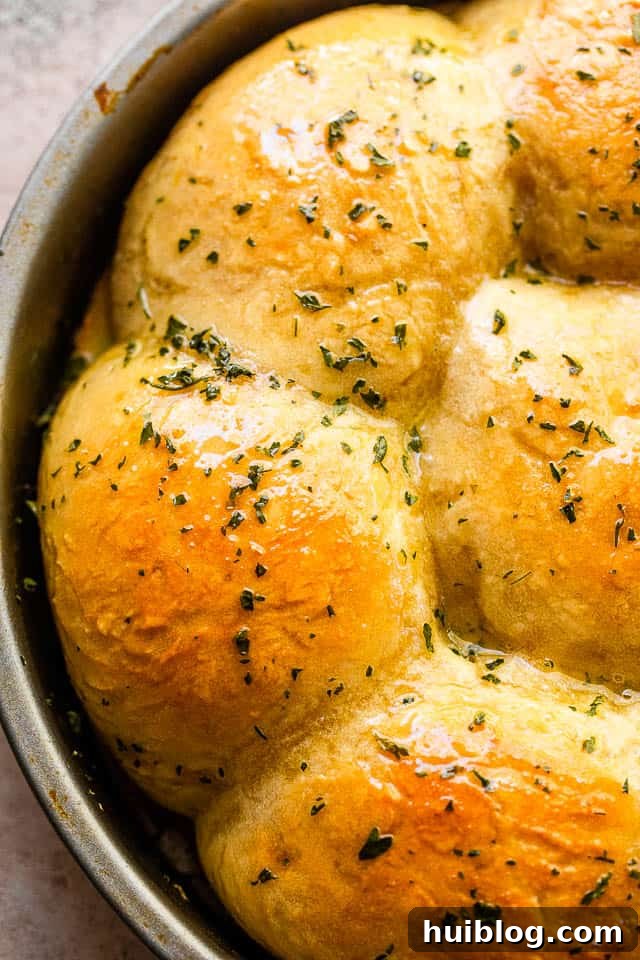
Unlock the secret to freshly baked bread at home with this incredibly simple **No-Knead Dinner Rolls** recipe. Imagine serving warm, golden-brown artisan rolls straight from your oven, impressing family and guests, all without the strenuous effort typically associated with homemade bread. This foolproof method eliminates the need for kneading, allowing you to create delightful, mouthwatering rolls quickly and effortlessly. Perfect for any meal, these rolls promise a tender crumb and a deliciously chewy crust, transforming ordinary dinners into extraordinary culinary experiences.
The Easiest Way to Homemade Dinner Rolls: No-Knead Perfection
There’s an undeniable comfort and luxury in freshly baked bread, but the thought of making it from scratch often feels daunting. Traditional yeast breads and rolls, with their requirements for precise kneading, multiple rises, punching down, shaping, and baking, can consume hours – time that most of us simply don’t have in our busy lives. The good news? You no longer have to sacrifice the joy of homemade rolls due to a packed schedule. This revolutionary no-knead technique simplifies the process dramatically, making daily fresh bread a delightful reality rather than a rare indulgence.
Unlike rich, traditional doughs that call for ingredients like butter, eggs, and sugar and demand extensive kneading to develop gluten, our no-knead method embraces simplicity. It focuses on minimal ingredients and a hands-off approach, allowing time to do the work. The beauty of no-knead dough lies in its ability to develop gluten structure through a long, slow fermentation process rather than physical manipulation. This means no more sticky hands, no vigorous kneading sessions, and no complex rising schedules. Just a simple mix, a little waiting, and then shaping and baking to perfection.
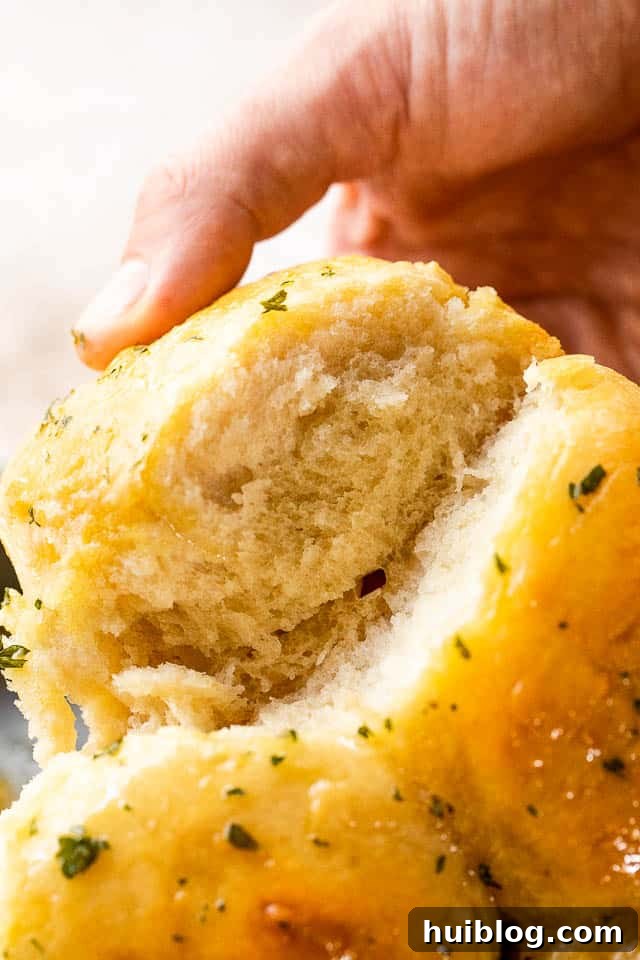
The resulting rolls boast a rustic, artisan quality. They offer a wonderfully chewy texture with an airy interior, reminiscent of fine bakery bread. This simplicity, combined with the incredibly satisfying outcome, makes no-knead dinner rolls a game-changer for anyone who loves fresh bread but has limited time or baking experience. Forget complicated steps and special equipment; this recipe is all about straightforward, accessible baking that yields truly exceptional results.
The Secret Weapon: My Foolproof No-Knead Dough
The foundation of these incredibly easy dinner rolls is my signature **No-Knead Dough** recipe. This popular and versatile dough truly lives up to its name, requiring only four basic ingredients and minimal effort. The process involves little more than combining the ingredients in a bowl, giving them a quick stir, and then allowing the mixture to chill. This extended cold fermentation allows the yeast to slowly work its magic, breaking down starches and developing complex flavors and a beautiful gluten network without you lifting a finger for kneading.
Originally popularized for creating rustic, crusty artisan bread in a Dutch oven, no-knead dough is incredibly adaptable. For this particular recipe, we harness its simplicity to craft a batch of eight savory dinner rolls. Baked together in a humble 9-inch round cake pan, these rolls emerge from the oven with a perfect shape and an inviting golden hue. The communal baking in the pan not only makes for an attractive presentation but also helps keep the rolls wonderfully soft on the inside while still achieving that desirable artisan crust. It’s a testament to how simple ingredients and a clever technique can yield bakery-quality results right in your own kitchen.
Essential Ingredients for Your No-Knead Dinner Rolls
One of the beauties of this recipe is its reliance on just a few simple, accessible ingredients. High-quality ingredients are always recommended for the best flavor, but even standard pantry staples will yield fantastic results with this foolproof method.
- No-Knead Dough: The star of the show! You’ll need approximately 1 ½ pounds of pre-prepared no-knead dough. This is typically made from just flour, water, yeast, and salt. Having a batch of this versatile dough ready in your fridge means fresh bread is always just a few steps away. Its long fermentation process contributes significantly to the unique flavor and texture of these artisan rolls.
- Egg and Water (for Egg Wash): A simple whisked mixture of one egg and a tablespoon of water creates an egg wash. This magical liquid, brushed over the rolls just before baking, is responsible for that beautiful, glossy, golden-brown crust and helps achieve an appetizing appearance. It adds a subtle richness to the exterior without altering the internal texture.
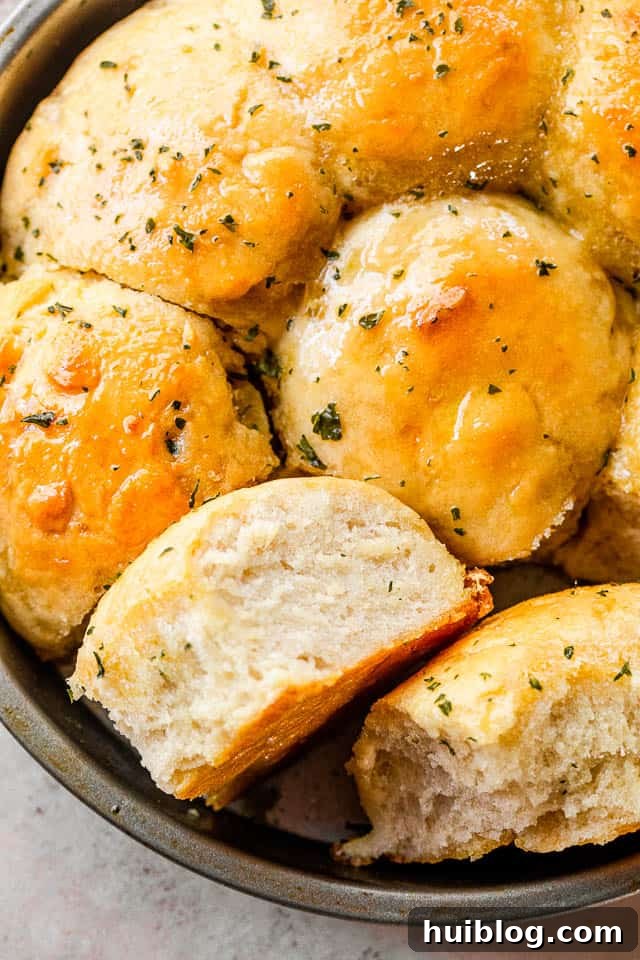
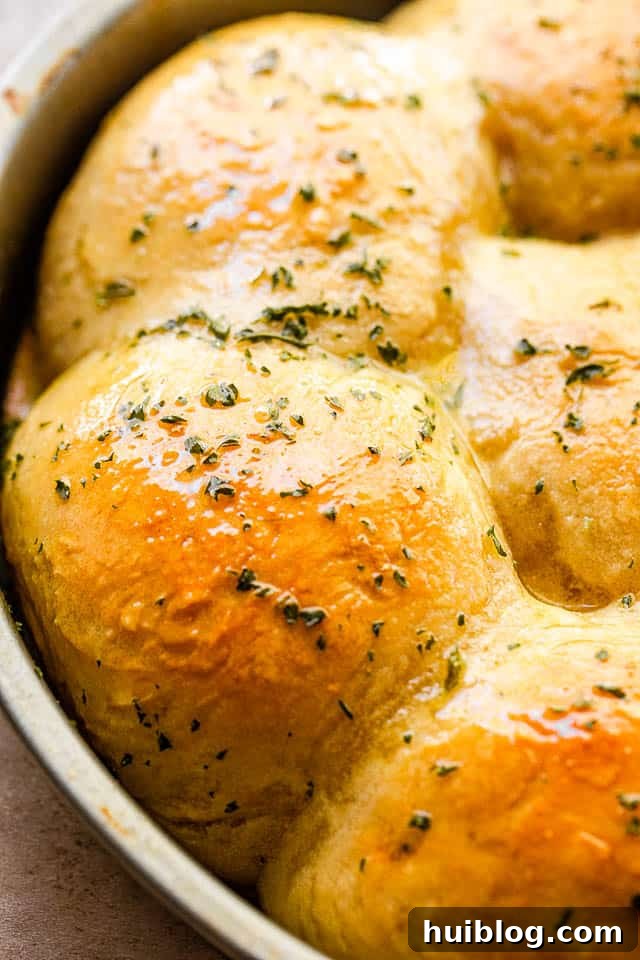
- Melted Butter: A final touch of melted butter, brushed generously over the hot rolls immediately after they come out of the oven, does wonders. It infuses the crust with a delicate tenderness, adds a wonderful richness, and enhances the overall flavor profile. This step ensures your rolls are not only visually appealing but also incredibly indulgent and flavorful.
Step-by-Step Guide: Making Your Easy No-Knead Dinner Rolls
Making these rolls is remarkably straightforward. Follow these simple steps for perfectly baked, artisan-style dinner rolls every time:
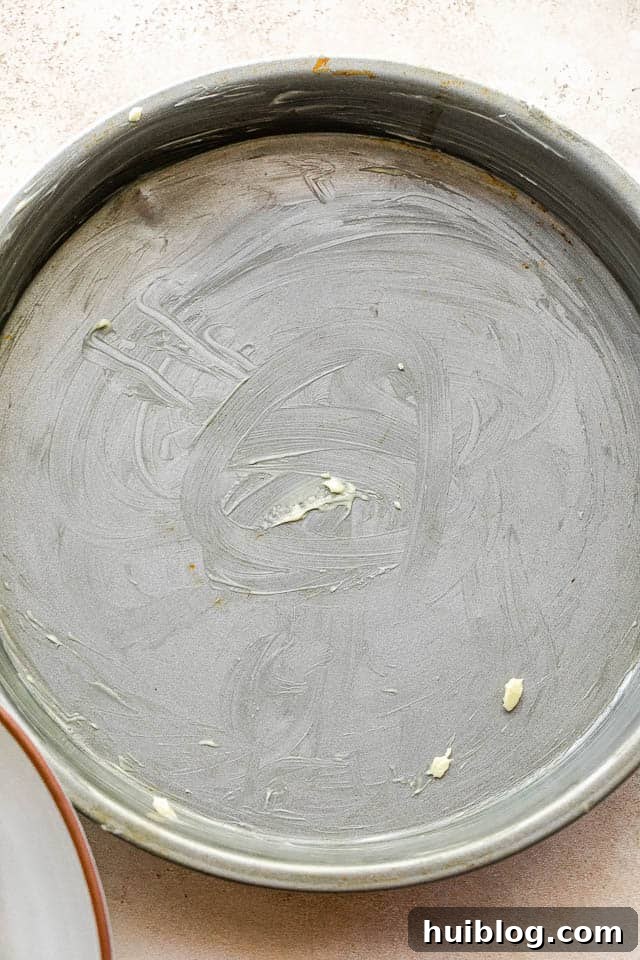
- Prepare Your Pan: Begin by buttering a 9-inch round cake pan thoroughly. This prevents sticking and helps the rolls develop a beautiful, even crust.
- Bring the Dough to Room Temperature: Take 1 ½ pounds of your prepared no-knead dough out of the refrigerator. Place it in a container, covered, on your counter and let it stand for about 30 minutes. This allows the dough to relax and become easier to handle, contributing to a better rise.
- Prepare Your Workspace and Shape the Rolls: Lightly flour your hands and your working surface. Carefully divide the dough into eight equal pieces. The goal is for each piece to be roughly the size of a golf ball. For precision, if you have a kitchen scale, measure out approximately 3 ounces of dough for each roll. Gently shape each piece into a smooth ball. Avoid overworking the dough during this stage.
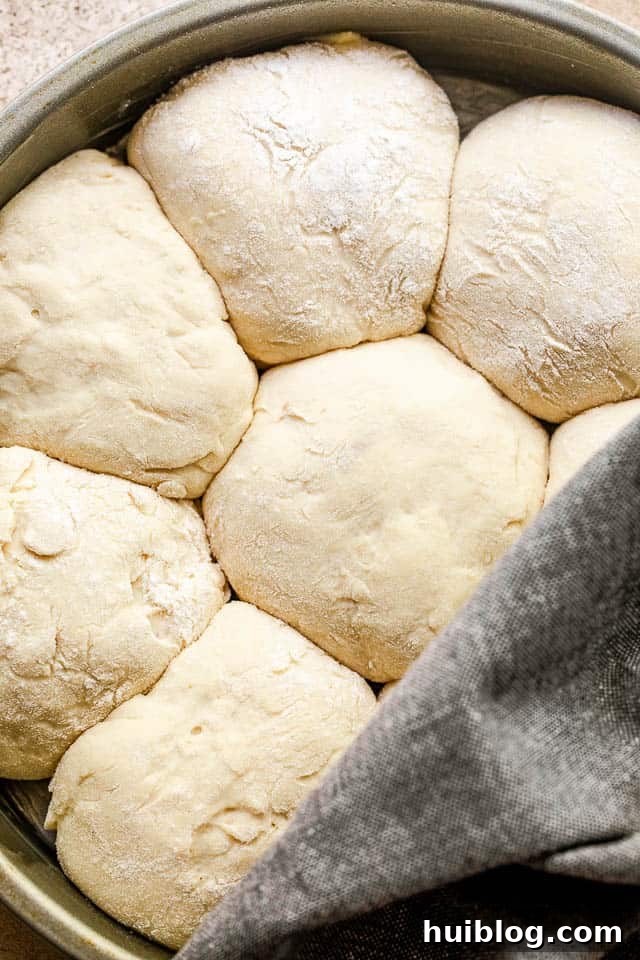
- Second Rise: Transfer the shaped dough balls to your prepared buttered 9-inch round cake pan, arranging them close together but allowing a little space for expansion. Cover the pan loosely with a clean kitchen towel and let the rolls rise in a warm, draft-free spot for 40 minutes to an hour. During this time, they should visibly increase in size. While the rolls are rising, prepare your egg wash by whisking together one egg and one tablespoon of water in a small bowl.
- Preheat and Bake: Approximately 15-20 minutes before the end of the rising time, preheat your oven to 350˚F (175˚C). Once the rolls have completed their second rise, gently brush the tops with the prepared egg wash. Bake the rolls, uncovered, for 25 to 30 minutes, or until they are beautifully golden brown on top and cooked through.
- Butter and Serve: As soon as you remove the hot rolls from the oven, brush them generously with melted butter. This adds a lovely sheen, softens the crust, and enhances the flavor. Let the rolls stand in the pan for about 10 minutes to cool slightly before serving. This brief resting period helps them set and makes them easier to handle. Remove from the pan and cool for an additional 10-15 minutes on a wire rack for optimal enjoyment. Serve warm and savor the deliciousness!
Expert Tips for Irresistible No-Knead Dinner Rolls
While this recipe is incredibly forgiving, a few expert tips can help you achieve the most delicious and visually appealing results every time:
- Mind Your Timing: The dough requires a 30-minute rest at room temperature before shaping and another 40-60 minutes for its final rise. To optimize your baking process and avoid preheating the oven for too long, set a separate timer. This timer should prompt you to preheat the oven and whisk together the egg wash well before the rolls finish rising, ensuring everything is ready simultaneously.
- Understand the Texture: Remember, these are true artisan rolls. They differ significantly from enriched dough rolls (like brioche or cinnamon buns) in texture. Expect a crumb that is firm, somewhat chewy, yet soft, often featuring lovely large holes indicative of a well-fermented dough. They will have a rustic charm, much like a homemade sourdough loaf. Plan your menu accordingly to complement this delightful texture.
- Don’t Be Alarmed by Appearance: No-knead dough often behaves differently from traditional yeast doughs. It may not puff up as smoothly or dramatically during the rising stages. This is perfectly normal! As long as you’ve used the correct amounts of active yeast and water, the dough is working its magic, and the final baked product will be wonderful. Trust the process.
- Embrace Steam for a Better Rise: If you’re concerned about your rolls not rising adequately in the oven, or if you desire an even softer crust, try placing a small, ovenproof bowl of water on the bottom rack of your oven while it preheats and during the initial baking time. The steam created will help keep the crust supple, allowing the rolls to expand more freely and achieve a puffier rise.
- Experiment with Toppings: For an extra layer of flavor and visual appeal, consider sprinkling your rolls with flaky sea salt, a pinch of dried herbs (like rosemary or thyme), or even some everything bagel seasoning before baking. This simple addition can elevate their taste and make them even more special.
- Ensure Proper Dough Temperature: While the initial room temperature rest is important, make sure your kitchen isn’t overly hot during the final rise, as this can cause the dough to over-proof too quickly, leading to a less desirable texture. A cozy, draft-free spot is ideal.
Delightful Serving Suggestions
These versatile no-knead dinner rolls are the perfect accompaniment to almost any meal. Their rustic charm and delicious chewiness make them a fantastic partner for a wide variety of dishes:
- Hearty Pasta Dishes: Their ability to soak up rich sauces makes them ideal for serving alongside comforting meals like Quick Cream Cheese Spaghetti or a robust lasagna.
- Sheet Pan Dinners: They perfectly complement the simplicity and vibrant flavors of a Chicken and Vegetables Sheet Pan Dinner, providing a satisfying bite to complete the meal.
- Grilled Meats: Pair them with succulent proteins such as Juicy Grilled Pork Chops, steaks, or roasted chicken. The rolls are excellent for sopping up any delicious pan juices.
- Soups and Stews: There’s nothing quite like a warm, crusty roll to dip into a hearty soup or stew on a chilly evening. Their sturdy texture stands up well to thick broths.
- Breakfast or Brunch: Don’t limit these to dinner! Split them, toast them lightly, and serve with butter and jam, or use them as the base for mini breakfast sandwiches.
- Simple Butter and Herbs: Sometimes, the best way to enjoy these rolls is simply with a generous smear of butter and a sprinkle of fresh herbs. Their inherent flavor truly shines through.
Truly, almost anything from our Dinner Ideas section would be wonderfully enhanced by the addition of these fresh, homemade rolls!
Storing and Reheating Your Homemade Rolls
Proper storage ensures you can enjoy the fresh taste of these no-knead dinner rolls for days to come. Here’s how to keep them at their best:
- Room Temperature: Freshly baked rolls are best enjoyed the same day. However, they can be stored at room temperature for 1-2 days. Place them in an airtight container or a sealed plastic bag once completely cooled to maintain their freshness and prevent them from drying out.
- Refrigeration: For slightly longer storage, leftover rolls can be kept in the refrigerator, tightly wrapped in plastic wrap or sealed in food storage bags. Make sure to press out as much air as possible before sealing. They will keep well for up to 2 days in the fridge.
- Freezing: These rolls freeze beautifully! Once completely cooled, place them in a single layer on a baking sheet and flash freeze for about an hour until firm. Then, transfer the frozen rolls to a freezer-safe bag or airtight container. They can be stored in the freezer for up to 6 months, though for the best flavor and texture, it’s recommended to consume them within 3 months.
- Reheating: To reheat, first thaw frozen rolls in the refrigerator overnight or on the counter for a few hours. Then, place the rolls directly on the oven rack in a preheated oven at 325˚F (160˚C). Bake for about 10-12 minutes, or until they are heated through and lightly re-crisped. If reheating from room temperature, a shorter time of 5-7 minutes should suffice. Avoid overheating, which can dry them out. You can also quickly warm them in a microwave for 15-20 seconds for a soft texture, though they won’t have the same crisp exterior.
ENJOY these wonderfully easy and delicious no-knead dinner rolls!
No-Knead Dinner Rolls
Katerina | Easy Weeknight Recipes
15 minutes
25 minutes
1 hour 30 minutes
8
Ingredients
- 1 ½ pounds No-Knead Dough
- 1 egg
- 1 tablespoon water
- ¼ cup melted butter
Instructions
- Butter a 9-inch round cake pan.
- Remove 1 ½ pounds of no-knead dough from the fridge and let sit at room temperature for about 30 minutes.
- Dust your working area with flour.
- Divide dough into eight pieces; flour your hands and shape each piece into a ball the size of a golf ball (or weigh out 3-ounces of dough for each roll).
- Transfer dough balls to the previously prepared pan, arranging them one next to another. Cover with a kitchen towel and let rest for 40 to 60 minutes.
- Preheat oven to 350˚F.
- Combine egg and water in a small mixing bowl and whisk to combine to make an egg wash.
- Brush rolls with the egg wash.
- Bake for 25 to 30 minutes, or until lightly browned on top.
- Remove from oven and brush rolls with melted butter.
- Allow to cool 10 minutes in the pan.
- Remove from pan and let cool for 10 to 15 more minutes.
- Serve warm.
Nutrition
Nutritional info is an estimate and provided as courtesy. Values may vary according to the ingredients and tools used. Please use your preferred nutritional calculator for more detailed info.
Did you make a recipe? Leave a rating
Frequently Asked Questions About No-Knead Dinner Rolls
- Can I make the no-knead dough ahead of time?
Absolutely! The beauty of no-knead dough is its flexibility. You can prepare the dough up to 5-7 days in advance and store it in an airtight container in the refrigerator. This allows you to have fresh bread ready with minimal notice. - What if my rolls don’t rise much?
Several factors can affect rising. Ensure your yeast is fresh and active. The ambient temperature of your kitchen also plays a role; a warm, draft-free spot is ideal for rising. If your home is particularly cool, you can place the covered pan in a slightly warm (but not hot) oven that has been turned off, or near a warm appliance. Even if the rise isn’t dramatic, the rolls will often puff up in the oven. - Can I add herbs or cheese to the dough?
Yes, you can! For a savory twist, gently fold in dried herbs like rosemary or thyme, minced garlic, or shredded cheese (parmesan, cheddar, or gruyere work well) when you are shaping the individual rolls. Be careful not to overmix, and ensure any additions are evenly distributed. - Do I need a special pan for this recipe?
A standard 9-inch round cake pan works perfectly, as specified. The key is to have a pan that allows the rolls to nestle together, promoting a soft interior. A cast-iron skillet of similar size could also work, but be sure to butter it well. - Why is the egg wash important?
The egg wash contributes significantly to the rolls’ appearance. It gives them a beautiful golden-brown color and a lovely, glossy sheen, making them look professionally baked. It also helps in achieving a slightly crispier crust.