

There’s an irresistible charm to a freshly baked cookie, and when that cookie is infused with the bright, zesty essence of lemon, it becomes truly unforgettable. These delightful lemon cookies are a testament to that magic – perfectly moist, wonderfully tender, and satisfyingly chewy. They deliver an explosion of fresh, tangy flavor from real lemon juice and vibrant lemon zest, beautifully balanced by the sweetness of granulated sugar and the rich, comforting depth of brown sugar. Imagine a sunshine-infused treat that brightens any day, yet is surprisingly simple to create in your own kitchen.

This lemon cookie recipe has quickly ascended to the top of my favorites list, and it’s sure to become a staple in your baking repertoire too. Each bite of these soft and chewy cookies is a burst of authentic lemon flavor, not just from the juice, but importantly, from the aromatic zest, which provides a more complex and intense citrus note. The clever addition of brown sugar plays a crucial role, mellowing the lemon’s tartness and adding a subtle caramel undertone that elevates the overall taste. Infused with generous amounts of butter and pure vanilla, these cookies boast a rich, comforting, and sophisticated flavor profile that feels both gourmet and homemade.
Beyond their incredible taste, these cookies are also a feast for the eyes. A touch of yellow food coloring ensures they possess a vibrant, sunny hue that perfectly reflects their fruity flavor. They are truly gorgeous cookies that are remarkably straightforward to bake, promising to be an absolute hit with everyone you share them with. Whether you’re baking for a special occasion, a casual gathering, or simply to treat yourself, these easy lemon cookies offer a perfect blend of tangy freshness and comforting sweetness.
Why You’ll Love This Easy Lemon Cookie Recipe
These lemon cookies aren’t just another dessert; they’re a delightful experience waiting to happen. Here’s why this recipe stands out and why you’ll find yourself reaching for it again and again:
- Effortlessly Simple: Don’t let their elegant appearance fool you; these lemon cookies are incredibly easy to make. The step-by-step instructions are clear and simple to follow, making this an ideal recipe for bakers of all skill levels, from beginners to seasoned pros. From start to finish, you can have a batch of these glorious cookies ready in just about 25 minutes of active prep and bake time, plus chilling.
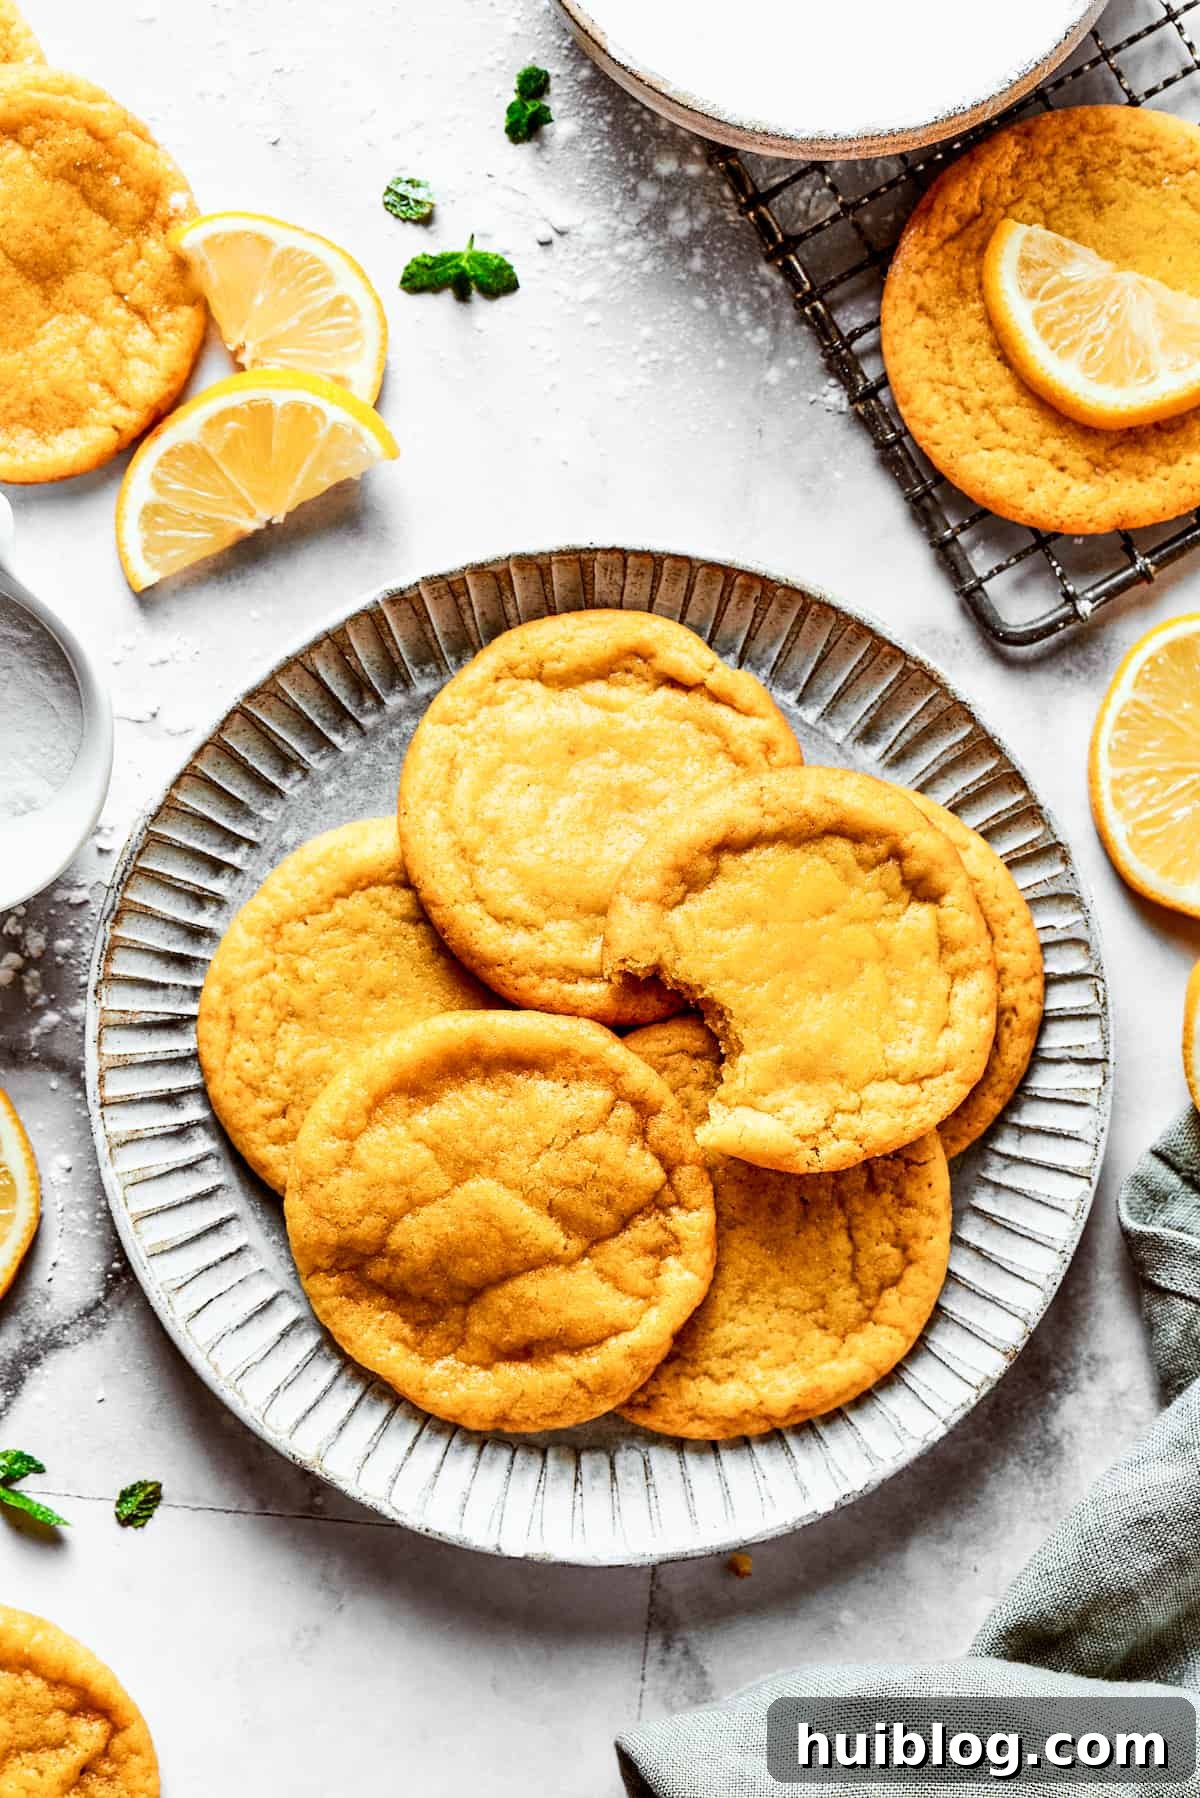
- Unrivaled Texture: The hallmark of an exceptional cookie lies in its texture, and these luscious lemon sugar cookies deliver perfection. They strike an exquisite balance, being wonderfully firm yet chewy on the outside, while remaining incredibly soft and moist on the inside. This desirable texture ensures every bite is a satisfying culinary delight that melts in your mouth.
- Bursting with Authentic Lemon Flavor: We harness the power of fresh lemon juice for its bright tang and, more importantly, lemon zest for its aromatic oils, which deliver a deep, complex, and true lemon flavor. This isn’t just a hint of lemon; it’s a full-bodied citrus celebration that will invigorate your palate.
- Easy to Customize and Scale: This recipe is incredibly adaptable. Whether you need a small batch for an evening treat or a large quantity for a party, it’s easy to double or triple without significantly increasing your workload. Plus, it serves as a fantastic base for various additions and variations, allowing you to tailor it to your preferences.
- Visually Appealing: With their beautiful golden-yellow hue, enhanced by a touch of food coloring, and a delicate powdered sugar coating, these cookies are as pretty to look at as they are delicious to eat. They add a pop of cheerful color to any dessert spread and are sure to impress guests with their charming appearance.
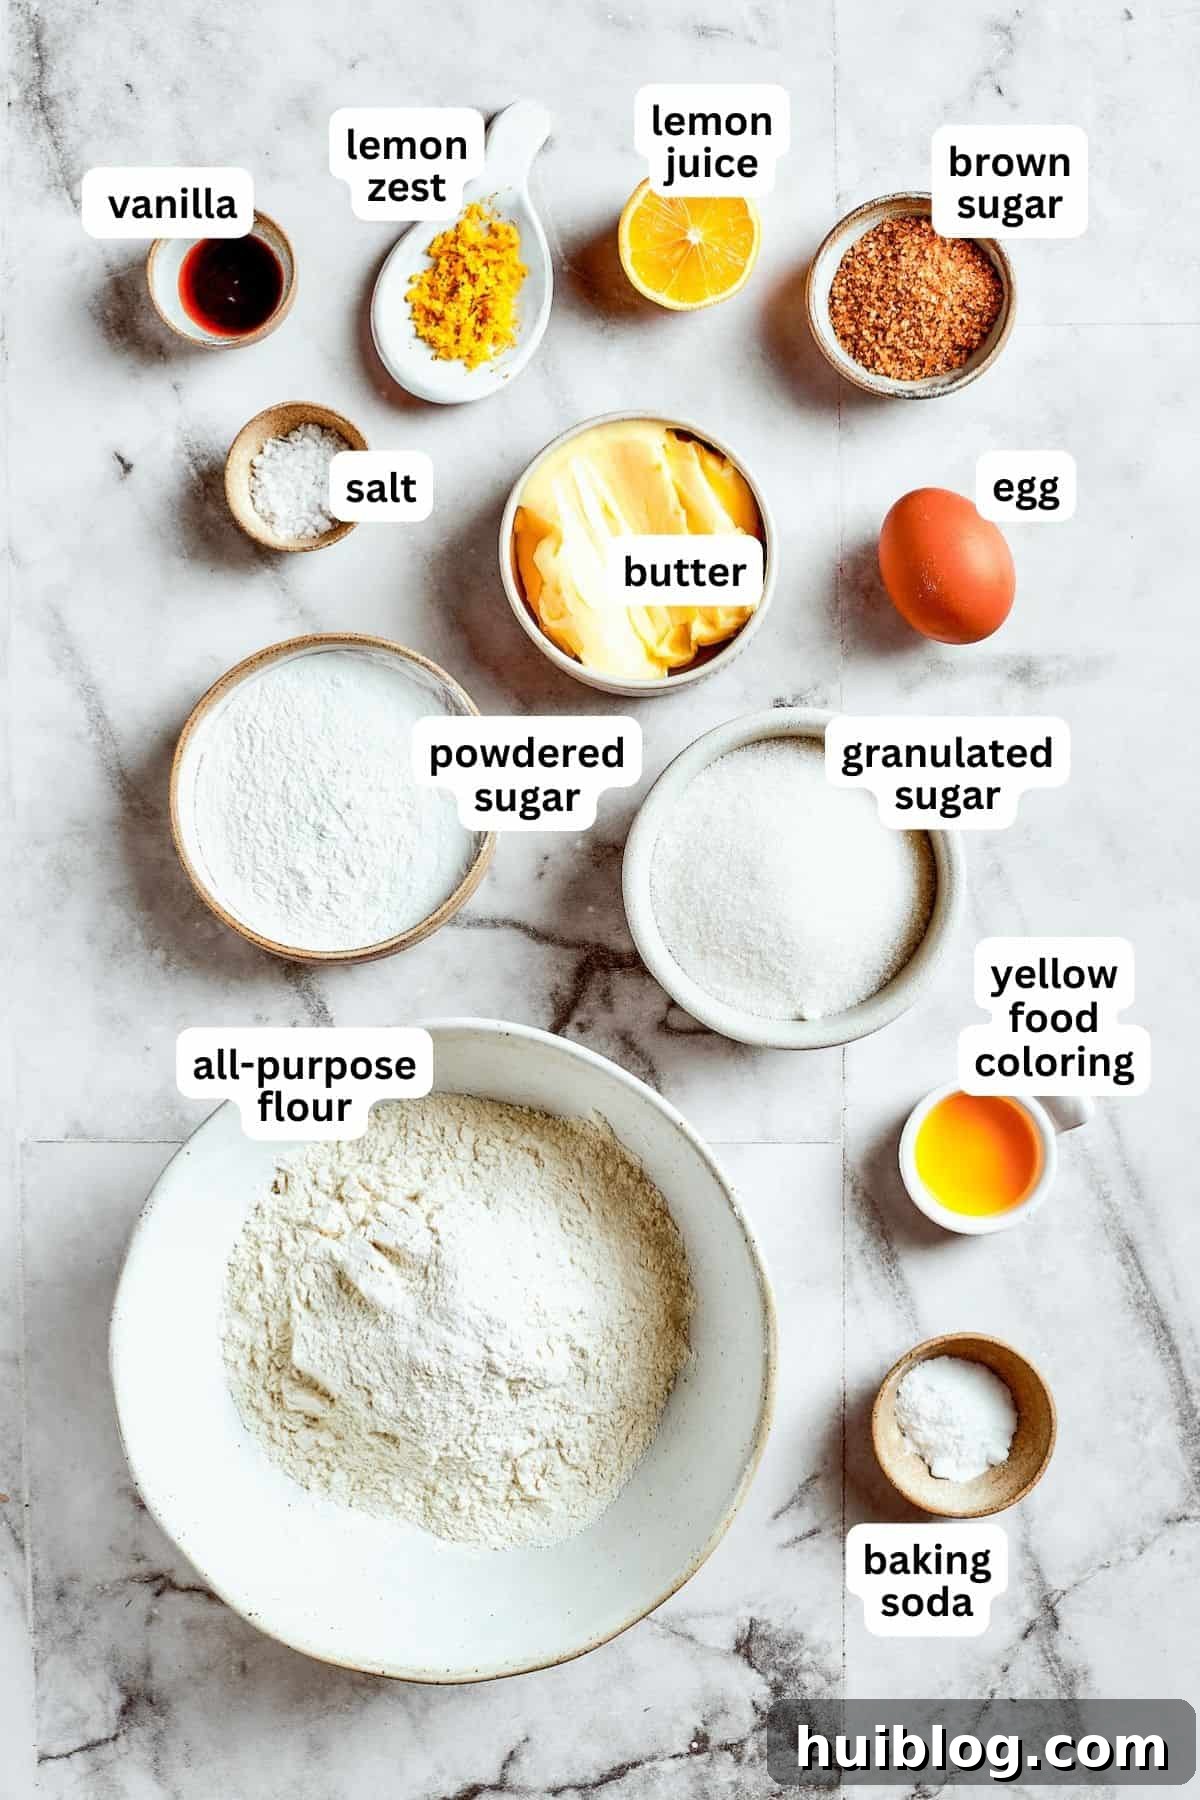
Essential Ingredients for Perfect Lemon Cookies
Crafting these delectable lemon cookies requires a thoughtful selection of common baking ingredients, each playing a vital role in achieving their signature taste and texture. Here’s a detailed look at what you’ll need and why:
- All-Purpose Flour: The foundation of our cookies, providing the necessary structure and body. Ensure it’s measured correctly, ideally by weight or using the spoon-and-level method, to prevent dense cookies.
- Baking Soda: A crucial leavening agent that helps the cookies spread and become tender, contributing to their soft, chewy texture.
- Salt: A small pinch makes a big difference! Salt balances the sweetness, enhances the lemon flavor, and brings out the richness of the butter and vanilla.
- Unsalted Butter (Room Temperature): Using unsalted butter allows you to control the overall saltiness of the recipe. It is absolutely essential that your butter is at room temperature. Softened butter creams beautifully with sugar, incorporating air that creates a light and airy cookie texture. If it’s too cold, it won’t cream properly; if too warm, it can make your cookies greasy.
- Granulated Sugar: Provides sweetness and contributes to the crisp edges and slight spread of the cookies.
- Light Brown Sugar: This is a secret weapon for chewiness and depth of flavor. Light brown sugar contains molasses, which adds moisture, makes the cookies softer, and introduces subtle caramel notes that beautifully complement the tart lemon.
- Lemon Zest: The true powerhouse of lemon flavor! Zest contains essential oils that provide an intense, aromatic lemon essence without adding extra liquid that could alter the dough consistency. Don’t skip this for maximum flavor impact.
- Large Egg (Room Temperature): Acts as a binder, adding richness, moisture, and helping the cookies hold their shape. Like butter, a room-temperature egg emulsifies better with the other ingredients, leading to a smoother, more uniform dough.
- Fresh Lemon Juice: Provides the signature tartness and tangy punch of lemon. Always use freshly squeezed juice for the best flavor; bottled juice simply won’t compare.
- Yellow Food Coloring (Optional): While purely for aesthetics, a small amount of yellow food coloring enhances the visual appeal, giving the cookies a bright, sunny disposition that hints at their delicious flavor.
- Pure Vanilla Extract (or Vanilla Paste): A classic enhancer that adds depth and warmth, perfectly complementing and rounding out the bright lemon notes. Use good quality vanilla for the best results.
- Powdered Sugar: Used for rolling the cookie dough balls, it creates a beautiful crinkled effect as the cookies bake and adds an extra touch of delicate sweetness to the exterior.
Step-by-Step Guide: How to Make Irresistible Lemon Cookies
Get ready to bake a batch of these super easy, delightfully zesty lemon cookies. You’ll be amazed at how quickly and simply this impressive dessert comes together. Follow these detailed steps for perfect results every time:
- Combine Dry Ingredients: In a medium mixing bowl, whisk together the all-purpose flour, baking soda, and a pinch of salt until thoroughly combined. This ensures the leavening agent and salt are evenly distributed throughout the dough. Set this mixture aside.
- Cream the Butter: In a large mixing bowl, preferably using an electric mixer, beat the softened unsalted butter on medium speed until it becomes light, fluffy, and airy. This process incorporates air, which is crucial for the cookies’ tender texture.
- Infuse Flavor with Sugars and Zest: Add the granulated sugar, light brown sugar, and fresh lemon zest to the creamed butter. Continue beating on medium-high speed for about 3 to 5 minutes, or until the mixture is light, pale, and incredibly fluffy. The sugar crystals help abrade the lemon zest, releasing its potent aromatic oils and infusing the butter with intense lemon flavor.
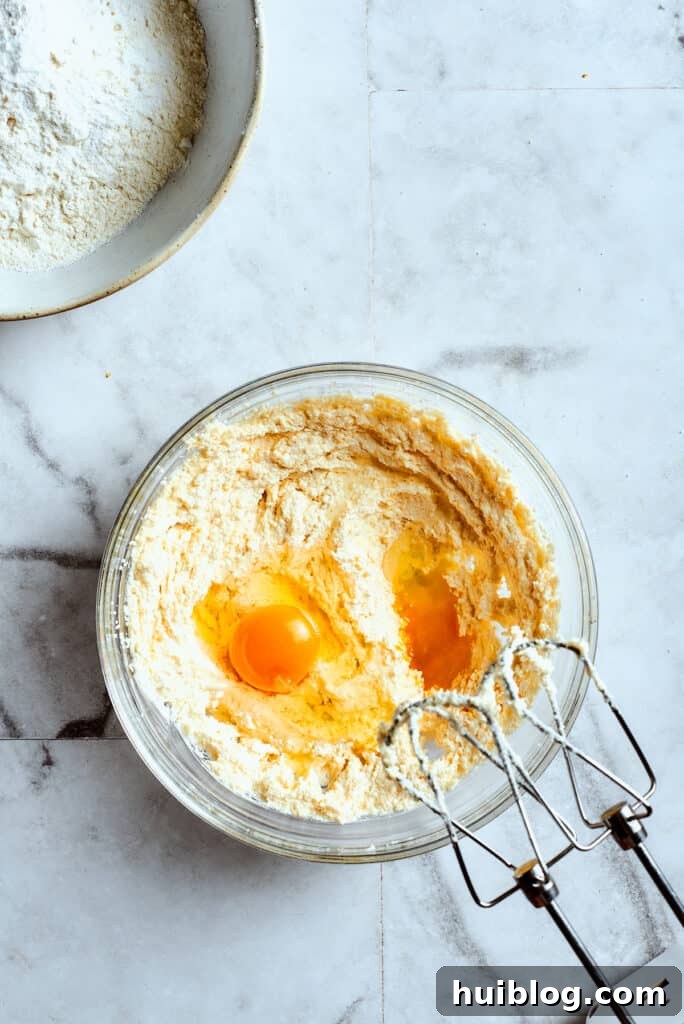
- Incorporate Wet Ingredients: Next, add the room-temperature egg, fresh lemon juice, pure vanilla extract, and yellow food coloring (if using) to the butter mixture. Mix on low speed until the ingredients are just combined. Be careful not to overmix at this stage, as it can overdevelop the gluten.
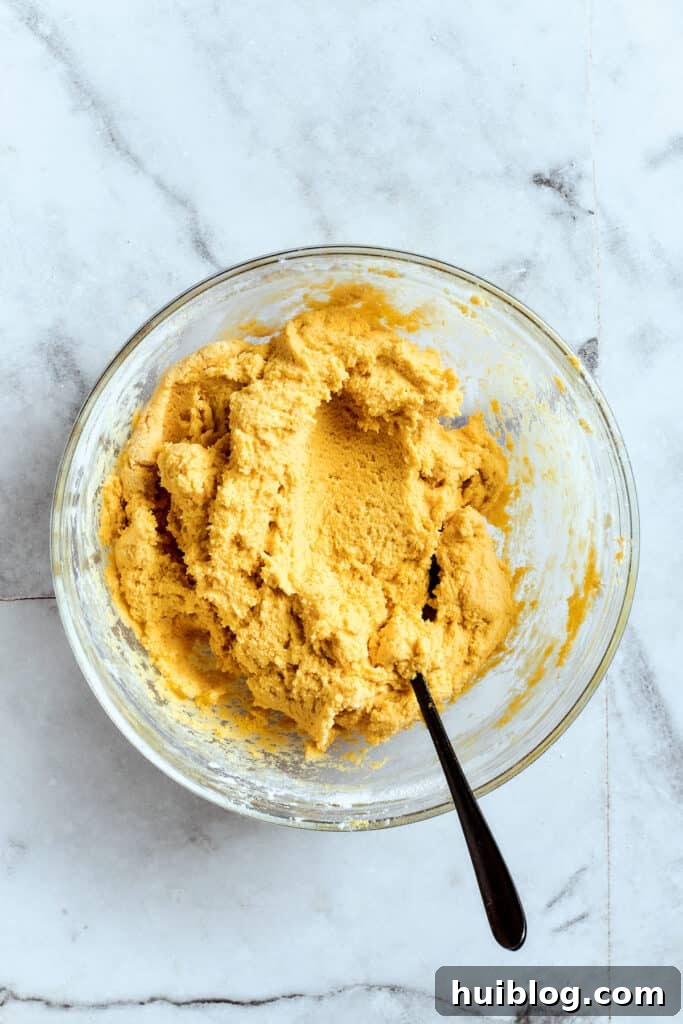
- Gently Mix in Flour Mixture: Reduce your mixer speed to low and gradually add the dry flour mixture to the wet ingredients. Mix just until the flour is incorporated and no streaks remain. The dough should be soft, slightly sticky, and uniformly mixed but not overbeaten. Overmixing will lead to tough, dense cookies.
- Chill the Dough: Cover the cookie dough tightly with plastic wrap and transfer it to the refrigerator. Allow it to chill for at least 30 minutes. This step is vital as it helps firm up the dough, making it easier to handle, prevents excessive spreading during baking, and allows the flavors to meld and deepen.
- Prepare for Baking: While your dough is chilling, preheat your oven to 350°F (175°C). Line two baking sheets with parchment paper or silicone baking mats. This prevents sticking and ensures even baking and easy cleanup.
- Shape the Cookies: Once the dough is chilled, scoop out approximately 1½ to 2 tablespoons of dough per cookie. Roll each portion into a smooth ball between your palms. Gently flatten each lemon cookie ball slightly, just enough to give it a disc-like shape, which helps them bake more evenly.
- Coat in Powdered Sugar: Place a generous amount of powdered sugar in a shallow bowl. Roll each dough ball in the powdered sugar until it is evenly and thoroughly coated. This creates a beautiful crackled, crinkled finish as the cookies bake. Arrange the coated dough balls on the prepared baking sheets, ensuring they are about 2 inches apart to allow for spreading.
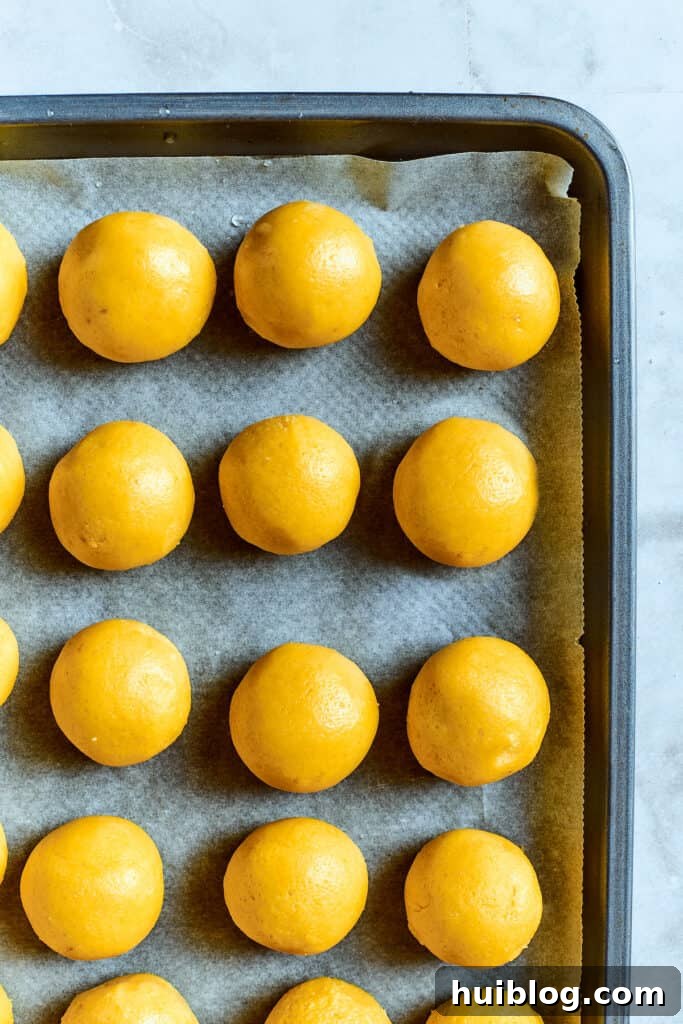
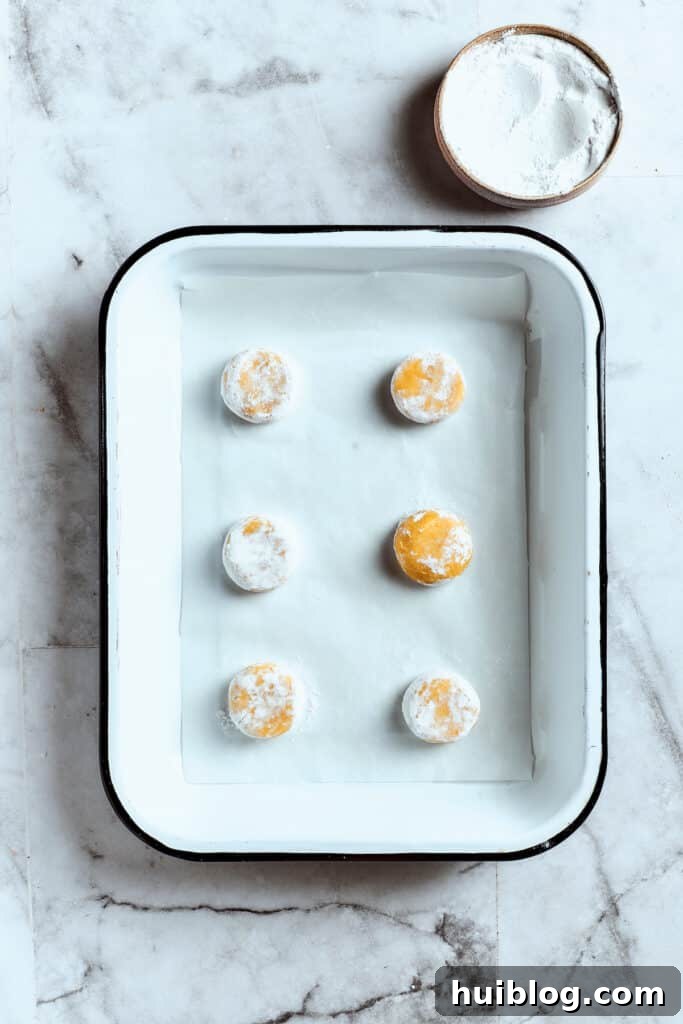
- Bake to Perfection: Place the baking sheets in the preheated oven and bake for 8 to 10 minutes. The cookies are ready when their edges are lightly set and very subtly golden, but their centers still appear soft and slightly underdone. Crucially, avoid over-baking, as this is key to achieving that tender, chewy texture.
- Cool Completely: Once baked, remove the cookies from the oven and allow them to cool on the baking sheets for at least 5-7 minutes. They will continue to set during this time. After the initial cooling, carefully transfer them to a wire rack to cool completely. Cooling thoroughly is essential for them to develop their firm, chewy structure and prevent them from crumbling. Resist the temptation to eat them warm; the wait is worth it!
Expert Tips for Baking the Best Lemon Cookies
Achieving bakery-quality lemon cookies at home is easier than you think with a few simple tricks. Here are some expert tips to ensure your cookies turn out perfectly moist, chewy, and bursting with flavor every single time:
- Precision with Lemon Juice: This recipe specifically calls for about 2 tablespoons of fresh lemon juice, which typically comes from half of a medium-sized lemon. While tempting to eyeball it, using the right amount is crucial for the perfect balance of tartness without making the dough too wet. Too little and the lemon flavor will be subdued; too much and the cookies might spread excessively or become overly tart.
- Embrace the Chill Factor: While the recipe suggests chilling the dough for 30 minutes, if time allows, extending this period will yield even better results. Chilling the dough for a few hours, or even overnight in the fridge, allows the dry ingredients to fully hydrate, preventing your cookies from spreading too much and resulting in a thicker, chewier texture. More importantly, it gives the lemon and vanilla flavors ample time to meld and deepen, creating a more complex and satisfying taste experience.
- Mind Your Butter and Egg Temperature: This cannot be stressed enough – both your unsalted butter and large egg should be at room temperature.
- Butter: Properly softened butter (not melted or greasy) creams beautifully with sugar, incorporating vital air that makes your cookies light and tender. If your butter is too cold, it won’t cream, leading to a denser cookie. If it’s too warm or melted, it will separate and result in greasy, flat cookies. Aim for butter that yields slightly when pressed, but still holds its shape.
- Egg: A room-temperature egg emulsifies more easily with the creamed butter and sugar, creating a smoother, more cohesive dough. A cold egg can seize the butter, affecting the texture.
- Avoid Overmixing: Once you add the flour mixture to the wet ingredients, mix only until the flour is just incorporated and no dry streaks remain. Overmixing develops the gluten in the flour, which can lead to tough, dry, and less tender cookies. A soft, slightly sticky dough is what you’re aiming for.
- Don’t Overbake: The key to chewy cookies is to remove them from the oven when the edges are set and lightly golden, but the centers still look soft and slightly undone. They will continue to bake slightly on the hot baking sheet even after removal. Over-baking is the quickest way to end up with dry, hard cookies.
- Cool Completely for Structure: It’s incredibly tempting to snatch a warm cookie right off the tray, but patience is a virtue here. Allowing the cookies to cool on the baking sheet for a few minutes before transferring them to a wire rack lets them set properly. Cooling completely on a wire rack ensures they firm up, develop their optimal chewy texture, and won’t break apart.
- Use Fresh Zest: The lemon zest is where much of the intense lemon aroma and flavor comes from. Always use fresh zest from organic lemons if possible. Avoid grating the white pith beneath the yellow skin, as it can be bitter. A microplane zester is ideal for this task.
- Consider a Cookie Scoop: For consistently sized cookies that bake evenly, invest in a good quality cookie scoop. This ensures each cookie is the same size, leading to uniform baking times and a professional appearance.

Creative Variations & Serving Suggestions
While these lemon cookies are perfect as is, they also serve as an excellent canvas for creative variations and can be enjoyed in numerous delightful ways:
Delicious Variations to Try:
- Lemon Glaze: For an extra layer of lemony goodness and a glossy finish, whisk together powdered sugar with a little fresh lemon juice (and a touch of milk or water if needed) to create a simple glaze. Drizzle or dip the cooled cookies before serving.
- Lemon Poppy Seed: Add 1-2 tablespoons of poppy seeds to the dry ingredients for a classic flavor combination and a delightful textural contrast.
- White Chocolate Chip: Fold in ½ cup of white chocolate chips to the dough along with the dry ingredients for a sweet and creamy addition that complements the tart lemon beautifully.
- Coconut Lemon: Mix in ½ cup of shredded coconut for a tropical twist that adds both flavor and chewiness.
- Spice It Up: A pinch of ground cardamom or a tiny hint of ginger can add a warm, complex note that pairs wonderfully with lemon.
- Other Citrus Zests: Experiment with lime zest or orange zest for a different citrus profile. A combination of lemon and lime can be particularly vibrant.
Serving Suggestions:
- Classic Pairing: Enjoy these cookies with a warm cup of tea, coffee, or a refreshing glass of lemonade for a comforting treat.
- Dessert Platter: Arrange them on a dessert platter alongside fresh berries or other small sweets for a beautiful spread.
- Ice Cream Sandwich: For a decadent dessert, sandwich a scoop of vanilla bean or raspberry sorbet between two cooled lemon cookies.
- Edible Gifts: Package a batch of these cookies in a pretty tin or box tied with a ribbon for a thoughtful homemade gift.
- After-Dinner Treat: They make a light and refreshing end to any meal, offering a palate-cleansing tartness.
How to Store Your Lemon Cookies
Proper storage is key to maintaining the freshness and delicious texture of your homemade lemon cookies. Here’s how to keep them at their best:
- Room Temperature: Once completely cooled, store leftover lemon cookies in an airtight container at room temperature for up to 5 days. This will keep them soft and chewy.
- Refrigeration: For a slightly longer shelf life, you can store them in an airtight container in the fridge for up to 2 weeks. They might become a bit firmer when chilled, but will soften up quickly at room temperature.
- Freezing Baked Cookies: For extended freshness, baked lemon cookies freeze exceptionally well. Arrange cooled cookies in a single layer on a baking sheet to freeze until solid (about 1-2 hours). Once frozen, transfer them to a freezer-safe airtight container or heavy-duty freezer bag, separating layers with parchment paper to prevent sticking. They will last beautifully in the freezer for up to 6 months. Thaw at room temperature before serving.
Can I Freeze The Lemon Cookie Dough For Later?
Absolutely! Freezing cookie dough is a fantastic time-saver, allowing you to enjoy freshly baked lemon cookies whenever a craving strikes without the full prep. This recipe is perfect for make-ahead freezing:
- Freezing Shaped Dough Balls: After chilling the dough and rolling it into individual balls (and even coating them in powdered sugar if desired), place them on a parchment-lined baking sheet. Freeze until the balls are solid, typically 1-2 hours. Once frozen, transfer the solid dough balls to a freezer-safe airtight container or a heavy-duty freezer bag. They will keep well for up to 3 months.
- Baking from Frozen: When ready to bake, you can place the frozen dough balls directly on a prepared baking sheet. You may need to add an additional 2-4 minutes to the baking time compared to fresh dough, so keep an eye on them until the edges are set and the tops are soft.
- Freezing Unshaped Dough: If you prefer to freeze the dough without shaping it first, simply wrap the entire ball of dough tightly in plastic wrap, then place it inside an airtight freezer bag. It can be stored this way for up to 3 months.
- Thawing Unshaped Dough: When you’re ready to use it, transfer the wrapped dough to the refrigerator and let it thaw overnight. Once thawed, you can proceed with shaping, coating, and baking as per the recipe instructions.
More Irresistible Cookie Recipes to Try
If you’re anything like me, your love for cookies knows no bounds! They are the ultimate comforting dessert, versatile for any occasion, and so incredibly satisfying to bake. If you enjoyed these zesty lemon cookies, you’ll surely love exploring more of my favorite easy cookie recipes. Each one offers its own unique charm and deliciousness, perfect for expanding your baking repertoire:
- Chewy Chocolate Chip Cookies
- Banana Cookies with Chocolate Chips
- Homemade Butter Cookies
- Orange Cookies
- Hot Chocolate Sugar Cookies
- Soft Pumpkin Cookies
Lemon Cookie Recipe Summary
Here’s a quick summary of the recipe details for these delightful lemon cookies.
Ingredients:
- 2 cups all-purpose flour
- 1 teaspoon baking soda
- pinch of salt
- ⅔ cup unsalted butter, at room temperature
- 1 cup granulated sugar
- 2 tablespoons light brown sugar
- 1 tablespoon lemon zest
- 1 large egg, at room temperature
- 2 tablespoons lemon juice, about half a lemon
- 1 teaspoon yellow food coloring
- 1 teaspoon pure vanilla extract, or vanilla paste
- powdered sugar, for rolling the dough balls
Instructions:
- Add the flour, baking soda, and salt to a mixing bowl and whisk to combine.
- Using an electric mixer, cream the softened butter in a large mixing bowl until light.
- Add the granulated sugar, brown sugar, and lemon zest to the butter and cream until combined and fluffy, about 3 to 5 minutes.
- Add in the egg, lemon juice, vanilla, and food coloring. Mix until just combined.
- With your mixer on low, slowly add in the flour mixture until the cookie dough is combined. Be careful not to over-mix. The dough should be soft and slightly sticky.
- Cover the dough and let it chill in the fridge for 30 minutes.
- While the dough chills, preheat your oven to 350˚F and line baking sheets with parchment paper or silicone mats.
- Pinch off about 1½ to 2 tablespoons of dough and roll the dough into balls. Flatten the balls slightly.
- Roll each dough ball in powdered sugar until coated evenly, then place on the prepared baking sheets about 2 inches apart.
- Bake for 8 to 10 minutes, until the edges of the cookies have set, but the tops are still soft in the center. Don’t over-bake the cookies.
- Cool the cookies on the baking sheets for a few minutes, then move them to a wire rack. Cool completely before serving.
Equipment:
- Measuring Cups and Spoons
- Stand Mixer or hand mixer
- Large Mixing Bowls
- Baking Sheets
- Wire Rack
- Parchment paper or silicone baking mats
- Microplane zester (for lemon zest)
Notes for Best Results:
- For the ideal firm and chewy texture, ensure the cookies cool completely after baking.
- Chilling the dough longer than 30 minutes (a few hours or even overnight) significantly enhances both texture and flavor development.
- Always use room-temperature butter and eggs for proper creaming and emulsification, leading to a smoother dough and better cookie structure.
- Store any leftover baked cookies in an airtight container. They’ll last for about 5 days at room temperature, up to 2 weeks in the fridge, or up to 6 months in the freezer.
- Unbaked cookie dough can also be frozen for up to 3 months, either as shaped balls or a wrapped dough log.
Estimated Nutrition (per cookie, for 20 servings):
Calories: 147kcal | Carbohydrates: 21g | Protein: 2g | Fat: 7g | Saturated Fat: 4g | Polyunsaturated Fat: 0.3g | Monounsaturated Fat: 2g | Trans Fat: 0.2g | Cholesterol: 26mg | Sodium: 89mg | Potassium: 23mg | Fiber: 0.4g | Sugar: 11g | Vitamin A: 203IU | Vitamin C: 1mg | Calcium: 7mg | Iron: 1mg
Nutritional information provided is an estimate and offered as a courtesy. Values may vary based on specific ingredients, brands, and preparation methods. Please use your preferred nutritional calculator for more precise details relevant to your ingredients.