
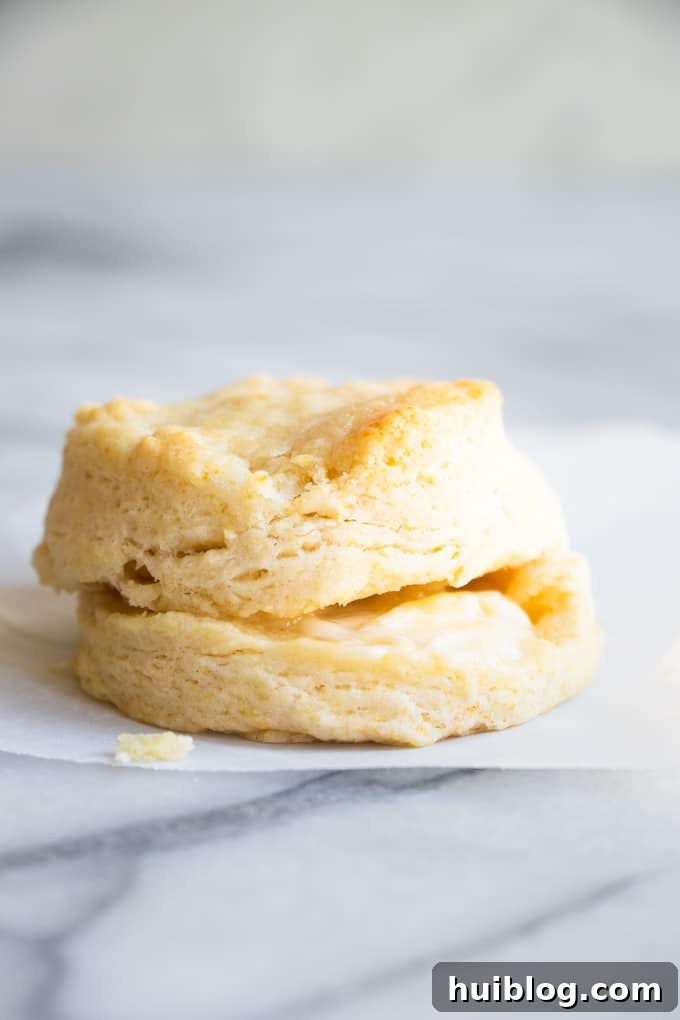
Welcome to the ultimate guide for crafting the **best homemade southern biscuits** you’ll ever taste. Forget everything you thought you knew about store-bought alternatives; this recipe is a game-changer, delivering unparalleled flavor and texture in about 15 minutes of active prep time. These tender, flaky marvels are perfect for any occasion, whether slathered with creamy butter, drizzled with golden honey, spread with your favorite jams, or crowned with a generous spoonful of rich sausage gravy. Get ready to elevate your breakfast, brunch, or dinner with these incredibly easy-to-make, utterly irresistible biscuits that are genuinely a thousand times better than anything you can buy.
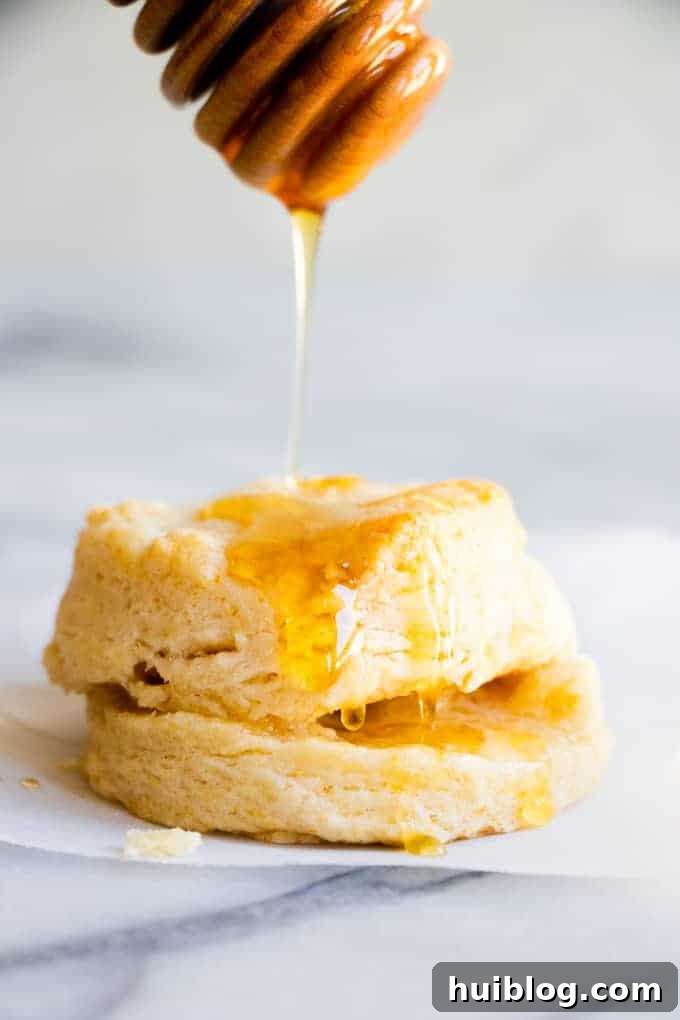
The Irresistible Allure of This Homemade Biscuit Recipe
There are countless reasons why this particular **biscuit recipe** stands out as a true culinary gem, destined to become a staple in your kitchen. It’s more than just a recipe; it’s an experience that brings warmth, comfort, and deliciousness to any meal.
- Effortless Ingredients, Extraordinary Results: One of the most beautiful aspects of these **southern biscuits** is their simplicity. They come together with a handful of common pantry staples you likely already have on hand – flour, baking powder, salt, a touch of sugar, cold butter, and heavy cream. This accessibility means you can whip up a batch of glorious, flaky biscuits whenever the craving strikes, without a special trip to the grocery store. The magic lies not in obscure components, but in the meticulous technique applied to these humble ingredients, transforming them into something truly special.
- The Perfect Complement to Any Meal: Biscuits are incredibly versatile, making them the ultimate side dish for a wide array of meals, especially classic southern comfort food. Imagine pairing these fluffy delights with hearty Texas Chicken Fried Steak, or alongside savory Pork Chops with Cream of Mushroom Soup. Beyond traditional pairings, they shine at breakfast with eggs and bacon, or even as a base for a sweet strawberry shortcake. Their mild, buttery flavor allows them to complement both savory and sweet dishes seamlessly, adding a touch of homemade goodness to every plate.
- A Guaranteed Family Favorite: There’s something universally appealing about warm, freshly baked bread, and these **homemade biscuits** are no exception. Serving a basket of these golden-brown beauties with any meal is a surefire way to bring smiles to every face at the table. The aroma alone will draw everyone to the kitchen, eager to enjoy a bite of their soft, tender texture and rich, buttery taste. They foster a sense of togetherness and tradition, making meal times even more memorable and enjoyable for the entire family.
Unlocking the Secret to Flaky, Tender Biscuits: A Step-by-Step Guide
Creating **flaky biscuits** is a simple process when you understand the key techniques. The foundation of these incredible southern biscuits rests on a few crucial steps, primarily involving temperature control and a gentle touch. Follow this guide carefully, and you’ll be rewarded with perfect biscuits every time.
- The Golden Rule: Freeze Your Butter. This is perhaps the single most important tip for achieving those coveted **flaky biscuit** layers. The recipe absolutely demands very COLD butter. To ensure optimal temperature, place a stick of unsalted butter in the freezer at least 20 minutes before you plan to begin mixing. If you’re thinking ahead, freezing it even longer won’t hurt. The reason for this chill is scientific: cold butter creates pockets of steam as it bakes, which in turn lifts the dough and forms distinct, airy layers. Warm butter, on the other hand, will simply melt into the dough, resulting in a denser, less desirable texture.
- Combine the Dry Essentials. In a large mixing bowl, thoroughly whisk together your all-purpose flour, baking powder, salt, and a touch of sugar. Use a fork or a balloon whisk to ensure these ingredients are perfectly combined and evenly distributed. This step is crucial for consistent rising and flavor throughout your biscuits. The baking powder is your leavening agent, providing the lift, while salt enhances the flavor, and sugar contributes to a beautiful golden-brown crust and subtle sweetness.
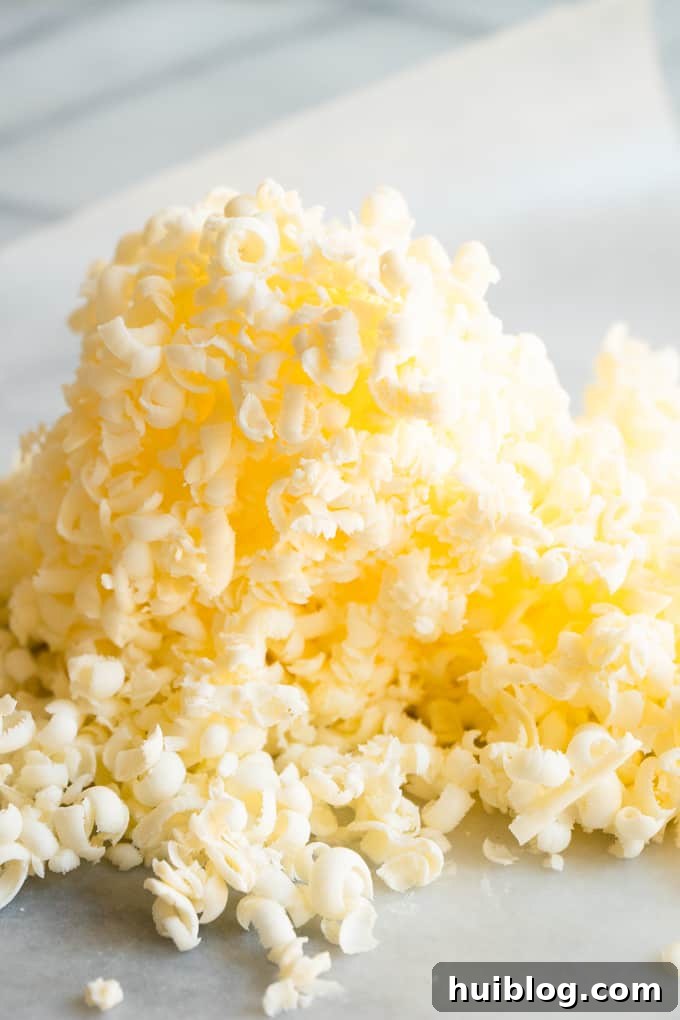
- Grate the Cold Butter for Superior Distribution. Once your butter is sufficiently chilled, it’s time to incorporate it into the dry ingredients. Grating the butter is a masterful technique that ensures it is evenly dispersed throughout the flour mixture in tiny, uniform pieces. This maximizes the potential for those flaky layers. If the butter is too frozen to grate easily, let it sit out for just a minute or two until it’s slightly pliable but still very firm. For ease and to prevent your hands from warming the butter, hold the stick with its wrapper on one end as you grate it directly into the bowl of dry ingredients. The goal is to keep the butter as cold as possible during this process.
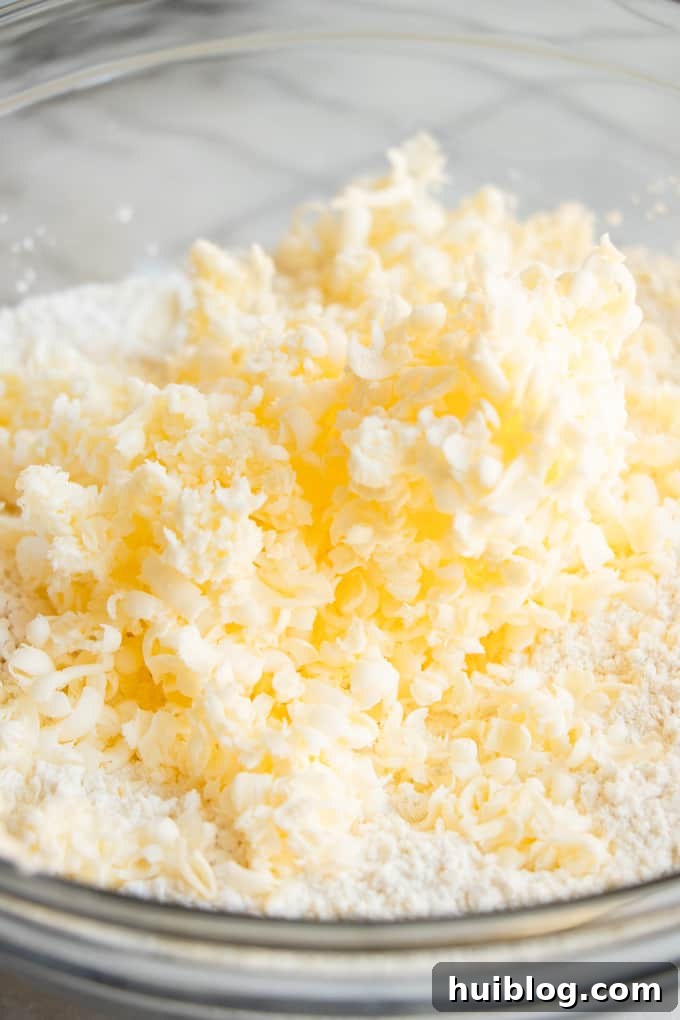
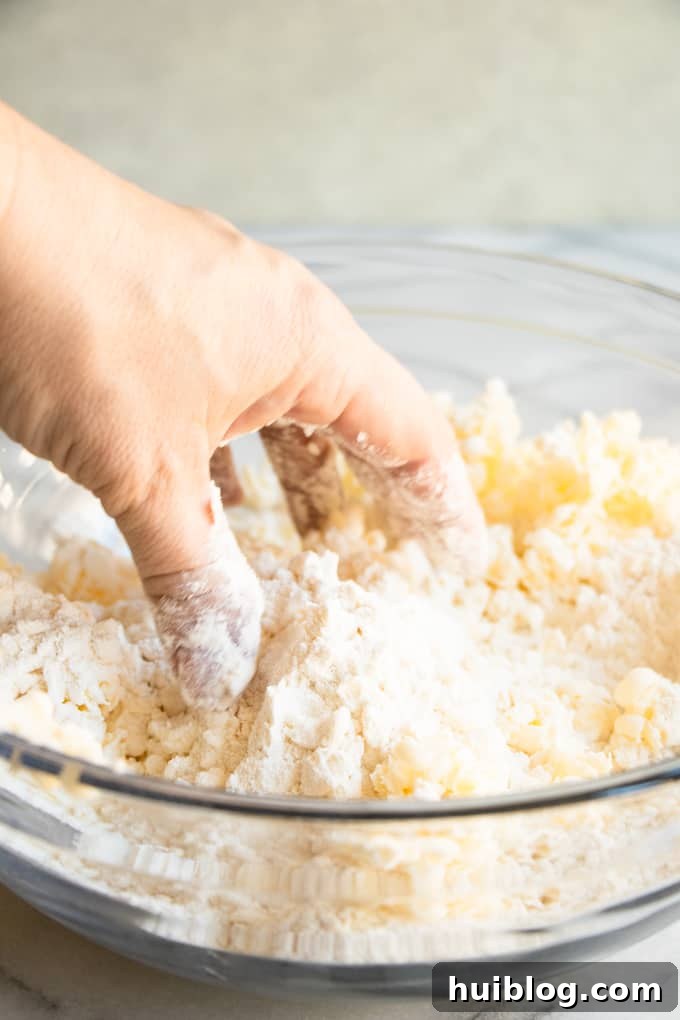
- Gently Work the Butter into the Dry Mix. This step is where your hands become your best tools. Using your fingertips, lightly rub the grated butter into the flour mixture until it resembles coarse crumbs. The goal is to coat the butter particles with flour without overworking the mixture or warming the butter too much. The best advice I ever heard regarding **biscuit making** comes from culinary expert Alton Brown, who, after years of trying to replicate his grandmother’s perfect biscuits, realized her arthritic hands were the secret. She couldn’t be forceful with the dough, resulting in an inherently gentle touch. This anecdote beautifully illustrates the principle: be gentle with your dough. Avoid kneading or pressing too hard; let your fingertips do the work.
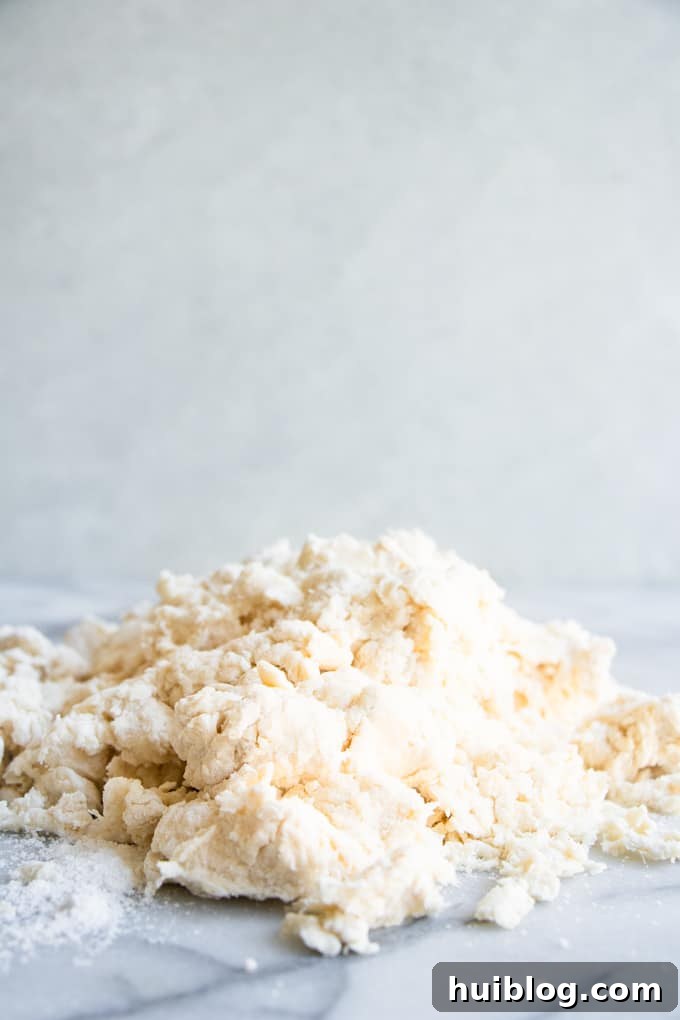
- Introduce the Cream for Unrivaled Tenderness. Now it’s time for the liquid. While many classic recipes call for buttermilk, I personally swear by heavy cream. There’s something truly magical about the extra fat content in cream that yields the most exquisitely tender, soft **homemade biscuits**. Pour the cream into the butter-flour mixture and, again, use your hands to gently bring the dough together. It will be a bit messy, but this hands-on approach allows for the lightest touch, which is paramount for tender biscuits. Resist the urge to overmix; combine just until the dry ingredients are moistened and a shaggy dough forms. Overworking the dough at this stage develops gluten, leading to tough biscuits – the exact opposite of what we want.
Crafting the Perfect Layers: The Art of Homemade Biscuit Baking
Once your dough is gently mixed, the next steps are all about shaping and baking to perfection, culminating in those signature tall, **flaky southern biscuits**.
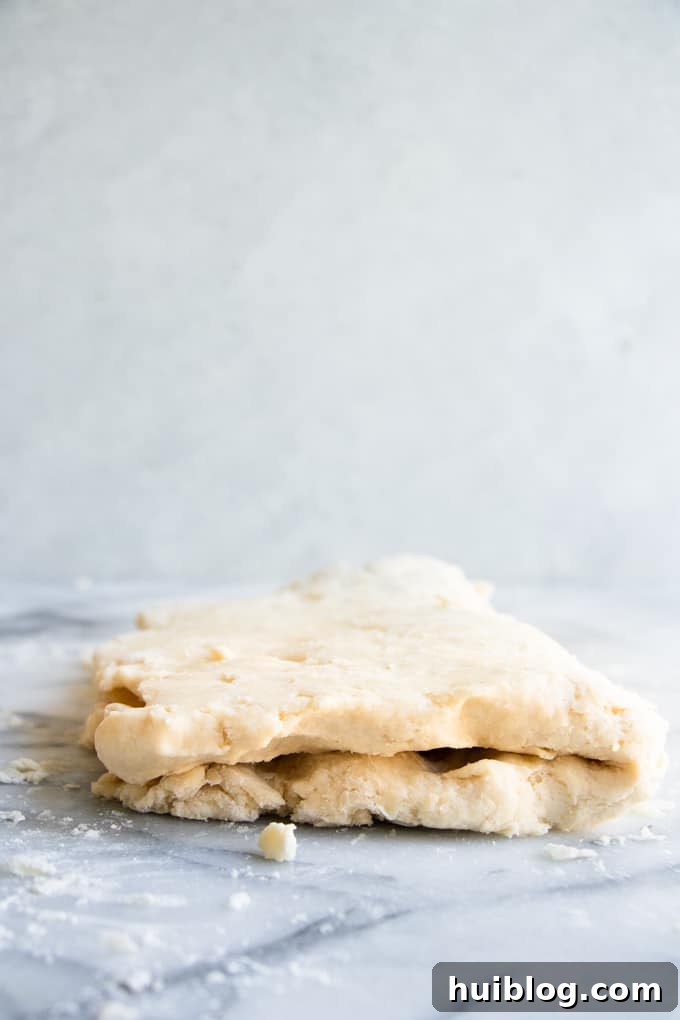
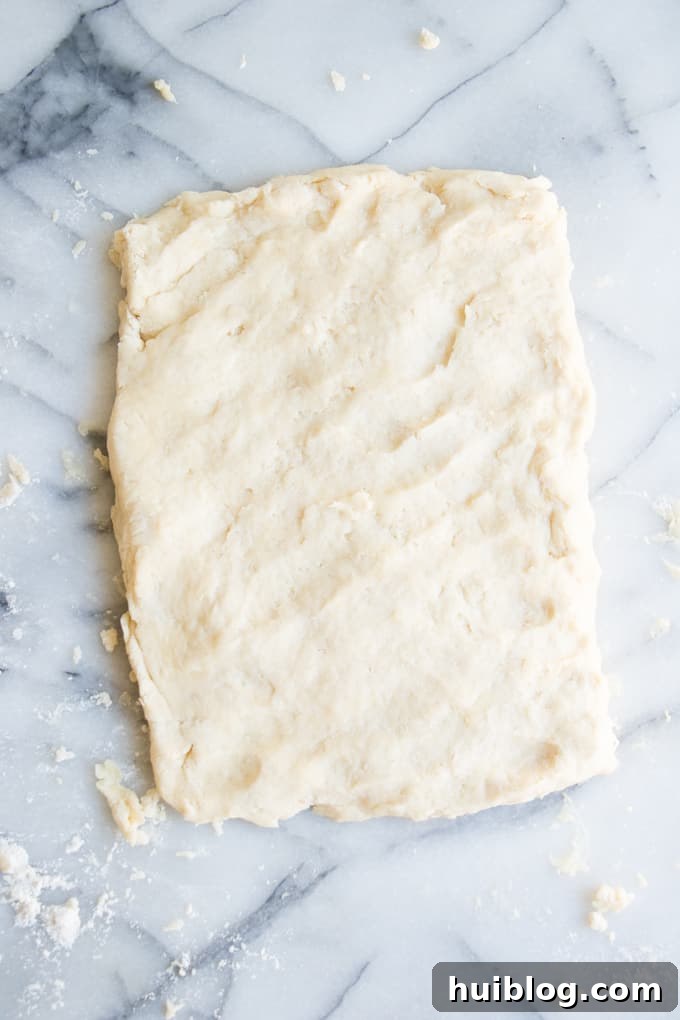
- Pressing and Laminating the Dough for Optimal Layers. Lightly dust a clean work surface with a small amount of flour to prevent sticking. Turn the crumbly dough out from the bowl onto the prepared surface. Don’t be alarmed by its crumbly nature; this is perfectly normal. Gently bring the dough together with your fingertips, pressing it into a rectangular shape, approximately 12 inches by 6 inches and about 3/4 of an inch thick. This initial pressing helps coalesce the dough without overworking it. Then, perform a series of folds: fold one third of the dough over the middle, and then the remaining third over that, like folding a letter. Rotate the dough 90 degrees, press it out into a rectangle again, and repeat the folding process. Continue this folding and pressing technique 4-5 times. This crucial process is known as laminating, and it’s what creates the hundreds of delicate, buttery layers that define a truly exceptional **flaky biscuit**. Add light sprinkles of flour to your work surface or the dough if it starts to become too sticky.
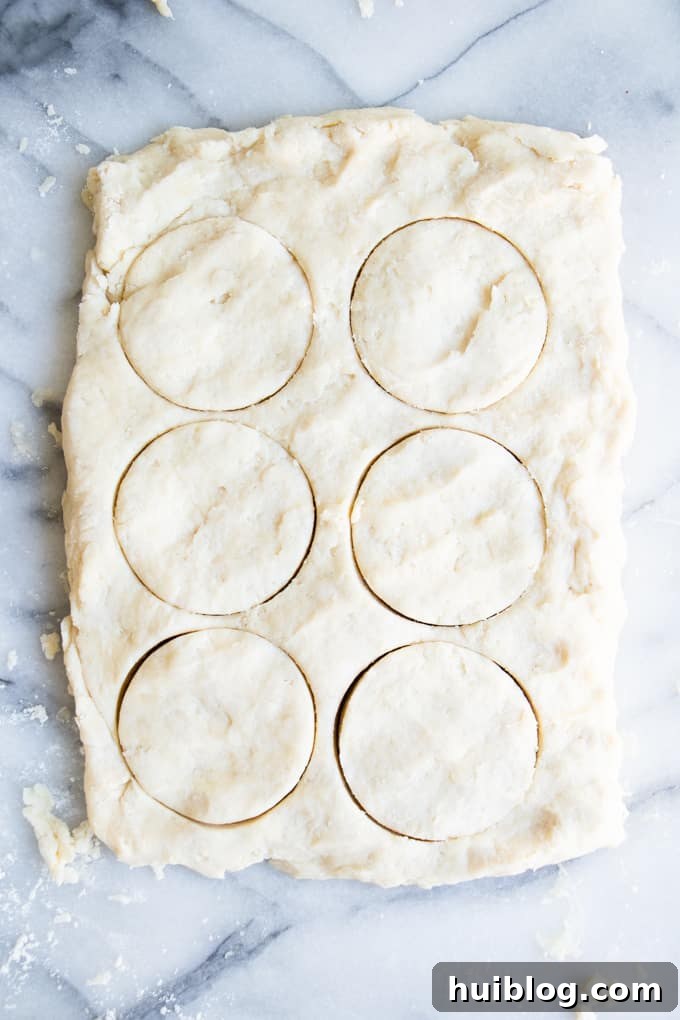
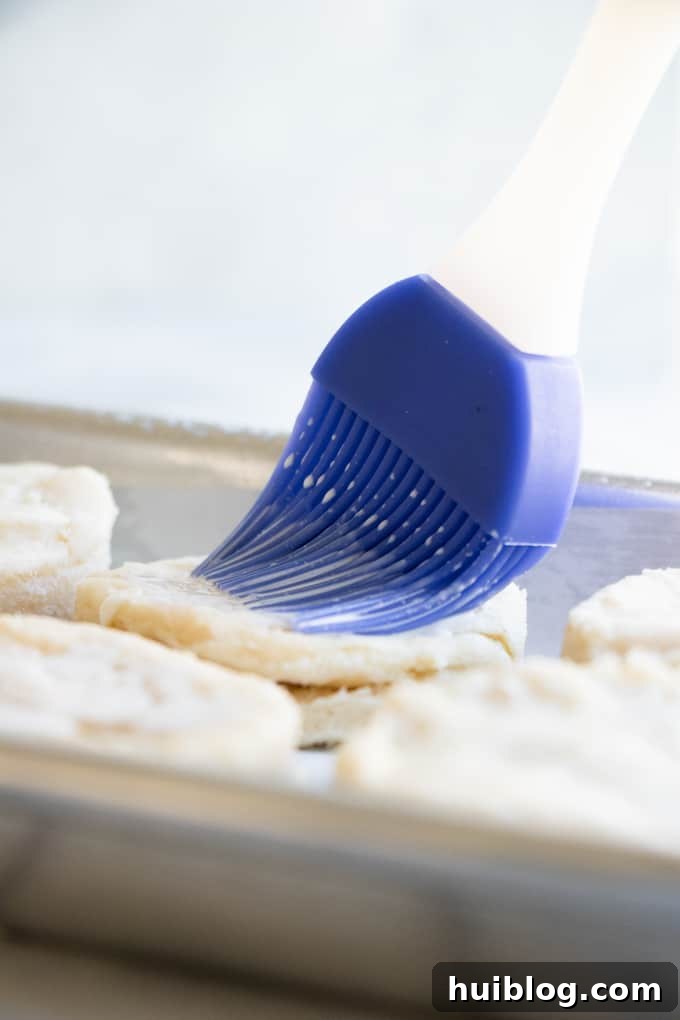
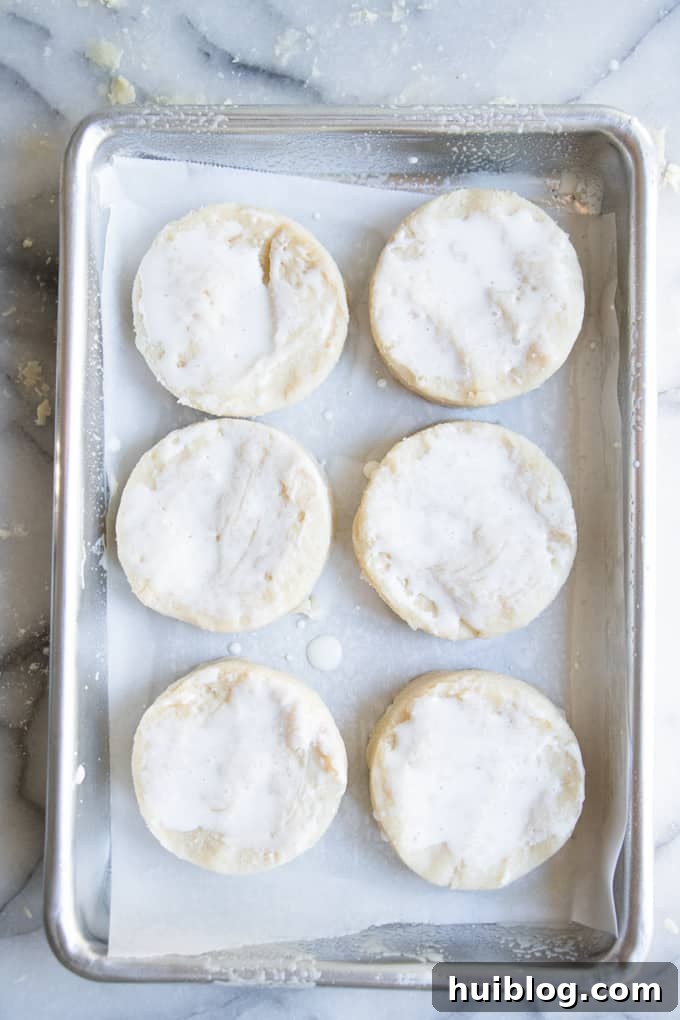
- Cut, Brush, and Bake for Golden Perfection. After laminating, press the dough one final time to your desired thickness (around 3/4 inch). Use a sharp biscuit cutter (a 2.5-inch cutter is ideal, but any size works) to cut out your biscuits. Press straight down without twisting the cutter to avoid sealing the edges of the layers, which would prevent them from rising properly. Carefully transfer the cut biscuits to a baking sheet lined with parchment paper. Now for another little “magic” trick: brush the tops of the biscuits with a small amount of heavy cream (about 1 tablespoon). While many recipes suggest butter, I find cream gives the tops a wonderfully soft, yet subtly textured finish and a beautiful golden hue as they bake. Preheat your oven to 425°F (220°C) and bake for 13-15 minutes, or until the tops are beautifully golden brown. Keep a close eye on them, as they can go from perfectly golden to over-baked quite quickly once they start browning.
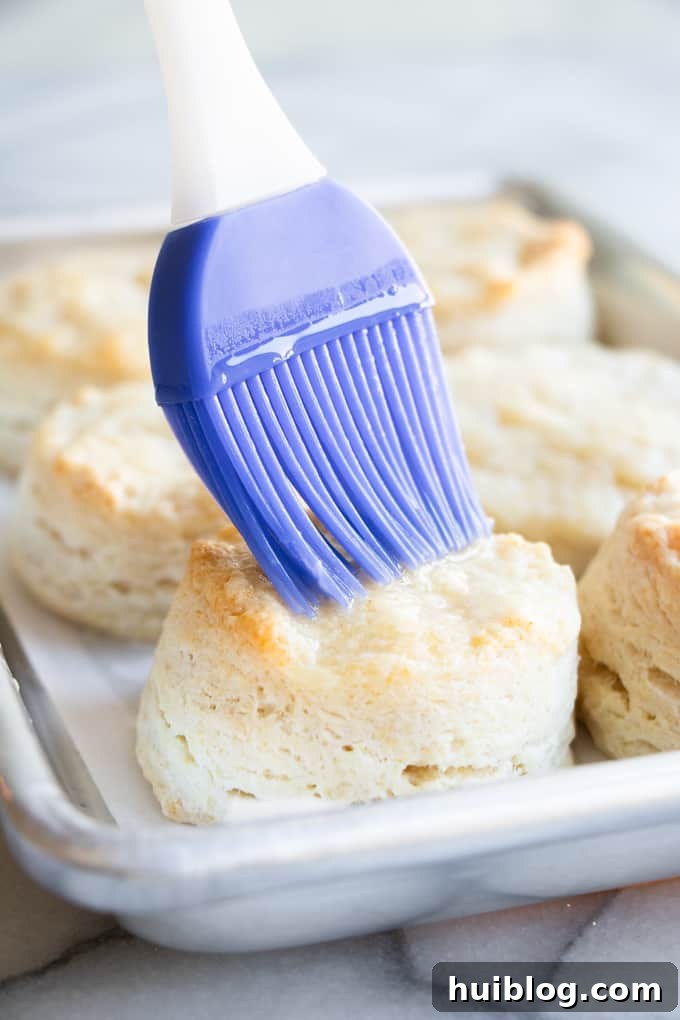
- The Final Flourish: Melted Butter and Immediate Serving. The moment your magnificent biscuits emerge from the oven, brush their warm tops with a generous amount of melted unsalted butter. This adds an extra layer of rich flavor and a gorgeous sheen. These **homemade southern biscuits** are undeniably at their absolute best when served warm, straight out of the oven. Break them open, watch the steam rise, and savor their soft, tender, and incredibly flaky interior.
Preparing Ahead: Can You Make Biscuit Dough in Advance?
While the full **biscuit dough** cannot be made completely ahead of time and stored indefinitely due to the nature of the leavening agents and the cold butter technique, there are certainly ways to streamline your preparation and save time when needed. You can certainly get a head start by combining the dry ingredients (flour, baking powder, salt, sugar) in a bowl. You can then grate and add the cold butter to this dry mixture, mixing it in gently until it resembles coarse crumbs. Once this butter-flour mixture is prepared, cover the bowl tightly with plastic wrap and store it in the refrigerator. This will keep the butter perfectly cold and ready. When you’re ready to bake your **homemade biscuits**, simply retrieve the mixture from the fridge, add the heavy cream, and proceed with the remaining steps of pressing, folding, cutting, and baking. This partial preparation can shave precious minutes off your busy morning routine, allowing you to enjoy fresh, warm biscuits with less effort.
The Art and Science of Creating Flaky Biscuit Layers
The secret to achieving those coveted **flaky layers in biscuits** isn’t a mystery; it all boils down to a specific technique and a gentle hand. The key method is the laminating process, which involves repeatedly pressing the dough into a rectangle and then folding it over itself. Each fold creates a new layer within the dough. By repeating this process 4 to 5 times, you effectively build hundreds of distinct, thin layers. During baking, the tiny pieces of cold butter between these layers melt and release steam, pushing the dough upwards and creating pockets of air, resulting in that wonderfully airy and flaky texture. It’s crucial to be gentle with the dough throughout this process. Use only your fingertips to press and shape the dough, avoiding the heel of your palm or, even worse, a rolling pin. The warmth and pressure from your palm or a rolling pin can melt the butter and overdevelop the gluten, leading to tough, dense biscuits instead of light, flaky ones. When you carefully cut the biscuits out, you’ll actually be able to see the faint lines of these delicate layers. As the biscuits bake, these layers will expand and separate, allowing you to easily split the warm biscuit in half and revel in all those soft, tender, buttery strata.
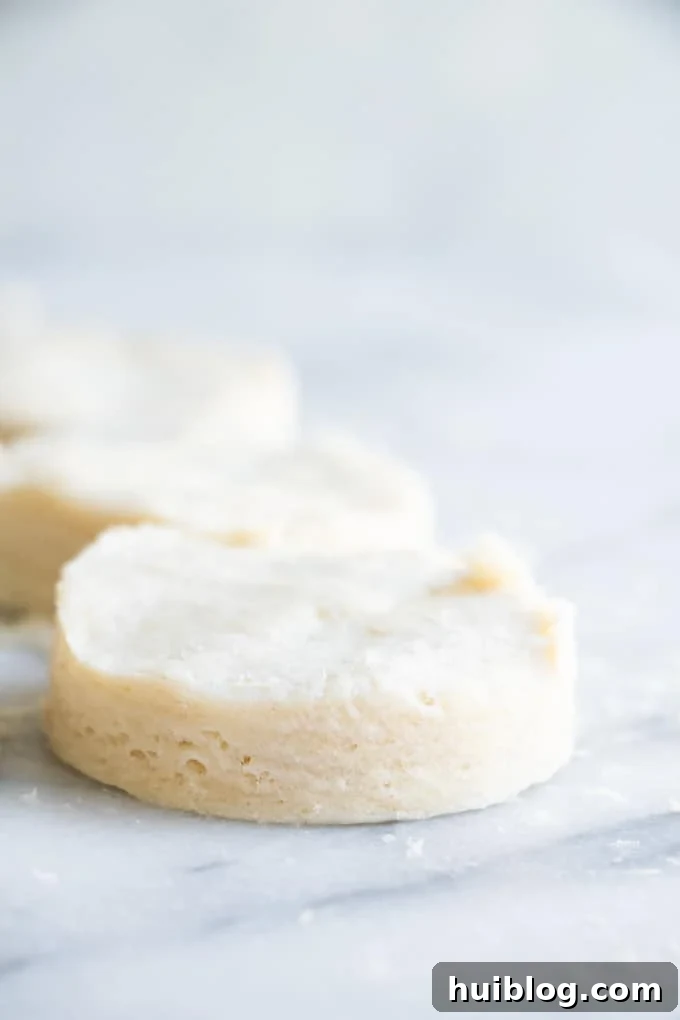
Essential Tips for Baking the Best Homemade Southern Biscuits
Mastering the **art of biscuit making** is about understanding a few fundamental principles. These crucial tips will guide you toward consistently perfect **homemade biscuits** every single time, ensuring they are light, fluffy, and full of flavor.
- Temperature is Paramount: Keep That Butter Ice Cold. As emphasized throughout, the temperature of your butter is non-negotiable for **flaky biscuits**. Always make sure to freeze your butter for at least 20 minutes before you begin grating it. This cold butter is the secret to creating those magnificent layers. When the small pieces of cold butter hit the hot oven, they melt and release steam, which dramatically puffs up the layers of dough, giving biscuits their signature texture.
- Embrace the Gentle Touch: Be Kind to Your Dough. Remember the wisdom imparted by Alton Brown, who observed his grandmother’s gentle approach to biscuit dough due to her arthritic hands. This light touch is not merely anecdotal; it’s fundamental to preventing gluten development. Overworking biscuit dough leads to tough, chewy biscuits. Handle the dough as little as possible, and with the utmost gentleness, to ensure your final product is wonderfully soft and tender.
- Fingertips Over Rolling Pins: Hands-On is Best. Forget the rolling pin for these biscuits. The most effective and gentle way to press the dough out is by using your fingertips, not the heel of your palm. Your fingers provide a softer, more controlled pressure, which helps to keep the butter cold and prevents the dough from being compacted too much. This preserves the delicate layers you’ve worked to create during the laminating process.
- Mind Your Scraps: Re-rolling Requires Care. Once you’ve cut out your first batch of biscuits, you’ll inevitably have leftover dough scraps. Resist the urge to simply ball them up and aggressively re-roll them. Due to the delicate layers you’ve meticulously formed through laminating, this approach will result in biscuits that come out “wonky” – unevenly risen and less flaky. Instead, gently gather the scraps, lightly knead them just enough to bring them together, and then repeat the laminating process (pressing and folding) to re-establish those crucial layers before cutting additional biscuits.
- Bake Promptly and Efficiently. To maintain the integrity of the cold butter and ensure maximum rise, it’s best to bake all your biscuits together at once, or at least as quickly as possible. If you must bake in batches or are waiting for your second batch to be prepared from scraps, place the tray of already cut biscuits in the refrigerator. This keeps the butter from warming up and melting prematurely, ensuring your biscuits achieve their full flaky potential when they finally hit the oven.
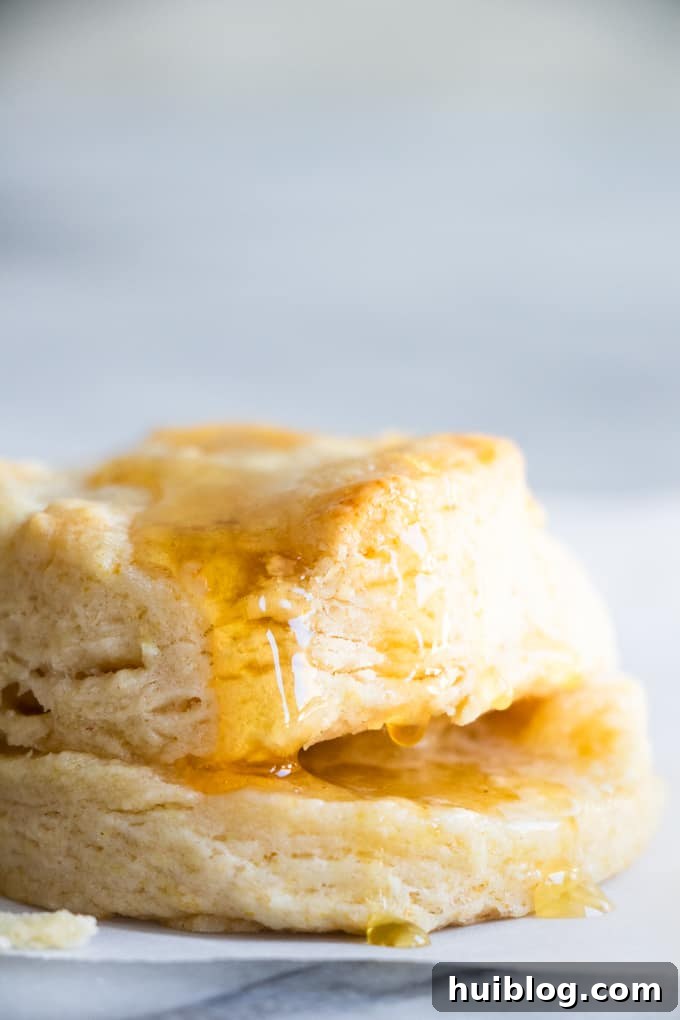
Best Homemade Southern Biscuits!
Ingredients
- 2 cups all purpose flour
- 1 tablespoon baking powder
- 2 tablespoons sugar
- 1/2 teaspoon salt
- 1/2 cup unsalted butter cold
- 1 cup heavy cream can sub with half and half, whole milk, or buttermilk
- 1 tablespoon cream (for the tops)
- 1 tablespoons unsalted butter melted
Instructions
-
Freeze your butter. This recipe requires COLD butter. To ensure that it’s nice and cold, just place a stick of butter in the freezer at least 20 minutes before you plan to make the biscuits. If you’re planning ahead you can place the butter in the freezer earlier.
-
Preheat oven to 425℉. Line a baking tray with parchment paper and set aside.
-
Mix dry ingredients. Stir together the flour, baking powder, salt, and sugar. Mix with a fork to make sure the ingredients are well combined.
-
Grate the butter. If the butter is too cold to grate from leaving in the freezer for a long time, just let it sit out for a couple minutes to warm slightly then grate. We want the butter as cold as possible. I find it best to leave the wrapper on one end to hold the stick while I grate, this helps prevent the butter from softening too much while in my hands.
-
Mix butter with the dry ingredients. Use your hands for this. Be gentle.
-
Add the cream. Gently combine the dough together. I still use my hands for this. Messy. Yes. But again, biscuit making comes down mostly to the method.
-
Sprinkle clean work surface with a small amount of flour to prevent the dough from sticking, remove the dough from the bowl and place on the work surface. When you remove the dough from the bowl it will be crumbly, it’s ok. Just keep pressing the dough together gently and press it out with your fingertips into a rectangular shape about 12 inches by 6 inches, and 3/4 of an inch thick.
-
Fold the dough over. Add sprinkles of flour as needed to your work surface or the dough if it’s too sticky. Continue doing this until you have folded the dough over 4-5 times. This is called laminating, and creates the layers in the biscuits.
-
Cut biscuits out. I use a 2.5 inch biscuit cutter, you can use any size you prefer. This is the set that I use (affiliate link) Place the cut out biscuits on a parchment lined baking sheet.
-
With the remaining dough, you can make additional biscuits. I typically have to press out my dough twice. Getting the dough to about a 3/4 of an inch thickness I can cut out 6 biscuits. To make the next batch, gently knead the dough back together. Then start the laminating process over again (folding the dough) then cut the remaining 6 biscuits. During this time keep the already cut biscuits in the fridge to stay cold.
-
Brush with cream. Use the additional 1 tablespoon of cream to brush onto the tops of the biscuits.
-
Bake. Bake between 13-15 minutes. Keep an eye on them, when the tops are golden brown to your preference then remove them. Once they start browning it goes quick. So keep an eye on them.
-
Brush with melted butter. Serve. After baking, brush with some melted butter, and eat up! These biscuits are best when served warm and out of the oven.
Video
Nutrition
Nutrition information is automatically calculated, so should only be used as an approximation.
Like this? Leave a comment below!